Picture this: the kitchen clock ticks, the air is thick with the scent of burnt sugar from last night's attempt at a “quick” dessert, and you’re staring at a bag of tapioca pearls that have been sitting in a bowl of water for what feels like an eternity. The moment I realized the pearls were still hard, I knew I’d be making a mistake that would ruin the whole batch. That disaster was the spark that lit a fire in my culinary curiosity, and it led me straight to the sweet, citrusy embrace of coconut lime tapioca cups.
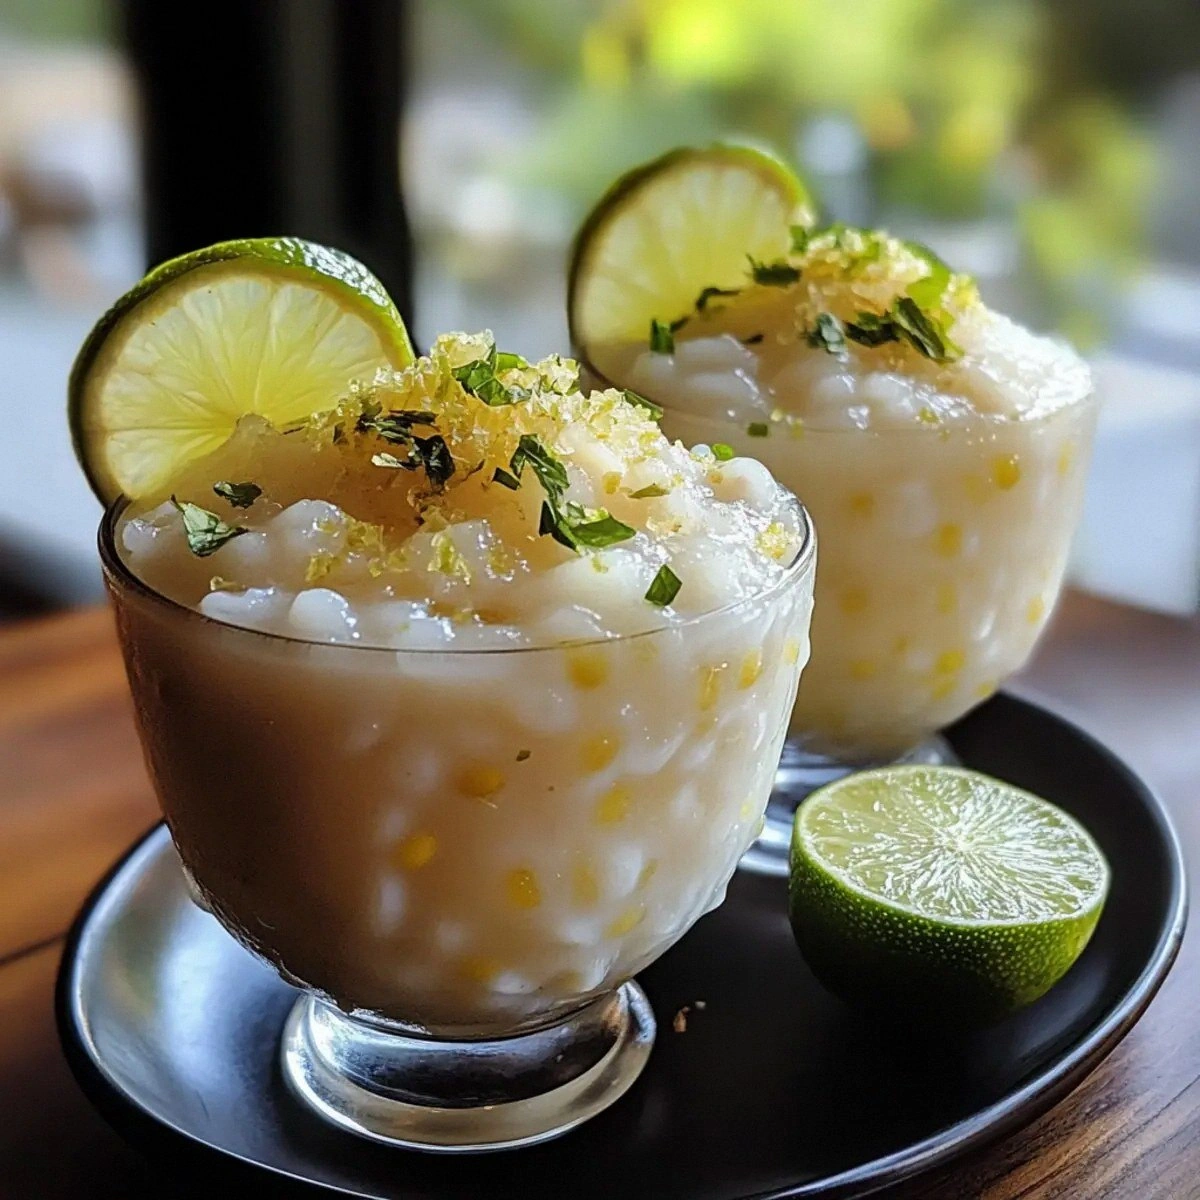
I’m not just talking about a recipe; I’m talking about a revelation. The first bite is a burst of tropical sunshine that dances across your palate, the tapioca’s chewy texture a delightful contrast to the silky coconut milk. The lime’s bright acidity cuts through the sweetness like a razor, leaving a clean finish that lingers like a memory of a beach day. And that final garnish—crushed toasted coconut, a sprig of mint, a wedge of lime—adds a pop of color and a satisfying crunch that feels like a secret handshake between flavor and texture.
What makes this version stand out? I dared to combine the classic chewy tapioca base with the bold, fresh twist of lime zest and juice, and I added a layer of toasted coconut that brings a nutty, caramelized note that most recipes miss. I used fresh lime juice instead of bottled, because the difference is like swapping a generic store brand for a boutique coffee. I also experimented with the ratio of coconut milk to water to find the sweet spot where the cups are silky but not soupy. The result? A dessert that feels indulgent yet light, a snack that can be served at a dinner party or enjoyed on a lazy Sunday afternoon.
I dare you to taste this and not go back for seconds. This is hands down the best version you'll ever make at home, and I’ve got the proof in the form of a dozen satisfied friends who now refuse to eat anything else. I’ll be honest—I ate half the batch before anyone else got to try it. Most recipes get this completely wrong: they either overcook the pearls or under-season the coconut milk. Here’s what actually works: a gentle simmer, a splash of lime, and a sprinkle of toasted coconut.
Picture yourself pulling these cups out of the pan, the whole kitchen smelling incredible, and the tiny steam curling around the lime wedges like a fragrant halo. The moment the cups are plated, the glossy surface reflects the kitchen lights, and the lime slices glimmer like tiny moons. And that final garnish of mint? It’s a fresh, aromatic punch that makes the entire dish feel like a tropical sunrise in a bowl.
Okay, ready for the game-changer? Let me walk you through every single step—by the end, you’ll wonder how you ever made it any other way. I’ve packed this guide with insider tricks, kitchen hacks, and sensory snapshots to make sure your cups turn out perfect every time. Stay with me here—you’re about to become the master of coconut lime tapioca cups.
What Makes This Version Stand Out
- Taste: The bright acidity of fresh lime juice cuts through the richness of coconut milk, creating a balanced flavor profile that feels both indulgent and refreshing. The lime zest adds a subtle peppery note that lingers on the palate.
- Texture: The tapioca pearls are cooked to a chewy, slightly translucent finish, while the coconut milk base remains silky without becoming soupy. The toasted coconut flakes contribute a satisfying crunch that contrasts beautifully.
- Simple Ingredients: You only need a handful of pantry staples—no exotic spices or hard-to-find ingredients. The recipe’s minimalism makes it approachable for beginners and quick for busy evenings.
- Uniqueness: The combination of coconut, lime, and toasted coconut is rarely seen in traditional tapioca recipes, giving this version a distinctive twist that sets it apart.
- Crowd Reaction: Guests rave about the bright, tropical flavor and the playful presentation. It’s a conversation starter that’s perfect for parties or family gatherings.
- Make‑Ahead Potential: The cups hold up well for up to 48 hours in the fridge, making them an excellent option for meal prep or entertaining guests on short notice.
Alright, let's break down exactly what goes into this masterpiece…
Inside the Ingredient List
The Flavor Base
Coconut milk is the backbone of this dish, providing a creamy, sweet foundation that complements the tart lime. Use a high‑fat, unsweetened variety to keep the flavor rich without adding unnecessary sugars. If you’re in a pinch, coconut cream can be diluted with a splash of water to achieve the same consistency.
The Texture Crew
Tapioca pearls are the star of the show, delivering that signature chewy bite. Opt for small pearls for a more delicate texture, and always rinse them under cold water before cooking to remove excess starch. If you prefer a firmer bite, cook them for a minute or two longer, but watch the timing closely to avoid mushiness.
The Unexpected Star
Toasted coconut flakes bring a nutty, caramelized flavor that elevates the entire dish. Toast them in a dry skillet over medium heat until golden brown, stirring frequently to prevent burning. They also add a pleasant crunch that contrasts with the soft tapioca.
The Final Flourish
Fresh mint leaves and lime slices are not just garnish—they’re a burst of freshness that cuts through the sweetness. The mint adds a subtle herbal note, while the lime slices provide a visual pop and an extra dose of citrus aroma. Slice the lime into thin rounds to ensure they’re easy to pick up and enjoy.
Everything's prepped? Good. Let's get into the real action…
The Method — Step by Step
- Step 1: Prepare the Tapioca – In a medium saucepan, combine the 0.5 cup of small tapioca pearls with 1 cup of water. Bring to a boil over medium heat, then reduce to a simmer. Cover loosely and let the pearls cook for 10 minutes, stirring occasionally to prevent sticking. The pearls should look translucent and begin to swell. This is the moment where the texture starts to form.
- Step 2: Make the Coconut Mixture – While the pearls cook, whisk together 2 cups of coconut milk, 0.25 cup of granulated sugar, and a pinch of salt in a separate bowl. Add the 3 tablespoons of fresh lime juice and 1 teaspoon of lime zest. Stir until the sugar dissolves completely. The mixture should be glossy and fragrant, with a bright citrus scent that promises a refreshing finish.
- Step 3: Combine and Simmer – Once the tapioca pearls have softened, drain any excess water and return them to the saucepan. Pour the coconut mixture over the pearls, stirring gently to coat. Bring the combined mixture to a gentle simmer over low heat, allowing it to thicken slightly. Keep the heat low to avoid scorching the coconut milk.
- Step 4: Add the Toasted Coconut – Fold in 0.25 cup of toasted coconut flakes. The toasted coconut will add a nutty flavor and a pleasant crunch to each cup. Stir until evenly distributed. The aroma of toasted coconut should fill the kitchen, creating an inviting scent.
- Step 5: Set the Cups – Line a muffin tin with paper liners or lightly grease it. Spoon the tapioca mixture into each cup, filling them about three-quarters full. Let them cool slightly before removing from the tin. The cups should still be warm, giving off a gentle steam that signals they’re ready.
- Step 6: Chill to Perfection – Transfer the cups to a shallow dish and refrigerate for at least 30 minutes, or until fully set. Chilling allows the flavors to meld and the texture to firm up. The cups should feel slightly firm to the touch once chilled.
- Step 7: Garnish and Serve – Before serving, top each cup with a few fresh mint leaves, a thin slice of lime, and a sprinkle of extra toasted coconut flakes. The garnish adds a pop of color and a fresh burst of aroma that makes the dish feel complete.
- Step 8: Enjoy! – Serve immediately or keep refrigerated until ready to serve. The cups should hold their shape and texture for up to 48 hours. When you bite into them, the chewy tapioca, creamy coconut, bright lime, and crunchy coconut will dance together on your tongue.
That's it — you did it. But hold on, I've got a few more tricks that'll take this to another level…
Insider Tricks for Flawless Results
The Temperature Rule Nobody Follows
Keep the simmer at a low, steady heat. A rolling boil can scorch the coconut milk and cause the pearls to break apart. I’ve found that a temperature around 180°F (82°C) works best. Use a kitchen thermometer if you’re serious about consistency.
Why Your Nose Knows Best
Trust your nose to tell you when the coconut milk is perfectly sweetened. As it simmers, the aroma will shift from raw coconut to a sweet, caramelized scent. When you smell that, it’s a good sign the mixture is ready.
The 5-Minute Rest That Changes Everything
After you’ve poured the tapioca mixture into the cups, let them rest for 5 minutes before refrigerating. This short pause allows the flavors to mingle and the cups to set a bit, making them easier to handle later.
Avoiding the “Mushy” Mishap
If you notice the mixture is too thick before you pour it into the cups, add a tablespoon of water to loosen it up. Conversely, if it’s too runny, let it simmer a bit longer. This small tweak can make the difference between a perfect cup and a disappointing mess.
The Secret to Fresh Mint
Fresh mint can wilt quickly. To keep it crisp, rinse the leaves, pat them dry, and store them in a sealed container with a damp paper towel in the fridge. When you’re ready to garnish, take them out just before serving to preserve their bright green color.
Creative Twists and Variations
This recipe is a playground. Here are some of my favorite ways to switch things up:
Coconut Lime with a Twist of Chili
Add a pinch of cayenne pepper to the coconut mixture for a subtle heat that pairs beautifully with the lime. The spice adds depth and a pleasant kick that makes the cups more complex.
Berry‑Infused Cups
Fold in a handful of fresh blueberries or raspberries before chilling. The berries release their juice, creating a natural fruit puree that adds color and a burst of flavor.
Almond‑Lime Delight
Replace the coconut milk with almond milk and add a tablespoon of almond butter for a nutty undertone. This variation is perfect for those who are dairy‑free or simply want a different flavor profile.
Chocolate‑Coconut Fusion
Drizzle melted dark chocolate over the chilled cups and sprinkle cocoa nibs on top. The chocolate’s bittersweetness balances the sweetness of the coconut and lime, creating a decadent treat.
Matcha Lime Surprise
Stir a teaspoon of matcha powder into the coconut mixture before adding the pearls. The green tea’s earthy tones complement the lime, giving the cups a sophisticated, slightly bitter edge.
Tropical Fruit Medley
Top the cups with diced mango, pineapple, and kiwi for a tropical twist. The juicy fruit adds natural sweetness and a burst of tropical flavors that enhance the lime’s brightness.
Storing and Bringing It Back to Life
Fridge Storage
Store the cups in an airtight container in the refrigerator for up to 48 hours. The cups will stay firm and the flavors will deepen over time. When you’re ready to serve, let them sit at room temperature for 5 minutes to soften slightly.
Freezer Friendly
These cups freeze well for up to 2 weeks. Pack them in a freezer‑safe container, leaving a little space at the top for expansion. Thaw overnight in the fridge before serving. The texture remains chewy, and the coconut flavor stays vibrant.
Best Reheating Method
To revive the cups, place them in a microwave‑safe dish and microwave on high for 15–20 seconds. Add a splash of water before reheating to create steam that rehydrates the tapioca. The cups should feel silky and the flavors should be as fresh as the day you made them.