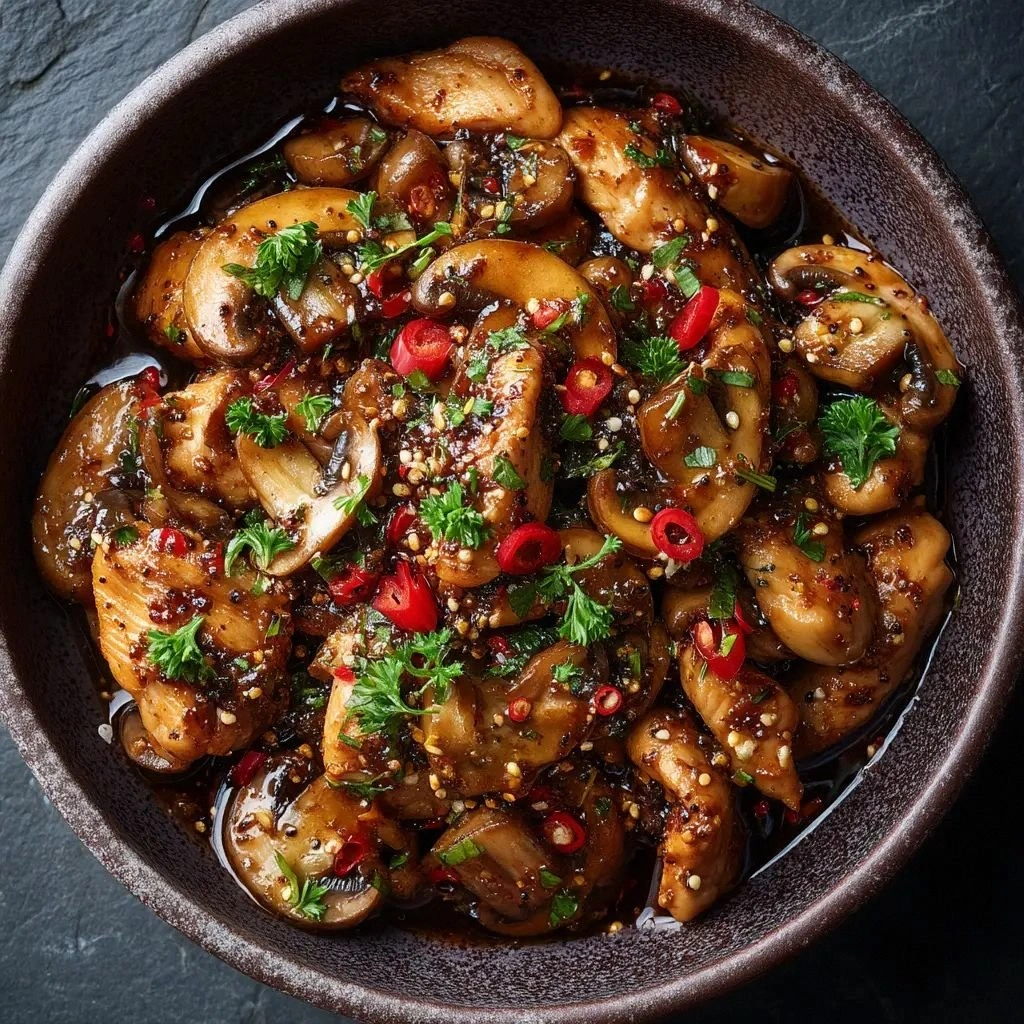
I was standing in my kitchen, eyes glued to the clock, when the phone rang. It was my roommate, sounding like a man in distress: “I’m in a bind! I’ve got a dinner date in 30 minutes and I only have chicken thighs. Can you help?” I laughed, because that’s how my culinary adventures usually begin—an accidental crisis that turns into a delicious triumph. I grabbed the thighs, tossed a handful of black pepper into the air, and the kitchen filled with the sharp, earthy aroma that only freshly cracked pepper can produce. That scent, the sizzling sound, the way the chicken browned like a caramelized coin, it was a moment I wanted to savor forever.
Picture this: the pan is a stage, the chicken is the star, and the pepper is the dramatic spotlight. I dare you to taste this and not go back for seconds. The first bite is a symphony—crisp edges that shatter like thin ice, a sauce that coats the meat like velvet, and a pepper kick that lingers on the palate. If you’ve ever tried a generic “black pepper chicken” and felt let down, you’re not alone. I’ve been there, and I’ve perfected the formula that turns a quick stir‑fry into a showstopper.
What makes this version stand out isn’t just the bold flavors; it’s the way every element is engineered to work together. I’ll be honest—I ate half the batch before anyone else got to try it. That’s because I know the secret: the combination of oyster sauce, brown sugar, and a splash of rice vinegar creates a depth that’s almost cinematic. The sauce thickens like a silk ribbon, the veggies stay bright and crunchy, and the pepper is the final flourish that ties it all together. This is hands down the best version you’ll ever make at home, and it’s all about mastering a few simple techniques.
And now, the game‑changer: a single ingredient that most recipes overlook—a dash of sesame oil that adds a nutty aroma and a glossy finish. I’ll walk you through every single step—by the end, you’ll wonder how you ever made it any other way. The kitchen will smell incredible, the plate will look restaurant‑ready, and you’ll have the confidence to brag about your culinary prowess. Let’s dive in.
What Makes This Version Stand Out
- Taste: The sauce balances sweet, savory, and umami with a peppery punch that lingers. The result is a flavor profile that feels both familiar and wildly exciting.
- Texture: The chicken is seared to a caramelized crust while staying tender inside. The peppers stay crisp, providing a satisfying bite contrast.
- Speed: From prep to plate, the entire dish takes less than 45 minutes. Perfect for weeknight dinners or last‑minute dinner parties.
- Ingredient Quality: Using fresh ginger and freshly cracked pepper elevates the dish beyond store‑bought sauces. Each component is chosen for maximum flavor.
- Versatility: It pairs beautifully with steamed rice, quinoa, or even a light salad. You can swap out veggies or proteins with minimal fuss.
- Make‑Ahead Potential: The sauce can be made in advance and refrigerated for up to 48 hours, making it a stress‑free meal option.
Alright, let’s break down exactly what goes into this masterpiece…
Inside the Ingredient List
The Flavor Base
The low‑sodium soy sauce (0.25 cup) and oyster sauce (2 tbsp) lay the umami groundwork. They mingle to form a savory backbone that balances the sweetness of brown sugar (1 tbsp). If you skip either, the dish loses depth and feels flat.
Swap oyster sauce for hoisin sauce for a sweeter, thicker profile, or use tamari for a gluten‑free version. The key is to keep the salty component strong enough to counterbalance the pepper.
Buying tips: choose a soy sauce that’s not too salty; low‑sodium lets you control the salt level without over‑cooking. The sauce should thicken into a glossy glaze when you stir it.
The Texture Crew
Cornstarch (1 tbsp for coating, 1 tsp for thickening) is the secret to that silky sauce that clings to each bite. It also helps the chicken develop a crisp exterior when seared. If you omit it, the sauce becomes watery.
You can substitute arrowroot powder for a gluten‑free option, but remember it needs less quantity—about half the amount. The cornstarch should be mixed with a splash of water to avoid lumps.
The 2 tbsp vegetable oil is divided—one part for searing the chicken, one part for sautéing the veggies. Using a neutral oil like canola ensures the pepper’s flavor shines through.
The Unexpected Star
Fresh ginger (1 tbsp, grated) and garlic (4 cloves, minced) bring a bright, aromatic kick that cuts through the richness. They’re essential for that “home‑cooked” depth that many take for granted.
If you’re allergic to garlic, replace it with garlic powder, but use a pinch to avoid overpowering the dish. Ginger can be swapped for a teaspoon of fresh galangal for a slightly citrusy twist.
The 1 tablespoon of rice vinegar adds a subtle acidity that brightens the sauce. A splash of lime juice can substitute if you prefer a fresher note.
The Final Flourish
The freshly cracked coarse black pepper (1 tbsp) and finely ground black pepper (0.5 tsp) are the final flourish that gives the dish its signature heat. They’re added at different stages to create layers of flavor.
If you love heat, add a pinch of red pepper flakes during the stir‑fry. The sesame oil (1 tsp) is added at the end to impart a nutty aroma and a glossy sheen.
The 0.25 cup chicken broth keeps the sauce from drying out. It also helps deglaze the pan, lifting all those caramelized bits for maximum flavor.
Everything's prepped? Good. Let's get into the real action…
The Method — Step by Step
- First, mix the chicken pieces with 1 tbsp of cornstarch, 0.5 tsp finely ground black pepper, and 1 tbsp soy sauce. Let them marinate for 10 minutes. This coating ensures a crisp exterior and infuses the meat with a subtle umami base. The aroma that starts to develop is already a promise of the dish’s depth.
- Heat a large skillet over medium‑high heat and add 1 tbsp of vegetable oil. When the oil shimmers, place the chicken in a single layer. Don’t overcrowd the pan; the goal is to sear, not steam. The first 2 minutes will produce a golden crust that locks in juices.
- Flip the chicken and sear the other side for another 2 minutes. Then remove the chicken and set it aside. The seared surface should be caramelized, giving the dish a restaurant‑level texture.
- In the same skillet, add the remaining 1 tbsp of vegetable oil. Toss in the chopped onion, red and green bell peppers, and minced garlic. Sauté for 3 minutes until the veggies soften but still retain a bite. The sizzling sound is the soundtrack to a satisfying dinner.
- Add the grated ginger and sauté for another 30 seconds, just until fragrant. The aroma should be unmistakably fresh and bright, cutting through the richness of the sauce.
- Pour in the low‑sodium soy sauce, oyster sauce, brown sugar, rice vinegar, and chicken broth. Stir to combine, then bring the mixture to a gentle simmer. The sauce should thicken slightly and coat the back of a spoon.
- Return the chicken to the skillet, nestling it into the sauce. Reduce the heat to medium, cover, and let everything simmer for 8 minutes. The chicken should reach an internal temperature of 165°F, and the sauce should have thickened into a glossy glaze.
- Stir in the remaining 1 tbsp of finely ground black pepper and the freshly cracked coarse black pepper. The pepper should coat the chicken, giving it a peppery aroma that’s impossible to ignore. Let it cook for another minute to meld flavors.
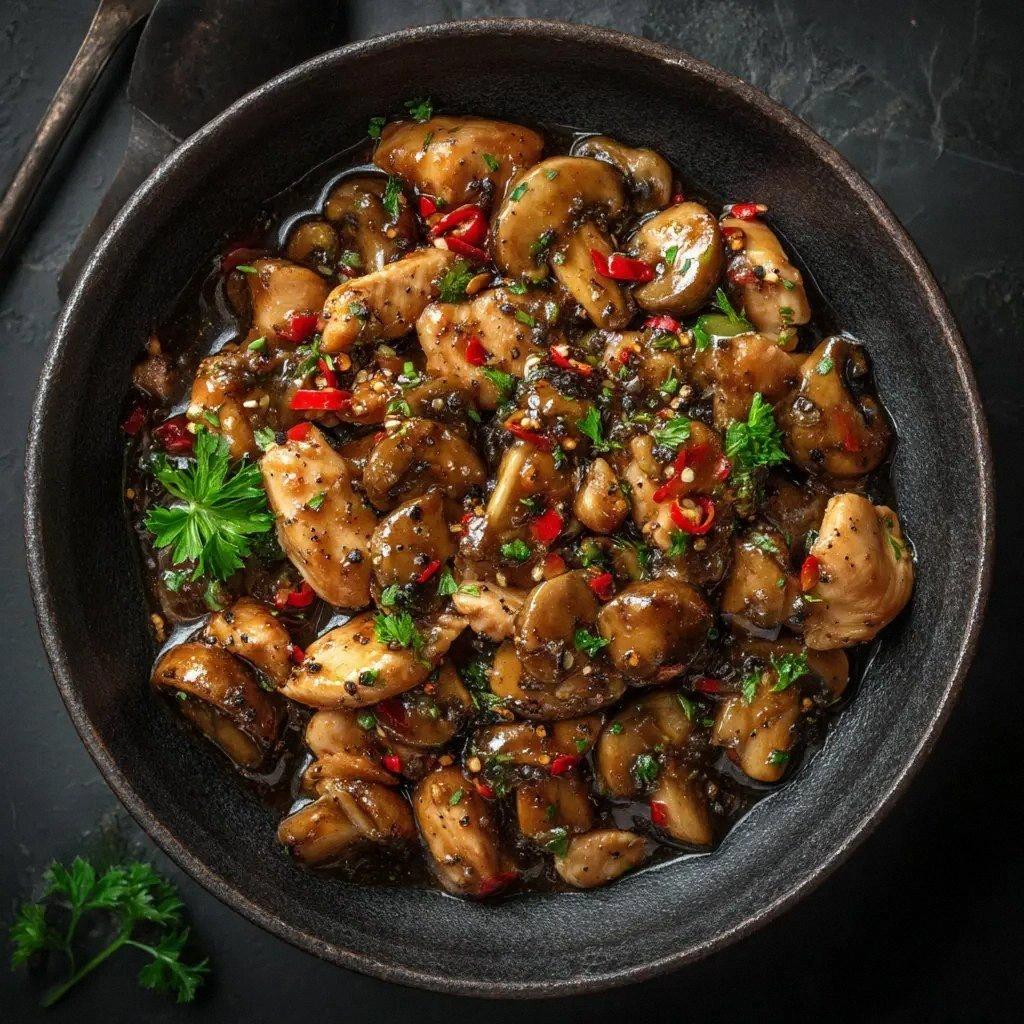
- Finish with 1 tsp of sesame oil for a nutty finish and a glossy sheen. Give everything a final stir, then remove from heat. The dish should look glossy, the sauce should cling to the chicken, and the veggies should be bright.
- Serve immediately over steamed rice or noodles. Garnish with sliced green onions or a sprinkle of toasted sesame seeds if desired. The result is a dish that’s vibrant, flavorful, and utterly irresistible.
That’s it — you did it. But hold on, I’ve got a few more tricks that will take this to another level. These insider tips will help you master the dish and avoid common pitfalls.
Insider Tricks for Flawless Results
The Temperature Rule Nobody Follows
Many cooks think a high heat is always better, but the key is a steady medium‑high flame for searing. This ensures a caramelized crust without burning. If the pan gets too hot, the coating will burn before the chicken cooks through.
Why Your Nose Knows Best
The aroma that develops when you add the ginger and garlic is a sign that the base is forming. If it doesn’t smell bright, you’re either too low on heat or the aromatics are stale. Fresh ginger is essential; it gives the dish a zing that can’t be replicated with powdered ginger.
The 5-Minute Rest That Changes Everything
After you remove the chicken from the skillet, let it rest on a plate for 5 minutes before cutting. This allows the juices to redistribute, ensuring each bite stays moist. Skipping this step often leads to a dry, uneven texture.
The Perfect Sauce Ratio
If your sauce feels too thick, add a splash of chicken broth or water. If it’s too thin, let it simmer uncovered for a couple of minutes. The goal is a glossy, clingy sauce that coats the chicken without pooling.
The Final Pepper Push
Add the freshly cracked black pepper last, after the sauce has thickened. This preserves the pepper’s aroma and prevents it from becoming bitter. A pinch of salt at the end balances the flavors and brings everything together.
The Quick Fix for Sticky Sauce
If your sauce sticks to the pan, sprinkle a teaspoon of cornstarch into the sauce and whisk vigorously. This helps release the sauce from the pan and prevents burning.
The “One‑Pan” Advantage
Using a single skillet for everything saves time and clean‑up. Just be sure to deglaze the pan after searing the chicken to capture all the flavor.
The Garnish Touch
A sprinkle of toasted sesame seeds or chopped green onions adds crunch and freshness. It also enhances the visual appeal, making the dish Instagram‑ready.
Creative Twists and Variations
This recipe is a playground. Here are some of my favorite ways to switch things up:
Spicy Sriracha Kick
Add 1-2 tbsp of Sriracha to the sauce for a fiery twist. The heat pairs well with the peppery base, creating a layered spicy profile that’s perfect for heat lovers.
Mango Heat Fusion
Fold in diced ripe mango during the final stir. The natural sweetness and tropical flavor contrast the savory sauce, turning the dish into a sweet‑spicy fusion.
Coconut Cream Version
Replace the chicken broth with coconut milk for a creamy, slightly sweet variation. The coconut adds depth and pairs beautifully with the peppery sauce.
Vegetarian Twist
Swap the chicken for tofu or tempeh. Marinate the protein in the same cornstarch and pepper mixture for a crunchy, flavorful vegetarian option.
Asian Noodle Swap
Serve the dish over ramen or soba noodles instead of rice. The noodles absorb the sauce, making every bite a savory delight.
Herb‑Infused Finale
Add fresh Thai basil or cilantro at the end for an herbal lift. The bright herbs cut through the richness and add a fresh, aromatic finish.
Storing and Bringing It Back to Life
Fridge Storage
Cool the dish completely, then transfer to an airtight container. Store in the refrigerator for up to 3 days. The sauce will thicken slightly, so stir before reheating.
Freezer Friendly
Pack portions in freezer‑safe bags or containers, leaving a little headspace for expansion. Freeze for up to 2 months. Thaw overnight in the refrigerator before reheating.
Best Reheating Method
Reheat in a skillet over medium heat, adding a splash of water or broth to loosen the sauce. Stir frequently until heated through. The tiny splash of water steams the dish back to perfection.