I was halfway through a week of bland, reheated takeout when my phone buzzed with a text from Maya: “I dare you to try this sheet‑pan chicken chimic recipe. If it’s good, I’m buying the next round of tacos.” I stared at the screen, my stomach growling louder than the late‑night traffic outside. The idea of a one‑pan, one‑bake, no‑fuss dinner that could turn a tired weeknight into a fiesta felt like a culinary lifeline. I’d been chasing the elusive balance between convenience and flavor for years, and the challenge was too tempting to ignore.
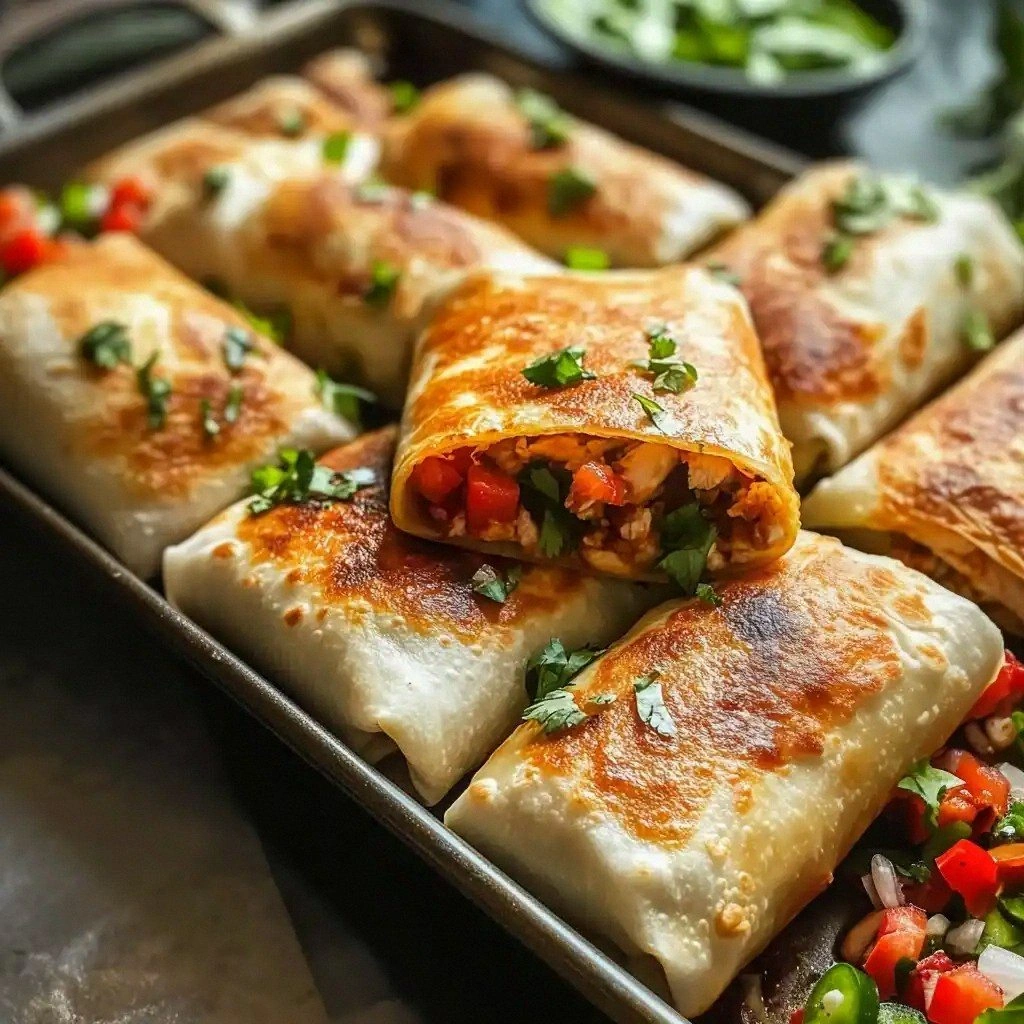
Picture this: the oven preheated to 425°F, a sheet pan lined with parchment that sighs as the first tortilla slides onto it. The air fills with the sweet scent of salsa and the earthy aroma of black beans, mingling with the sharp tang of cheese melting. The sound of the pan sliding into the oven is a quiet promise of crisp edges, and the anticipation is palpable. You can almost taste the crunch before it even hits the plate, a crunchy, cheesy bite that feels like a warm hug from a friend you haven’t seen in months.
What makes this version stand out is that it’s not just a recipe; it’s a confidence‑boosting ritual that turns a simple sheet pan into a stage for flavor fireworks. The chicken is shredded, not diced, so every bite is packed with protein and moisture. The taco seasoning is a homemade blend that leans into cumin and smoked paprika, giving that smoky depth you’d expect from a grill. And the tortillas are brushed with olive oil before baking, ensuring a golden, flaky finish that shatters like thin ice when you bite into it.
I’ve tried countless sheet‑pan chicken dishes, and most of them fall flat—too soggy, too bland, or just plain unremarkable. This one, however, hits every note: the salsa adds a bright, fresh kick; the beans provide a subtle earthiness; the cheese creates a gooey, melty bridge between the fillings and the tortilla. The result is a dish that feels like a well‑executed, crowd‑pleasing meal that’s still easy to pull together. The secret? A single, simple step that transforms the whole thing: a quick drizzle of olive oil over the tortillas before they hit the pan.
And there’s a twist you won’t expect: the use of a cooking spray, not to replace oil but to give the tortillas an extra crunch and a subtle caramelization that makes the edges pop like confetti. This is hands down the best version you’ll ever make at home. I dare you to taste this and not go back for seconds. Picture yourself pulling this out of the oven, the whole kitchen smelling incredible, and your friends’ eyes lighting up as they dig in. Stay with me here—this is worth it.
Okay, ready for the game‑changer? Let me walk you through every single step—by the end, you’ll wonder how you ever made it any other way. From the first stir of the filling to the final garnish of cilantro, every detail is designed to amplify flavor and texture. And if you’ve ever struggled with sheet‑pan meals, you’re not alone—I've got the fix. Let’s dive in.
What Makes This Version Stand Out
- Taste: The combination of taco seasoning, salsa, and black beans creates a layered flavor profile that feels both familiar and adventurous. The salsa’s acidity cuts through the richness of the cheese, while the beans add a comforting earthiness that grounds the dish.
- Texture: The brushed olive oil gives the tortillas a golden crisp that shatters delightfully, while the melted cheese forms a gooey bridge that holds the fillings together. The chicken’s shredded texture keeps every bite moist.
- Convenience: With all the ingredients pre‑shredded and the tortillas pre‑lined, the entire cooking process takes less than 45 minutes from prep to plate. No extra pans, no fuss.
- Uniqueness: The use of a cooking spray for an extra crisp finish and the addition of fresh cilantro and lime wedges give this dish a bright, fresh finish that sets it apart from other sheet‑pan chicken recipes.
- Crowd Reaction: Friends who taste this will immediately ask for the recipe, because the combination of flavors is both comforting and exciting.
- Ingredient Quality: Using fresh, high‑quality tortillas and fresh salsa ensures that every bite is packed with flavor, and the homemade taco seasoning gives you control over the heat level.
- Cooking Method: Baking at a high temperature (425°F) ensures the tortillas crisp while the fillings stay moist, a technique that can be applied to other sheet‑pan dishes.
- Make‑Ahead Potential: The assembled sheet pan can be refrigerated for up to 24 hours and baked when ready, making it perfect for busy weeknights.
Inside the Ingredient List
The Flavor Base
Shredded Cooked Chicken: The star of the dish, shredded chicken absorbs the seasoning and salsa, becoming a silky, flavorful filling. If you skip this, the dish loses its protein punch and becomes a flat, tortilla‑only experience. For a plant‑based twist, substitute shredded tofu or tempeh seasoned with the same spices.
Taco Seasoning: This blend of cumin, smoked paprika, garlic powder, and chili powder gives the chicken its signature smoky heat. Using a homemade blend allows you to dial in the heat level and avoid the sodium overload of store‑bought mixes. If you’re allergic to any spice, replace it with a mild chili powder and add fresh cilantro for brightness.
The Texture Crew
Salsa or Diced Tomatoes with Green Chilies: The salsa’s acidity and fresh tomato flavor brighten the dish, cutting through the richness of cheese and chicken. If you prefer a smoother sauce, blend the salsa into a puree; if you like heat, add more green chilies or a dash of hot sauce. Skipping salsa will make the dish flat and less vibrant.
Shredded Cheese: A generous amount of cheese creates a gooey, melty layer that binds the fillings and gives the tortillas a satisfying chew. Cheddar or Monterey Jack works well, but a mix of pepper jack adds a subtle kick. If you’re lactose‑intolerant, use a dairy‑free cheese that melts well.
The Unexpected Star
Black Beans or Refried Beans: Beans add a creamy texture and earthy flavor that balances the spicy salsa. Black beans also bring fiber and protein, making the dish more filling. If you’re short on time, canned refried beans are a quick alternative; just warm them before adding.
The Final Flourish
Large Flour Tortillas: Choosing the right tortilla size is key. Large tortillas allow for a generous filling and prevent the sheet pan from getting overcrowded. If you prefer a gluten‑free version, use corn tortillas but be mindful that they may not crisp as well.
Olive Oil or Melted Butter: A light coating of oil or butter on the tortillas before baking creates a golden, flaky crust. If you’re watching calories, use a spray oil; if you’re after extra flavor, melted butter adds a buttery richness.
Cooking Spray: This is not a replacement for oil but an enhancer for extra crispness. Spritzing the tortillas before baking gives them a beautiful, even browning that’s hard to achieve with oil alone.
Sour Cream, Fresh Cilantro & Lime Wedges, Shredded Lettuce or Diced Tomatoes: These toppings add a cool, fresh counterpoint to the warm, spicy core. Sour cream’s tang balances the heat, cilantro’s brightness lifts the dish, and lime wedges add a citrusy zing. If you’re dairy‑free, skip the sour cream or use a coconut yogurt.
Everything's prepped? Good. Let's get into the real action...
The Method — Step by Step
- Preheat the oven to 425°F (220°C). As the oven warms, the air inside begins to circulate, setting the stage for the tortillas to crisp up. The high temperature ensures that the cheese melts quickly while the tortillas develop a golden crust. If you’re in a hurry, you can preheat the oven while you prep the fillings.
- Line a sheet pan with parchment paper. This prevents sticking and makes cleanup a breeze. The parchment also allows the heat to circulate evenly around the tortillas. If you’re feeling fancy, you can use a silicone baking mat for extra non‑stick protection.
- Spread a thin layer of olive oil or melted butter over each tortilla. This step is crucial for that buttery, flaky finish. Use a pastry brush or a paper towel to coat the tortillas evenly, paying particular attention to the edges. Kitchen Hack: If you’re short on time, spray the tortillas lightly with cooking spray instead of brushing with oil. It gives a similar crispness and saves a few minutes.
- In a large bowl, combine the shredded chicken, taco seasoning, salsa, black beans, and shredded cheese. Stir until all the ingredients are evenly coated and the mixture is moist. The salsa should coat the chicken like velvet, ensuring each bite is bursting with flavor. If the mixture feels dry, add a splash of salsa or a teaspoon of water.
- Place each tortilla on the sheet pan and spoon a generous amount of the filling onto the center. Spread the filling out to the edges of the tortilla, but leave a small border to prevent overflow. The filling should be thick enough to keep the tortilla intact but not so thick that it drips. If you’re using a smaller tortilla, adjust the amount accordingly.
- Bake in the preheated oven for 12-15 minutes. Watch closely as the cheese melts and the edges of the tortilla begin to turn golden. The aroma will be intoxicating, and the edges will start pulling away from the pan. Watch Out: Don’t overcook. If the tortillas get too dark, the filling can dry out. Keep a close eye on the edges and remove from the oven when they’re golden but still slightly soft.
- Let the sheet pan cool for 3 minutes before transferring to a cutting board. This short rest allows the cheese to set slightly, making the chimichangas easier to slice. If you’re impatient, you can skip this step, but the result may be a bit messy.
- Slice each chimic into bite‑size pieces. Use a sharp knife and a gentle sawing motion to keep the tortillas from tearing. If you prefer whole rolls, you can fold them in half before slicing. The key is to preserve the structure for a clean, satisfying bite.
- Serve immediately with a dollop of sour cream, fresh cilantro, lime wedges, shredded lettuce, and diced tomatoes. The cool, tangy toppings balance the heat and add a refreshing crunch. If you’re serving a crowd, set up a toppings bar so everyone can customize their chimic to taste.
- Enjoy the crispy, cheesy, and flavorful result. The combination of textures and flavors will leave you craving a second plate. I dare you to taste this and not go back for seconds.
Insider Tricks for Flawless Results
The Temperature Rule Nobody Follows
Many cooks bake at 375°F, but this dish thrives at 425°F. The higher temperature crisps the tortilla edges while keeping the filling moist. If you’re using a convection oven, lower the temperature by 25°F to avoid over‑browning.
Why Your Nose Knows Best
The moment the cheese starts to bubble, you’re in the sweet spot. Your nose will tell you the edges are turning golden, and the aroma will be irresistible. Don’t wait until the timer hits 15 minutes; trust your senses.
The 5-Minute Rest That Changes Everything
Letting the sheet pan sit for 5 minutes after baking allows the cheese to set, preventing it from sliding off the tortilla when you cut. I once rushed it out of the oven and the fillings ran like a river. That rest is worth the extra minutes.
Use a Silicone Mat for Extra Non-Stick Power
If you’re tired of peeling parchment paper off the pan, a silicone baking mat ensures the tortillas won’t stick. It also makes cleanup a breeze, especially if you’re cooking for a crowd.
Add a Splash of Water Before Reheating
When reheating leftovers, add a teaspoon of water to the pan and cover with foil for 5 minutes. This steams the tortillas back to a slightly softer, more enjoyable texture.
Creative Twists and Variations
This recipe is a playground. Here are some of my favorite ways to switch things up:
Mediterranean Twist
Swap the salsa for a tomato‑based tapenade and replace black beans with chickpeas. Add feta cheese and a drizzle of olive oil for a Mediterranean flair that still feels comforting.
Breakfast Chimic
Use scrambled eggs in place of chicken, add shredded cheddar, and top with avocado slices. Serve with a side of salsa and a splash of hot sauce for a hearty breakfast.
Vegan Version
Replace chicken with shredded jackfruit seasoned with the same taco blend, use vegan cheese, and serve with a dairy‑free sour cream alternative. The texture is surprisingly close to the original.
Spicy Kick
Add a handful of fresh jalapeños to the filling and a dash of sriracha to the salsa. The heat will dance on your tongue and give the dish an extra layer of excitement.
Sweet & Smoky
Incorporate a spoonful of chipotle adobo sauce into the filling and finish with a sprinkle of brown sugar before baking. The smoky sweetness will create a surprising contrast.
Cheese‑Only Chimic
For a dairy‑rich version, double the cheese and use a cheese blend that melts well. The result is a gooey, decadent treat that pairs well with a simple green salad.
Storing and Bringing It Back to Life
Fridge Storage
Store leftovers in an airtight container in the refrigerator for up to 3 days. Keep the tortillas separate from the filling if you want to preserve crispness. When ready to eat, reheat in a skillet over medium heat until the cheese melts.
Freezer Friendly
Wrap the assembled sheet pan tightly in plastic wrap and place in a freezer bag. Freeze for up to 2 months. Thaw overnight in the fridge before baking at 425°F for 10 minutes.
Best Reheating Method
Reheat in a 350°F oven for 10 minutes, or use a microwave for 2 minutes. Add a splash of water before reheating to keep the tortillas from drying out. The result will be almost as good as freshly baked.