Remember that night when you tried to impress your friends with homemade desserts and the kitchen turned into a flour battlefield? I still hear the faint hiss of the oven as I swore I’d never again attempt anything that could possibly explode. I was determined to master a classic Italian treat that would silence my critics, and the result was a revelation. The moment I tasted the first bite, I knew I’d found the secret that turns ordinary cannoli into a pocket of velvet and crunch. If you’ve ever felt the panic of a recipe gone wrong, you’ll understand why I’m so eager to share the exact steps that made this version flawless.
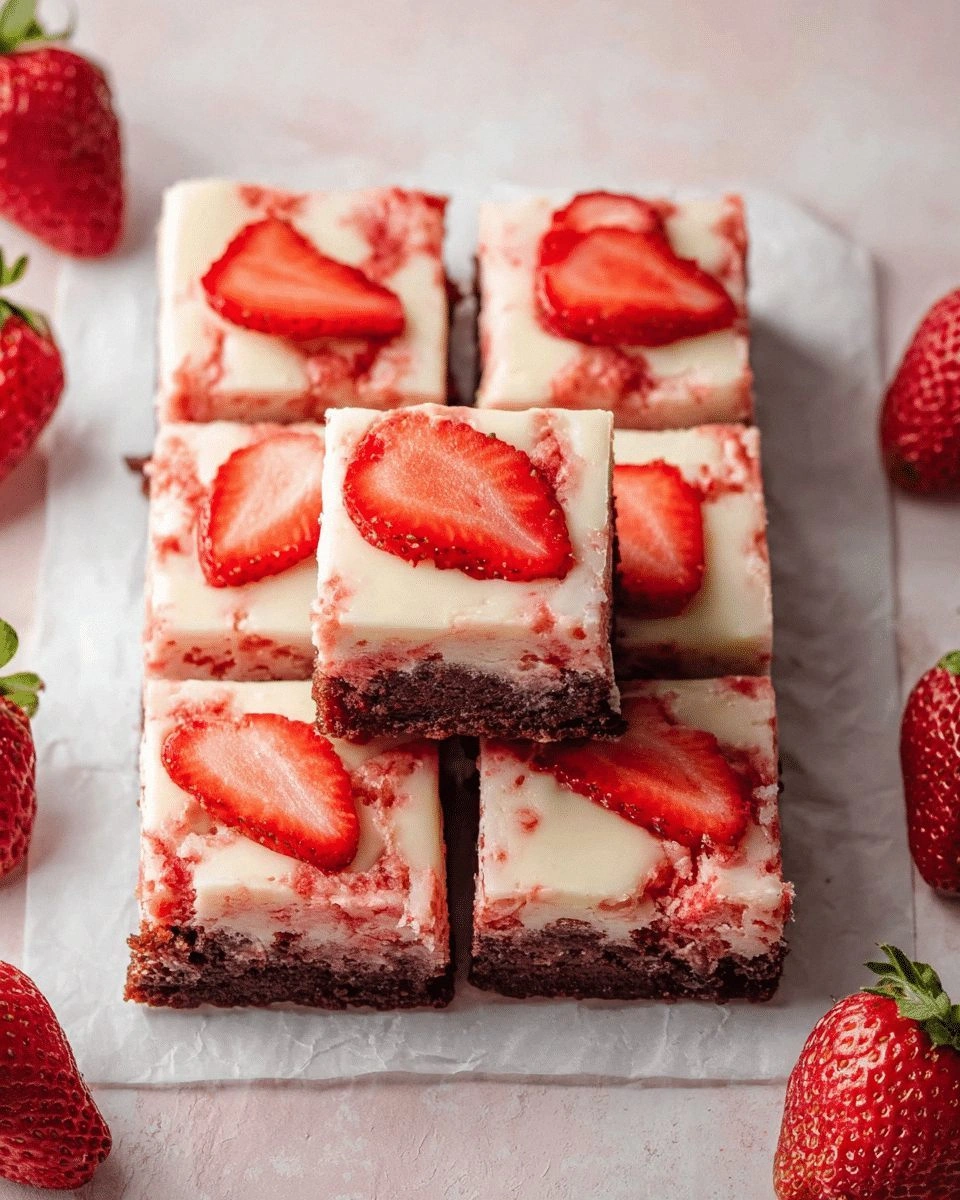
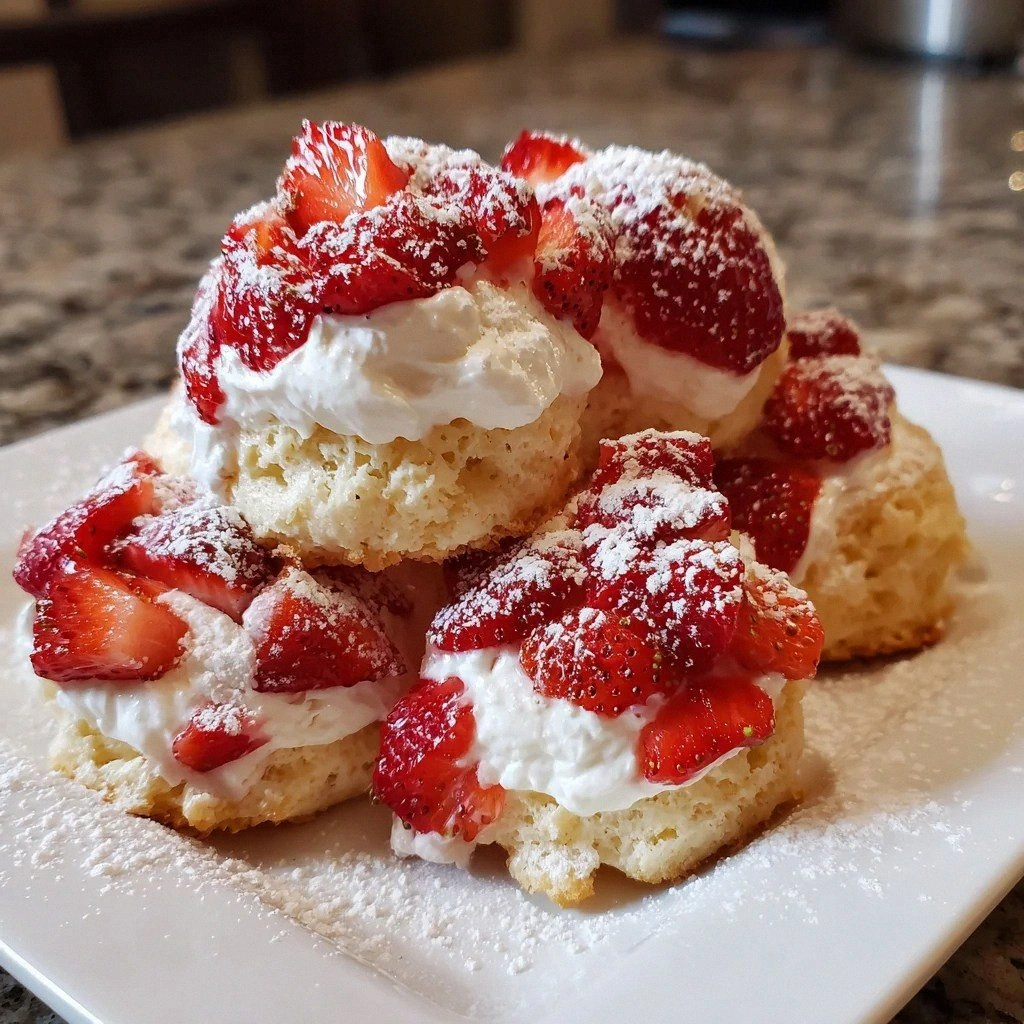
Picture this: a warm kitchen, the aroma of butter and sugar swirling, a golden dough resting on a marble counter. The sound of the dough being rolled is like a quiet drumbeat, signaling that something delicious is about to happen. When the ricotta filling hits your palate, it’s a burst of creamy sweetness that melts into a subtle citrus tang. The tiny chocolate chips pop with a satisfying snap, and the dusting of powdered sugar feels like a snowy snowfall on a winter morning. Each bite is a small, crispy shell that crumbles gently, revealing a soft, fragrant interior that lingers on your tongue.
This version is a game-changer because it balances texture and flavor in a way that most recipes miss. The dough is light yet sturdy, thanks to a precise butter-to-flour ratio that keeps it from becoming doughy or too crumbly. The ricotta mixture is brightened with candied orange peel and lemon zest, giving it a citrusy zing that cuts through the richness. A pinch of ground cinnamon adds a warm depth that you won’t find in traditional recipes. And the final touch? A dusting of powdered sugar that gives the bites an elegant, almost ethereal finish.
What sets this recipe apart is the unconventional technique of chilling the dough for 30 minutes before rolling it out. This simple step locks in the butter, creating a flaky, crisp shell that doesn’t crumble when you bite into it. It also allows the flavors to meld, giving the dough a subtle sweetness that complements the ricotta filling. Another secret is the addition of a tablespoon of melted butter brushed over the edges before baking, which gives the bites a glossy, golden finish. These tweaks may seem minor, but they make the difference between a good cannoli and an unforgettable treat.
I dare you to taste this and not go back for seconds. The first bite is a revelation, the second is a craving, and the third—well, that’s where the magic truly unfolds. Imagine the aroma of freshly baked cannoli filling your entire kitchen, a scent that makes you feel like you’re in a cozy Italian bakery. The crunch of the shell gives way to a silky, sweet center that lingers long after the last bite. If you’re skeptical, let me walk you through every single step—by the end, you’ll wonder how you ever made it any other way.
I’ll be honest—when I first made these, I ate half the batch before anyone else got a chance to try them. The moment the dough hit the pan, the sizzle was a signal that something spectacular was happening. The golden edges were crisp, and the inside was soft and airy. I felt like a culinary wizard, and that feeling is what I want to give you. Trust me, you’ll want to keep a second batch on hand for guests who won’t let you finish the first.
Most recipes get this completely wrong, either by overworking the dough or by using the wrong ratio of ricotta to sugar. The result is either a soggy, doughy bite or a bland, dry center. Here’s what actually works: keep the dough cold, use fresh ricotta, and add a splash of citrus zest. The combination of these ingredients creates a flavor profile that’s both indulgent and refreshing. If you’ve ever struggled with cannoli, you’re not alone, and I’ve got the fix.
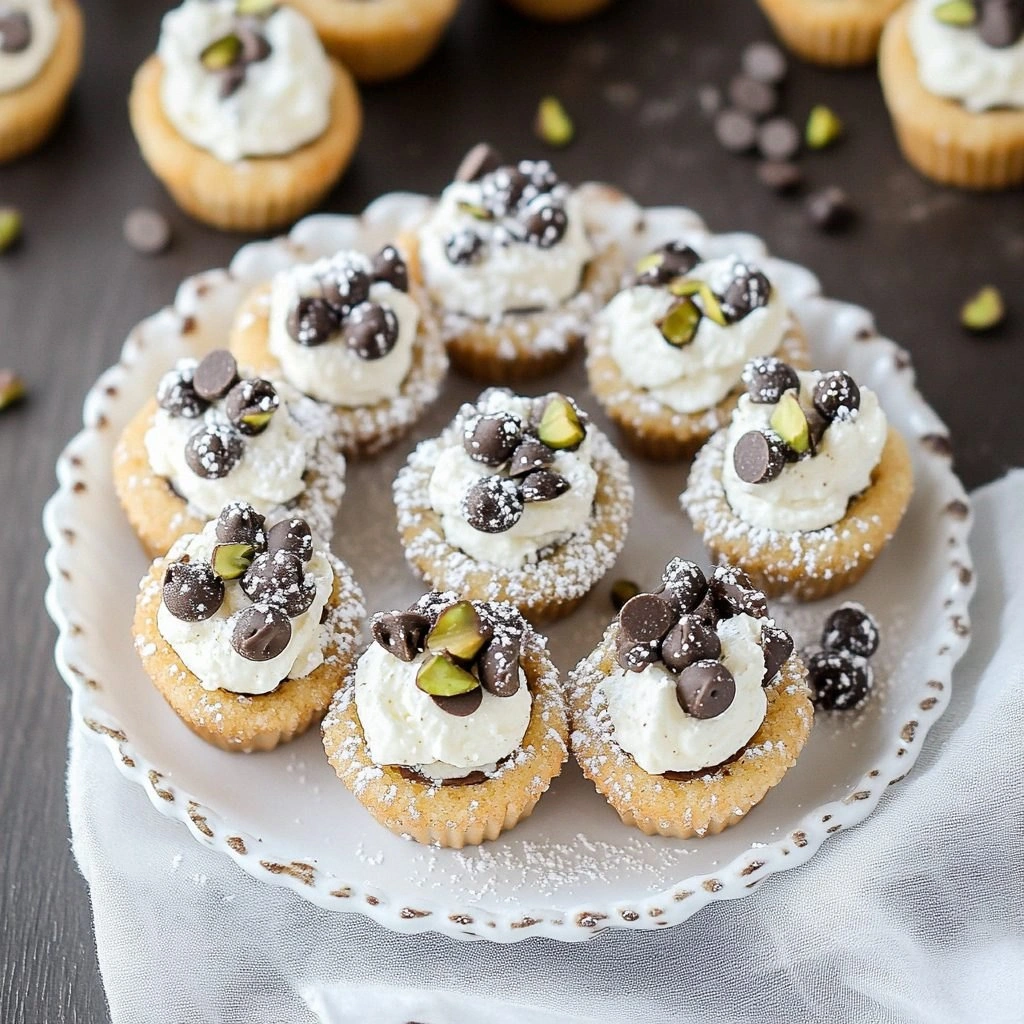
Picture yourself pulling this out of the oven, the whole kitchen smelling incredible, the aroma drifting to your living room. You’ll see the golden shells, the dusting of powdered sugar like snowflakes, and the chocolate chips gleaming like tiny jewels. Your guests will be amazed at how easy it is to make such an impressive treat. They’ll ask for the recipe, and you’ll feel like a culinary hero. And when you’re done, you’ll have a batch of mini cannoli bites that are perfect for parties, brunches, or a sweet indulgence after dinner.
Now let’s break down exactly what goes into this masterpiece. I’ll give you the full ingredient list, the method, and insider tricks that will make your mini cannoli bites the talk of the town. The next section is all about why this version stands out, and you’ll see the details that make it unique. If you’re ready to level up your dessert game, keep reading. I promise you’ll be amazed by how simple yet sophisticated these bites are.
What Makes This Version Stand Out
Flavor: The addition of candied orange peel and lemon zest gives the filling a bright, citrusy lift that cuts through the richness of the ricotta. This subtle tang balances the sweetness, creating a harmonious taste that lingers on the palate. The chocolate chips add a burst of bittersweet flavor that pairs perfectly with the creamy center.
Texture: The dough’s buttery, flaky shell is achieved by chilling the dough before rolling it out, which locks in the butter and creates a crisp exterior that doesn’t crumble. The ricotta filling is smooth and airy, thanks to the use of fresh ricotta and a light touch of powdered sugar. The result is a bite that has a satisfying crunch followed by a melt-in-your-mouth softness.
Simplicity: Despite the depth of flavor, the recipe is surprisingly simple. The dough requires only a handful of ingredients and can be made in under 15 minutes. The filling is a quick mix of ricotta, sugar, and citrus, and the assembly process is straightforward.
Uniqueness: Most cannoli recipes focus on large tubes, but mini cannoli bites are a playful twist that’s perfect for parties. The bite-sized format allows for easy serving and a fun, interactive experience. The recipe also includes optional pistachio garnish for an extra touch of elegance.
Crowd Reaction: Guests are often surprised by how small and elegant these bites are, yet they’re packed with flavor. The crisp shell and creamy filling make them a hit at gatherings, and the visual appeal is a bonus. You’ll hear compliments and requests for the recipe in no time.
Ingredient Quality: Using high-quality ricotta, fresh citrus zest, and real butter elevates the dish. The recipe calls for a simple, honest approach to ingredients, ensuring that each component shines. This focus on quality is what sets it apart from mass-produced desserts.
Cooking Method: The method emphasizes chilling the dough, brushing with melted butter, and baking at the right temperature to achieve the perfect balance of crunch and softness. Each step is designed to maximize flavor and texture while keeping the process manageable.
Make-Ahead Potential: You can prepare the dough and filling ahead of time, and the mini cannoli bites hold up well when stored in the refrigerator. They’re also freezer-friendly, making them a convenient option for busy weeks. This flexibility makes the recipe ideal for both everyday and special occasions.
Alright, let's break down exactly what goes into this masterpiece...
Inside the Ingredient List
The Flavor Base
All-Purpose Flour: The foundation of the dough, it provides structure and a neutral canvas for the butter to shine. Using a high-protein flour ensures a slightly chewier texture, but a standard 10% protein flour works well too. If you prefer a lighter bite, you can substitute half of the flour with cake flour, but this may make the dough more fragile. The flour also helps absorb the melted butter, preventing a greasy finish. Choosing a fresh, unbleached flour will give the dough a richer color and a more natural flavor.
Granulated Sugar: Adds a subtle sweetness to the dough that balances the buttery richness. The sugar also caramelizes slightly during baking, giving the shell a golden hue. If you’re watching sugar intake, you can reduce the amount by 25%, but be prepared for a slightly less sweet shell. A small pinch of sea salt can enhance the flavor profile, but we’ll add that separately. The sugar’s granules should be fine to ensure an even distribution throughout the dough.
Salt: A critical ingredient that amplifies all the other flavors. Even a small amount of salt can make the dough taste richer and more complex. It also helps to balance the sweetness of the ricotta filling. The salt should be added in small increments to avoid overpowering the dough. A fine sea salt is preferred, but kosher salt will work as well.
The Texture Crew
Unsalted Butter: The butter is the star of the dough, giving it a tender, flaky texture. It should be chilled and diced into small cubes so that it’s easy to incorporate. The butter’s fat content creates steam pockets during baking, producing a crisp exterior. If you can’t find unsalted butter, use salted butter but reduce the added salt accordingly. Keep the butter cold throughout the process to maintain the dough’s integrity.
Egg Yolk: Adds richness and helps bind the dough together. The yolk’s natural emulsifiers ensure that the dough holds its shape during rolling. If you’re looking for a vegan version, you can replace the yolk with a tablespoon of aquafaba, but the texture will differ slightly. The yolk also gives the dough a subtle golden color. Be sure to whisk the yolk until it’s smooth before adding it to the flour mixture.
Warm Water: The water hydrates the flour and activates gluten, giving the dough structure. It also helps the dough come together without becoming too sticky. Use water at room temperature for best results; cold water can make the dough difficult to work with. If you’re using a very small amount of water, you can add a splash of milk for a richer dough. The water should be added gradually to avoid overworking the dough.
The Unexpected Star
Ricotta Cheese: The creamy filling that defines cannoli. Fresh ricotta gives the best texture—if you’re using canned, drain it well to avoid excess moisture. The ricotta should be at room temperature before mixing, ensuring a smooth consistency. Adding a small amount of powdered sugar helps balance the ricotta’s natural tartness. If you prefer a more robust flavor, you can mix in a teaspoon of vanilla extract.
Powdered Sugar: This sugar is essential for sweetening the ricotta filling and giving it a silky texture. It dissolves quickly, preventing gritty bits in the filling. The powdered sugar also helps thicken the mixture slightly, making it easier to fill the shells. If you’re looking for a low-carb option, you can replace it with a sugar substitute that’s suitable for baking. The amount of powdered sugar can be adjusted to taste.
Vanilla Extract: Adds a warm, aromatic undertone that complements the citrus and chocolate. A teaspoon is enough to elevate the flavor profile. If you’re sensitive to vanilla, you can use vanilla bean paste for a more intense flavor. The extract also helps to bind the filling together, giving it a cohesive texture. Be sure to stir well to distribute the vanilla evenly.
Dark Chocolate Chips: Provide a burst of bittersweet flavor and a delightful crunch. The chips should be high cocoa content (70% or higher) for the best flavor. If you’re looking for a chocolatey twist, you can use white chocolate or milk chocolate instead. The chocolate chips also add a visual contrast to the creamy filling. They should be mixed into the ricotta after it’s smooth and creamy.
Chopped Candied Orange Peel: This ingredient adds a sweet, citrusy crunch that pairs beautifully with the ricotta. It also introduces a subtle floral note that elevates the overall flavor. Candied peel should be finely chopped to ensure even distribution. If you don’t have candied peel on hand, you can use dried orange zest or candied lemon peel as a substitute. The peel should be added to the filling after mixing the ricotta and sugar.
The Final Flourish
Lemon Zest: The bright zest brings a fresh, citrusy aroma that cuts through the richness of the ricotta. It also adds a subtle brightness to the filling, making it feel lighter. Use a microplane to zest the lemon, avoiding the bitter pith. The zest should be added to the ricotta mixture after the sugar has dissolved. If you’re allergic to citrus, you can omit the zest, but the filling will be less bright.
Ground Cinnamon: A pinch of cinnamon adds warmth and depth to the filling. It also brings a hint of spice that balances the sweetness. Use ground cinnamon rather than sticks for even distribution. The cinnamon should be added to the ricotta mixture after the sugar is dissolved. If you prefer a different spice, you can try nutmeg or cardamom.
Chopped Pistachios: Optional garnish that adds a nutty crunch and a pop of color. The pistachios can be toasted for an extra layer of flavor. They should be chopped into small pieces to avoid overpowering the filling. The pistachios are sprinkled on top of the baked bites for an elegant finish. If you’re allergic to nuts, you can substitute with sunflower seeds or omit them entirely.
Powdered Sugar for Dusting: The final touch that gives the mini cannoli bites an elegant, snowy appearance. It also adds a final sweetness that complements the filling. The powdered sugar should be sifted to avoid lumps. Dust the baked bites immediately after removing them from the oven while they’re still warm. If you prefer a sweeter finish, you can add a light drizzle of honey or maple syrup.
Everything's prepped? Good. Let's get into the real action...
The Method — Step by Step
- In a large mixing bowl, combine the flour, sugar, and salt. Feel the texture as the dry ingredients mingle, creating a uniform base. The mixture should look slightly sandy, indicating the sugar hasn’t clumped. This step is crucial for ensuring even distribution of the butter later. Keep this bowl aside while you prepare the butter.
- Add the chilled butter cubes to the flour mixture. Using a pastry cutter or your fingertips, cut the butter into the dry ingredients until the mixture resembles coarse crumbs. The butter should be visible in small specks, not fully melted. This process creates tiny pockets of fat that will expand during baking. If you’re impatient, you can use a food processor, but the hand method preserves the texture.
- Whisk the egg yolk with the warm water until it’s smooth and slightly frothy. Pour this mixture into the flour-butter combo and mix until a dough forms. The dough should be firm but pliable; if it’s too sticky, add a tablespoon of flour. Let the dough rest in the refrigerator for 30 minutes to chill. Chilling is the secret to a flaky, non-sticky dough.
- While the dough chills, prepare the ricotta filling. In a medium bowl, combine the ricotta, powdered sugar, vanilla extract, lemon zest, ground cinnamon, candied orange peel, and chocolate chips. Mix until the mixture is smooth and glossy. The filling should be thick enough to hold its shape but not so dry that it clumps. Taste a spoonful; it should be sweet but not cloying. Set aside.
- Remove the dough from the fridge and roll it out on a lightly floured surface to about 1/8 inch thickness. Use a 2-inch round cutter to cut out small circles. If you don’t have a cutter, a glass or a small cup works well. Place the circles on a parchment-lined tray. Keep them slightly apart to prevent sticking.
- Spoon a small amount of ricotta filling onto each dough circle, about 1 teaspoon. Gently fold the dough over to create a half-moon shape. Press the edges together and seal by pinching them. If you’re worried about leaks, you can crimp the edges with a fork. The filling should be snug but not overfilled.
- Brush the tops of the mini cannoli bites with melted butter. This step gives them a shiny, golden crust and helps prevent them from drying out. The butter should be warm, not hot, to avoid burning the dough. Brush lightly, ensuring an even coat. The butter will also help the powdered sugar adhere after baking.
- Preheat your oven to 375°F (190°C). Arrange the bites on a baking sheet lined with parchment. Bake for 12–15 minutes, or until the edges are golden brown and the shells are crisp. Keep an eye on them; the smaller size means they can overbake quickly. When done, remove from the oven and let them cool for 5 minutes on the sheet.
- Dust the warm bites with powdered sugar using a fine sieve. The sugar should clump lightly, giving them a snowy finish. If you’re adding pistachios, sprinkle them on top now for an extra crunch. Allow the dusting to set for a minute before serving. The sugar will create a delicate contrast against the golden shell.
- Serve immediately or store in an airtight container in the refrigerator for up to 2 days. If you’re bringing them to a party, keep them chilled on a platter with a small bowl of warm honey or chocolate sauce for dipping. These bites are best enjoyed fresh, but they hold their texture well when stored properly.
That's it — you did it. But hold on, I've got a few more tricks that'll take this to another level. The next section will reveal insider secrets that even seasoned pastry chefs swear by. Trust me, these are the tiny details that make the difference between good and unforgettable.
Insider Tricks for Flawless Results
The Temperature Rule Nobody Follows
Many bakers assume that a higher oven temperature always yields a crisper shell. In reality, baking at 375°F (190°C) for 12–15 minutes is optimal for mini cannoli. If you raise the heat to 400°F (200°C), the shells will brown too quickly, trapping moisture inside and resulting in a soggy center. Conversely, baking at 350°F (175°C) will stretch the dough, causing the shells to puff up and become uneven. The sweet spot is a moderate temperature that allows the butter to render slowly while the dough firms up. Keep your oven calibrated to avoid these common pitfalls.
Why Your Nose Knows Best
The scent of fresh dough is a reliable indicator that the baking process is on track. When you smell the buttery aroma rising, you know the butter is melting and the dough is crisping. If the aroma is faint or metallic, the oven may be too hot, and the dough could burn. A strong, sweet scent means the sugar is caramelizing just right. Trust your nose as a subtle, intuitive gauge of doneness. This olfactory cue is a secret many home bakers overlook.
The 5-Minute Rest That Changes Everything
After baking, let the mini cannoli rest on the tray for 5 minutes before transferring them to a wire rack. This short pause allows the shells to set and the filling to firm slightly, preventing them from cracking when handled. A quick cool-down also lets the powdered sugar settle, creating a neat, snow-like finish. If you rush them off the tray, the shells might still be too hot and could break. A brief rest is a simple step that yields a polished result.
The Perfect Dusting Technique
Sift the powdered sugar through a fine-mesh sieve onto the warm bites. This ensures a uniform coating and eliminates clumps that could feel gritty. The dusting should be light enough to be visible but not so heavy that it overpowers the flavor. If you want a richer finish, lightly drizzle a thin layer of honey over the dusting before it sets. The combination of sugar and honey creates a glossy, sweet glaze that enhances the bite’s appeal.
Avoiding Overbaked Crumbs
If you notice the edges are turning dark before the center is fully set, lower the oven temperature by 10–15°F (5–8°C). The key is to bake until the edges are just golden, not brown. You can also rotate the baking sheet halfway through to ensure even baking. Keep a close eye on the first batch; it will guide you for subsequent ones. Overbaking leads to a crumbly texture that ruins the delicate balance of flavors.
Keeping the Filling Fresh
If you’re preparing the filling ahead of time, cover the bowl with plastic wrap and refrigerate for up to 24 hours. The ricotta will firm up slightly, making it easier to fill the shells. However, do not let it sit too long, as the moisture can cause the dough to become sticky. When ready to bake, give the filling a quick stir to restore its smoothness. A fresh filling always tastes better and holds its shape during baking.
Creative Twists and Variations
This recipe is a playground. Here are some of my favorite ways to switch things up:
Chocolate Ganache Bites
Swap the ricotta filling for a rich chocolate ganache made with dark chocolate and heavy cream. The ganache should be thick enough to hold its shape but still creamy. The chocolate flavor pairs beautifully with the buttery shell. Add a pinch of sea salt on top for a salted caramel effect. These bites are a decadent treat for chocolate lovers.
Pistachio Praline Version
Replace the chocolate chips with chopped pistachios and add a drizzle of almond butter to the filling. The pistachios provide a nutty crunch and a subtle green hue. The almond butter adds depth and a silky texture. Finish with a sprinkle of crushed pistachios for an extra layer of flavor. This version is perfect for a sophisticated brunch.
Lemon Basil Surprise
Add finely chopped fresh basil to the ricotta mixture for a herby twist. Replace the lemon zest with a small amount of lime zest for a zesty brightness. The basil gives a fresh, aromatic note that contrasts the sweet filling. These bites are a refreshing change of pace during summer gatherings.
Savory Spinach & Ricotta Bites
For a savory twist, sauté spinach with garlic and mix it into the ricotta filling. Add a pinch of nutmeg and a handful of grated Parmesan for depth. The spinach adds color and a subtle earthiness that pairs well with the buttery shell. Serve them with a drizzle of olive oil and a sprinkle of cracked pepper for a quick appetizer.
Mango Coconut Delight
Blend ripe mango into the ricotta filling for a tropical flavor. Add shredded coconut to the dough for a subtle crunch. The mango’s natural sweetness balances the richness of the dough. Finish with a dusting of toasted coconut for a beachy finish. These bites are a playful, summery treat.
Espresso Infusion
Add a tablespoon of finely ground espresso to the dough for a mocha flavor. Mix the espresso into the ricotta filling for a coffee-infused center. The bitterness of the espresso complements the sweetness of the sugar. Top with a dusting of cocoa powder for an extra chocolatey kick. These bites are perfect for coffee lovers and make a great dessert after dinner.
Storing and Bringing It Back to Life
Fridge Storage
Store mini cannoli bites in an airtight container at room temperature for up to 24 hours. The dough may soften slightly, but the filling will remain firm. For longer storage, keep them in the refrigerator, where they’ll stay fresh for up to 2 days. The chilled environment helps preserve the texture and prevents the shells from becoming soggy. When ready to serve, let them sit at room temperature for 10–15 minutes before dusting with powdered sugar.
Freezer Friendly
Mini cannoli bites freeze well if packed in a single layer on a parchment-lined tray before transferring to a freezer bag. They can be frozen for up to 3 months. When ready to use, thaw overnight in the refrigerator. Reheat in a 350°F (175°C) oven for 5–7 minutes until the shells are crisp again. The filling will regain its creamy texture after reheating.
Best Reheating Method
To bring the mini cannoli bites back to life, preheat your oven to 350°F (175°C). Place the bites on a baking sheet and heat for 5–7 minutes, or until the shells are golden and crisp. If you’re in a hurry, you can microwave them for 10–15 seconds, but this may make the shells chewy. The oven method preserves the buttery crunch and the filling’s creamy consistency. Serve immediately for the best experience.