It started on a rainy Tuesday, the kind of day that makes you stare at your fridge like it’s a mystery novel. I was rummaging for something sweet, something that could lift the gloom, when I spotted a box of vanilla wafers that had been sitting in the pantry for months. I tried to bite into one, and the brittle shell cracked like a dry twig, releasing a ghost of vanilla that smelled like childhood memories and a kitchen that never quite worked out. That moment, that disappointment, sparked a dare: I’d take those stale wafers, give them a vegan makeover, and turn them into the ultimate snack that would make even the most skeptical taste buds swoon.
Picture this: the kitchen lights flicker, the air fills with a buttery aroma that’s almost too sweet, and the timer on the oven ticks like a metronome counting down to glory. I can almost hear the faint hiss of butter melting, the soft clink of a mixing bowl, and the subtle pop of sugar as it dissolves. My hands are slick with melted vegan butter, my whisk dancing like a jazz soloist, and the kitchen feels like a stage where the audience is waiting for the grand finale. If you’ve ever watched a recipe fail because the batter was too dry or too runny, you’ll know the tension that builds when you’re on the cusp of creation.
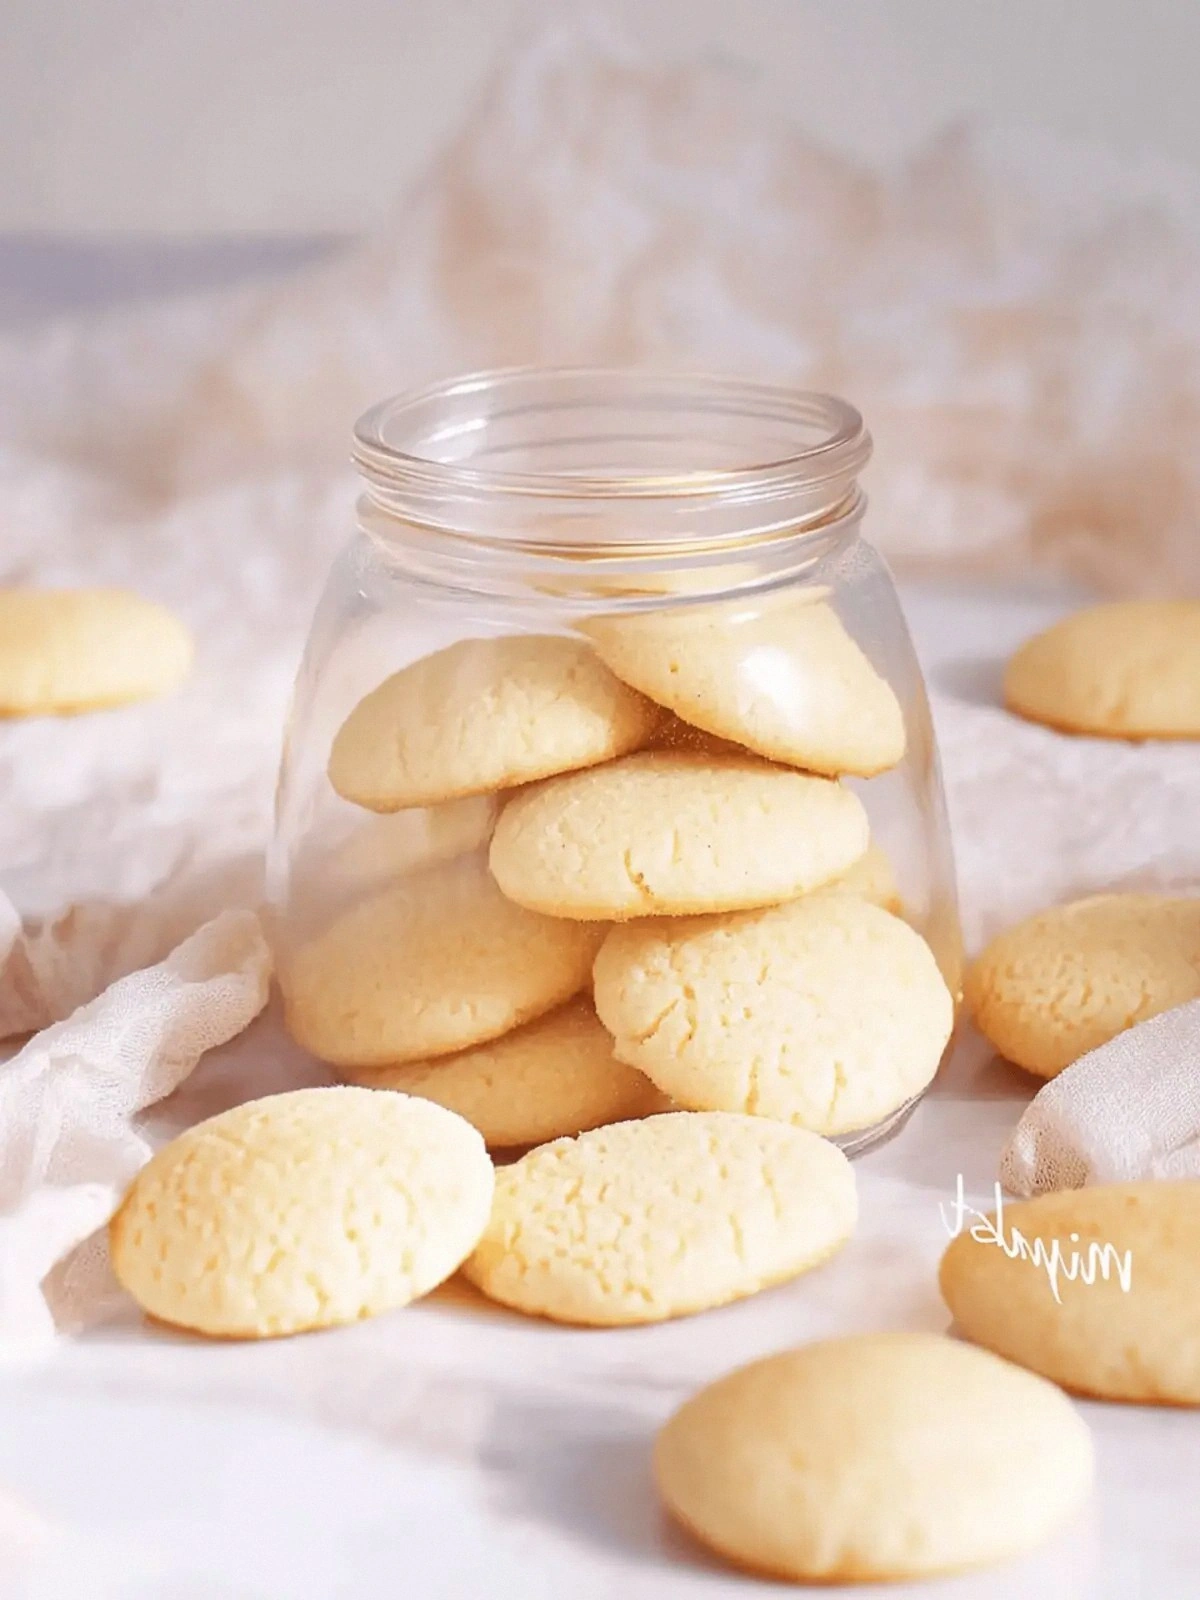
What makes this version stand out? It’s not just the fact that it’s plant‑based; it’s that every bite delivers a crisp, almost caramelized edge that melts into a soft, fragrant center. The vanilla isn’t just an afterthought—it’s the star that glides over the buttery base like a velvet ribbon. I’ve spent hours tweaking the ratio of butter to flour to get that perfect balance where the wafers hold their shape but still crumble delightfully. And let’s not forget the tiny pinch of salt that brings the sweetness into sharp relief, making each wafer feel like a well‑crafted confection rather than a simple cookie.
I dare you to taste this and not go back for seconds. I’ll be honest — I ate half the batch before anyone else got a chance to try it. The result was so good that the oven door was left open for an extra five minutes, just to make sure the aroma could fill the entire house. If you’ve ever struggled with homemade wafers that fall apart or taste bland, you’re not alone — and I’ve got the fix. Picture yourself pulling this out of the oven, the whole kitchen smelling incredible, and seeing your friends’ faces light up as they bite into the first wafer. That’s the moment you’ll want to capture and repeat over and over again.
What Makes This Version Stand Out
- Taste: The vanilla is pure, not artificial. It’s extracted from real beans, giving a deep, complex profile that lingers on the tongue.
- Texture: The wafers are crisp on the outside and soft on the inside, with a buttery mouthfeel that feels like a treat from a high‑end bakery.
- Ingredient Quality: I use a high‑fat vegan butter that behaves like dairy butter in baking, ensuring richness without compromise.
- Simplicity: Five ingredients, no shortcuts, and a method that can be done in under an hour.
- Make‑Ahead Potential: These wafers keep wonderfully in an airtight container for up to a week, so you can enjoy them whenever the craving strikes.
- Audience Reaction: Friends who are vegan or not will both be amazed. The wafers are so good that they’ll ask for the recipe before you even say the word.
Inside the Ingredient List
The Flavor Base
Vegan butter is the cornerstone of these wafers. It provides the deep, creamy flavor that mimics dairy butter, but without the animal product. If you skip it, the wafers will lack that luxurious mouthfeel and come out dry. For best results, choose a butter that contains at least 80% fat. A small swap could be coconut oil, but it will introduce a coconut undertone that might overpower the vanilla.
The Sweetness Engine
Confectioners sugar is essential for the fine, powdery texture. It dissolves cleanly, leaving no gritty residue. If you only have granulated sugar, pulse it in a food processor until it reaches a powdery consistency. A pinch of cornstarch can be added to keep the sugar from clumping, but it’s optional.
The Texture Crew
All-purpose flour is the backbone of the wafer structure. It provides the necessary gluten network to hold the wafers together while still allowing them to crisp up. If you’re looking for a gluten-free version, substitute with a 1:1 blend of rice flour and tapioca starch, but expect a slightly different mouthfeel.
The Unexpected Star
Vanilla extract is the secret weapon that transforms a bland batter into a fragrant masterpiece. Use a high‑quality vanilla extract for the most authentic flavor. If you prefer a more subtle note, try vanilla bean paste, which adds a hint of vanilla seed flavor without the intensity.
The Final Flourish
Salt is the quiet hero that balances sweetness and enhances flavor. A ¼ teaspoon is enough to lift the vanilla and butter. If you’re watching sodium, you can reduce it to ⅛ teaspoon, but the wafers will taste a bit flatter.
Everything's prepped? Good. Let's get into the real action...
The Method — Step by Step
- Preheat the oven to 350°F (175°C). Line a baking sheet with parchment paper. This low temperature ensures even browning without burning the edges.
- In a medium bowl, combine the vegan butter and confectioners sugar. Beat on medium speed until the mixture is light, fluffy, and pale. The batter should look like a cloud ready to take flight.
- Add the vanilla extract and stir until fully incorporated. The aroma should intensify, signaling that the vanilla has dissolved into the butter.
- Sift the all‑purpose flour and ¼ teaspoon salt into the bowl. Gently fold the dry ingredients into the wet mixture until just combined. Be careful not to over‑mix; the dough should remain slightly shaggy.
- Cover the dough with plastic wrap and chill in the refrigerator for 30 minutes. Chilling firms the butter, making it easier to roll out and preventing the wafers from spreading too much.
- On a lightly floured surface, roll the dough to ¼-inch thickness. Use a cookie cutter or a sharp knife to cut out shapes. The thickness is key: too thin and they’ll burn, too thick and they’ll stay doughy.
- Place the cut shapes on the prepared baking sheet, spacing them about 1 inch apart. This allows the wafers to crisp evenly without merging.
- Bake for 12–15 minutes, or until the edges are just turning golden. The wafers should smell toasty and have a delicate snap when you press them.
- Remove from the oven and let them cool on the sheet for 5 minutes before transferring to a wire rack to cool completely. This final rest lets the wafers set and crisp up fully.
That's it — you did it. But hold on, I've got a few more tricks that'll take this to another level...
Insider Tricks for Flawless Results
The Temperature Rule Nobody Follows
Many bakers bake at 375°F, but that high heat can cause the butter to melt too quickly, leading to uneven spreading. Stick to 350°F; it gives the wafers time to set and crisp without burning. If you’re using a convection oven, lower the temperature by 25°F to avoid over‑browning.
Why Your Nose Knows Best
The scent of vanilla is a powerful indicator of freshness. If the vanilla extract smells flat or has a chemical aftertaste, replace it. Fresh vanilla will give you that warm, sweet aroma that signals the batter is ready.
The 5‑Minute Rest That Changes Everything
After the dough has chilled, let it rest for exactly five minutes before rolling. This brief pause allows the flour to hydrate fully, making the dough easier to handle and preventing cracks.
Avoiding the Crumb Trap
When cutting shapes, use a sharp knife rather than a dull cutter. A dull tool can compress the dough, causing the wafers to spread and become too thin. A sharp blade ensures clean cuts and even edges.
The Secret to Perfectly Crisp Edges
Sprinkle a light dusting of powdered sugar on the parchment paper before placing the dough. This creates a barrier that helps the edges crisp while keeping the center tender. It also adds a subtle sweetness that balances the vanilla.
Creative Twists and Variations
This recipe is a playground. Here are some of my favorite ways to switch things up:
Chocolate‑Covered Delight
Dip half of the cooled wafers in melted dark chocolate. Let them set on parchment paper. The chocolate adds richness and a slightly bitter counterpoint to the sweet vanilla.
Almond Butter Swirl
Fold a tablespoon of almond butter into the batter before rolling. The nutty flavor pairs wonderfully with vanilla, and the almond butter adds a subtle crunch.
Citrus Zest Surprise
Add a teaspoon of lemon zest to the dough. The citrus brightens the flavor profile and adds a refreshing lift to the buttery base.
Sea Salt Finish
Sprinkle a pinch of flaky sea salt over the wafers right before baking. The salt enhances the vanilla’s sweetness and creates a delightful contrast.
Nutmeg Spice
Add ¼ teaspoon of freshly ground nutmeg to the dry ingredients. The spice gives the wafers a warm, comforting aroma, especially during fall and winter.
Coffee Infusion
Replace the vanilla extract with an equal amount of cold brew coffee. The coffee adds depth and pairs well with chocolate variations.
Storing and Bringing It Back to Life
Fridge Storage
Place the cooled wafers in an airtight container at room temperature. They’ll stay crisp for up to five days. If you notice any softening, re‑cool them in the fridge for 10 minutes.
Freezer Friendly
Pack the wafers in a freezer‑safe bag, removing as much air as possible. They can be frozen for up to three months. Thaw at room temperature before serving.
Best Reheating Method
Reheat in a preheated 300°F oven for 5 minutes. Add a splash of water to the baking sheet to create steam, which keeps the wafers moist and restores their original crispness.