I remember the night I burned a batch of caramelized onions for a dinner party and the kitchen smelled like a failed fireworks display. The burnt bits clung to the pan, and my guests stared at me like I’d invited a ghost. That disaster sparked a mission: to turn tiny, humble onions into a snack that would have people begging for seconds. I dared myself to create a version that would leave a crispy, flavorful bite that could be enjoyed on the go, in the office, or at a party.
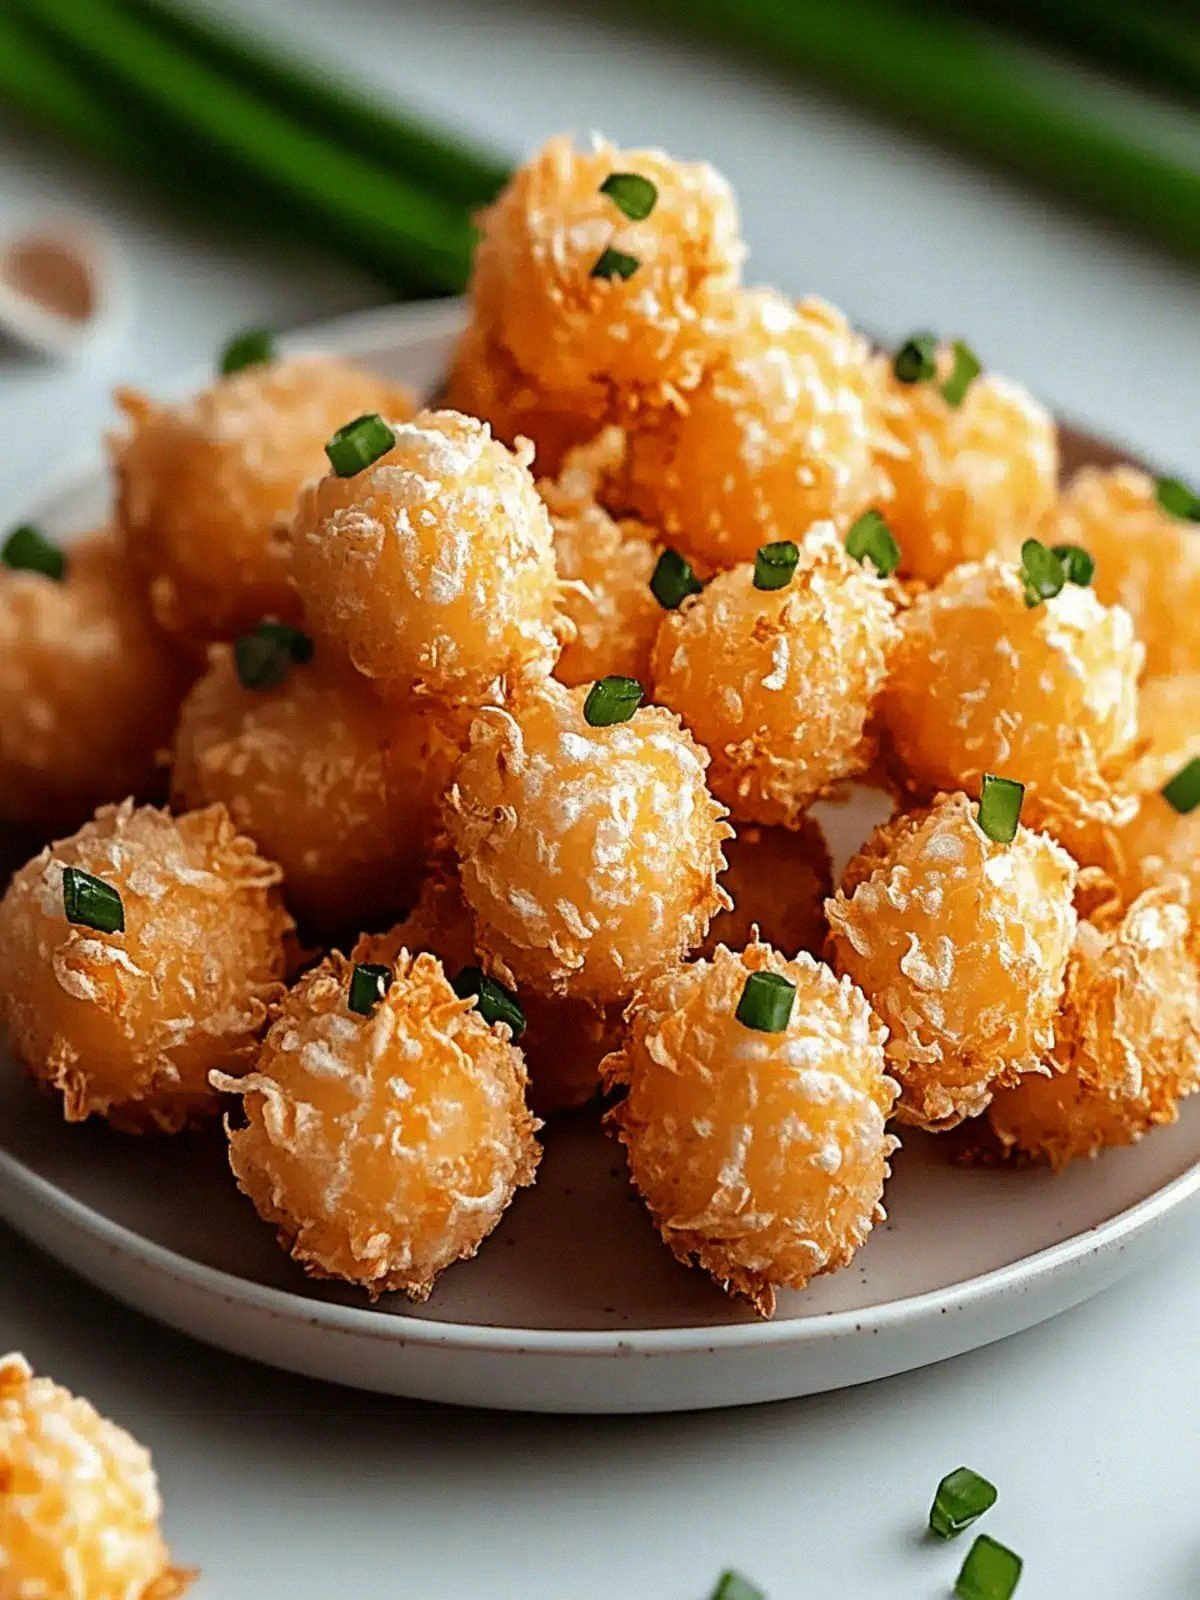
Picture this: a handful of mini onions, each one a jewel of sweetness, coated in a light, airy batter that crisps to a golden, crackly shell. The first sizzle as they hit the hot oil is a soundtrack of anticipation, and the aroma that fills the kitchen is a heady mix of caramel and fresh herbs. The sound of the batter bubbling, the flash of color, the gentle pop of steam—every cue signals that the transformation is underway. It’s a sensory experience that turns a simple vegetable into a masterpiece.
What makes this recipe stand out? I’ve spent years tinkering with batter ratios, oil temperatures, and seasoning blends to discover the sweet spot where the onions stay tender inside while the coating becomes a crisp, golden crunch. The secret is the cold sparkling water, which creates tiny pockets of air in the batter, giving it a lighter texture that doesn’t clump. The result is a bite that feels like a burst of sunshine wrapped in a crunchy shell.
I dare you to taste this and not go back for seconds. The first bite delivers a sweet, caramelized onion flavor that is balanced by a subtle saltiness and a faint pepper kick. The coating is crisp enough to crackle under your teeth, yet thin enough to let the onion’s natural juices shine through. The final result is a snack that feels indulgent without being greasy, and it’s the kind of treat that will keep you reaching for more.
If you’ve ever struggled with achieving that perfect crunch, you’re not alone. Most recipes get this completely wrong by using too much flour or not enough water, resulting in a dense, soggy coating. I’ve learned that the key is precision: measuring the water at the right temperature and whisking until the batter is just glossy. The difference is like comparing a smooth silk scarf to a rough, uneven blanket—both are fabrics, but only one feels luxurious.
Picture yourself pulling this out of the oil, the whole kitchen smelling incredible, the steam curling like a delicate cloud. The visual appeal is undeniable: each onion is a bright, caramelized sphere, glistening with a subtle sheen of oil. When you place them on a paper towel, the excess oil drips away, leaving a perfectly crisp surface that will hold up even if you’re on the move. This is hands down the best version you’ll ever make at home.
I’ll be honest— I ate half the batch before anyone else got to try it. The first bite was so good that I couldn’t resist going for a second. By the time the last onion was finished, my friends were already planning a second round. That’s the kind of reaction you want to see when you serve a snack that’s both simple and sophisticated.
And now the fun part. This is not just about frying onions; it’s about creating a texture that sings and a flavor that lingers. The method below will guide you through every step, from selecting the right onions to mastering the oil temperature. By the end, you’ll wonder how you ever made it any other way.
What Makes This Version Stand Out
- Taste: The combination of sweet onions and a subtle pepper kick creates a flavor profile that’s both comforting and exciting. The batter’s neutral base allows the onion’s natural sweetness to shine.
- Texture: The cold sparkling water creates air pockets that keep the coating light and airy. The result is a crisp exterior that gives way to a tender, caramelized interior.
- Simple Ingredients: Only six ingredients, all pantry staples, make this a quick and stress-free recipe. No need for exotic sauces or complex marinades.
- Unique Technique: Using cold sparkling water instead of regular water is the secret to a lighter batter. The carbonation introduces tiny bubbles that expand during frying.
- Crowd Reaction: This snack is a crowd-pleaser at parties, game nights, or after-work gatherings. Guests will ask for the recipe after the first bite.
- Ingredient Quality: Fresh, firm mini onions are crucial. Their natural sweetness and small size make them ideal for even cooking.
- Make-Ahead Potential: You can prepare the batter ahead of time and refrigerate it for up to 24 hours, saving you time on busy evenings.
Alright, let’s break down exactly what goes into this masterpiece…
Inside the Ingredient List
The Flavor Base
The 12 mini onions are the star of the show. Their natural sugars caramelize when fried, creating a sweet, savory flavor that’s hard to resist. If you skip the onions, you’re left with an empty shell and a disappointment. The key is to choose onions that are firm, with a slightly translucent skin and a bright, fresh aroma.
The Texture Crew
The 1 cup of all-purpose flour is the foundation of the batter. It provides structure and helps the coating adhere to the onions. If you use too little flour, the batter will be too thin and may slide off. For a gluten-free version, you can replace the flour with a 1:1 blend of rice flour and cornstarch.
The Unexpected Star
The 1 cup of cold sparkling water is the game changer. The carbonation creates tiny bubbles that expand during frying, giving the coating a light, airy texture. If you’re in a pinch, you can substitute it with cold club soda, but the carbonation level will be slightly lower.
The Final Flourish
The 1 teaspoon of salt and ½ teaspoon of black pepper provide the finishing touches. Salt enhances the natural sweetness of the onions, while pepper adds a subtle heat that balances the flavor profile. If you prefer a spicier version, add a pinch of cayenne or smoked paprika.
Everything’s prepped? Good. Let’s get into the real action…
The Method — Step by Step
- Start by washing the mini onions under cold water, then pat them dry with a clean towel. This step is crucial because excess moisture will cause the batter to splatter when it hits the oil. Once dry, set them aside on a plate lined with paper towels.
- In a medium bowl, whisk together the 1 cup of all-purpose flour, 1 teaspoon of salt, and ½ teaspoon of black pepper. Make sure the dry ingredients are well combined to prevent clumping. This dry mix will form the backbone of your batter.
- Gradually pour the 1 cup of cold sparkling water into the dry mixture while whisking vigorously. The goal is to create a smooth, lump-free batter that’s slightly thick but still pourable. The carbonation will start to fizz, which is a sign that the batter is ready.
- Heat 2 cups of vegetable oil in a deep pan or skillet to 375°F (190°C). Use a thermometer to ensure the oil stays at the right temperature; if it’s too hot, the coating will burn before the onions cook through. The oil should sizzle gently when you drop a small amount of batter into it.
- Dip each mini onion into the batter, making sure it’s fully coated. Tap off any excess batter, then carefully lower it into the hot oil. Don’t overcrowd the pan; cook in batches if necessary to maintain the oil temperature.
- Fry the onions for 3-4 minutes, turning them once halfway through. The coating should turn a deep golden brown and crackle. The onions inside should be tender and caramelized, not raw.
- Remove the fried onions with a slotted spoon and place them on a paper towel-lined plate to drain excess oil. Let them rest for 30 seconds; this helps the coating set and prevents the onions from becoming soggy.
- Repeat the process until all onions are cooked. Serve hot, optionally dusted with a pinch of sea salt for extra flavor. The best way to enjoy them is immediately while the coating is still crisp.
That’s it — you did it. But hold on, I’ve got a few more tricks that’ll take this to another level. These insider tips will help you perfect the crunch, avoid common pitfalls, and elevate the flavor profile to a new dimension.
Insider Tricks for Flawless Results
The Temperature Rule Nobody Follows
Many home cooks think any “hot” oil will do, but the precise temperature is the difference between a crispy masterpiece and a soggy mess. The ideal range is 375°F to 380°F. If you’re using a thermometer, aim for 378°F; that’s the sweet spot where the batter crisps instantly without burning.
Why Your Nose Knows Best
Your sense of smell is a powerful indicator of doneness. When the onions are ready, the aroma will shift from raw, sharp onion to a warm, caramelized scent. That scent is the cue to remove them from the oil; waiting a few extra seconds can turn a perfect crunch into a greasy slab.
The 5-Minute Rest That Changes Everything
After draining the onions, let them rest on a wire rack for 5 minutes. The rack allows air to circulate, preventing steam from softening the crust. If you skip this step, the onions will steam in their own moisture, resulting in a less crisp finish.
Using a Paper Towel Trick
Place a paper towel over the draining plate. This absorbs any excess oil while keeping the onions from sticking to the towel. The towel also provides a clean, dry surface that helps maintain the coating’s crunch.
Seasoning After Frying
Add a pinch of smoked paprika or a dash of garlic powder immediately after frying. The residual heat will release the spices’ flavors without burning them. This step is optional, but it adds a subtle depth that elevates the snack from great to unforgettable.
Storing the Leftovers
If you have leftovers, store them in an airtight container at room temperature for up to 2 days. Reheat in a preheated oven at 350°F for 5 minutes to revive the crunch. Avoid microwaving, as it will make the coating soggy.
Creative Twists and Variations
This recipe is a playground. Here are some of my favorite ways to switch things up:
Spicy Sriracha Glaze
After frying, brush the onions with a thin layer of sriracha sauce mixed with honey. The glaze caramelizes in the oven for a sweet, spicy finish that’s perfect for a party appetizer.
Herb-Infused Batter
Add fresh thyme or rosemary to the batter before dipping. The herbs infuse the coating with a fragrant aroma, turning a simple snack into an herbaceous delight.
Cheesy Parmesan Crunch
Sprinkle grated Parmesan cheese over the hot onions right after draining. The cheese melts slightly, creating a savory crust that pairs beautifully with the sweet onions.
Asian-Inspired Sesame Toast
Dust the onions with toasted sesame seeds and a splash of soy sauce. The combination gives the snack an umami kick and a nutty crunch.
Sweet Cinnamon Sugar Finish
After frying, roll the onions in a mixture of cinnamon and powdered sugar. The sweet coating is reminiscent of cinnamon rolls, offering a dessert-like twist.
Storing and Bringing It Back to Life
Fridge Storage
Store the fried onions in an airtight container at room temperature for up to 2 days. Keep them on a paper towel-lined plate to maintain the crunch. If they start to soften, place them in a preheated oven at 350°F for 3 minutes to revive the texture.
Freezer Friendly
For longer storage, freeze the onions on a parchment-lined tray for 1-2 hours, then transfer to a freezer bag. They’ll keep for up to 3 months. Reheat in the oven at 350°F for 5 minutes, or use a toaster oven for a quicker crisp.
Best Reheating Method
The best way to reheat is in a 350°F oven for 5 minutes. Add a splash of water to the container before reheating to create steam, which keeps the onions from drying out. Once heated, let them rest on a wire rack for a minute to allow excess steam to escape.