Picture this: it’s a chilly October evening, the wind is howling outside, and you’re standing in a kitchen that smells like a haunted bakery. I was halfway through a pumpkin spice latte when a friend dared me to make something “spooky enough to scare the sugar‑craving monsters out of my roommates.” I laughed, grabbed a bag of flour, and set out on a quest that ended with a loaf that looks like it was conjured by a mischievous witch, yet tastes like a warm hug from a friendly ghost. That night, the kitchen turned into a laboratory of color, aroma, and texture, and the result was nothing short of magical.
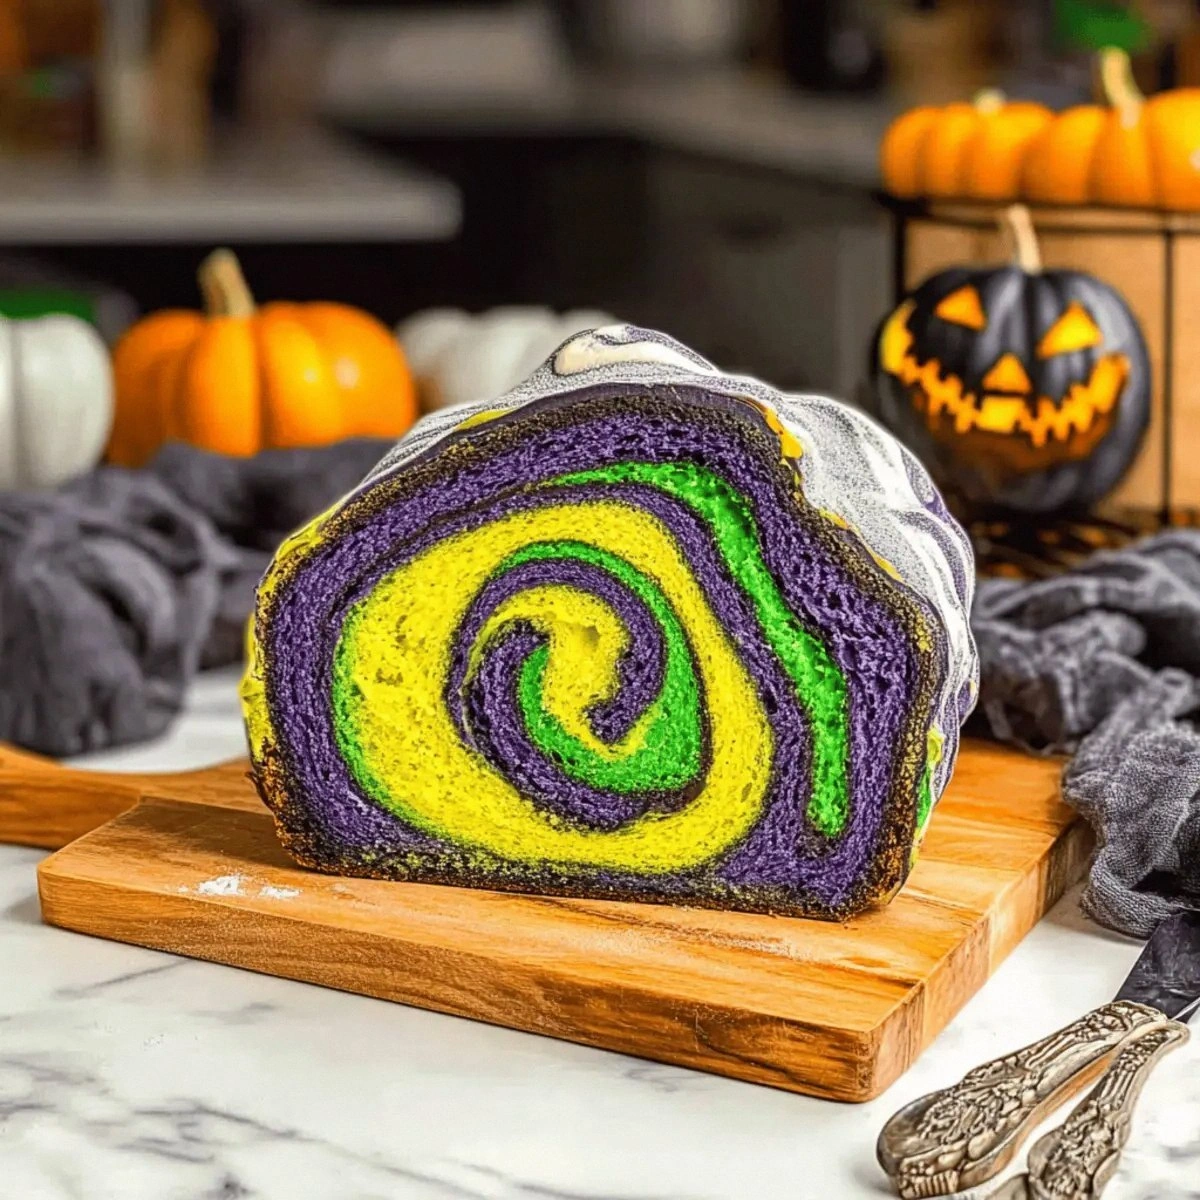
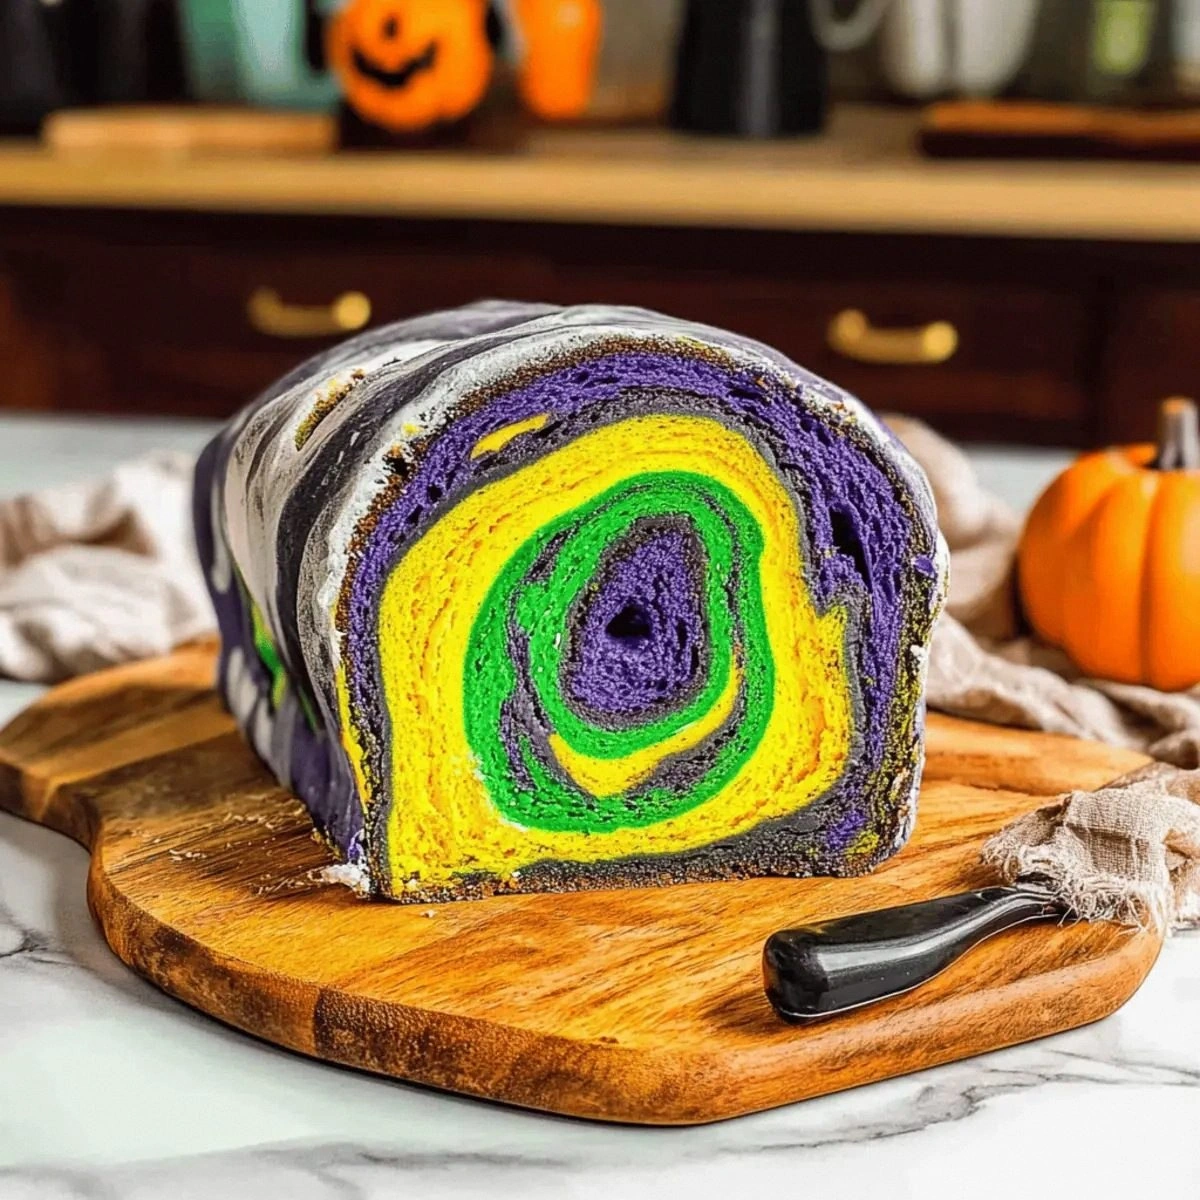
From the moment the dough hit the counter, I could hear it whisper promises of caramel‑deep sweetness and a subtle, almost buttery, melt‑in‑your‑mouth feel. The air filled with a sweet, earthy perfume that reminded me of autumn leaves drenched in honey, while the bright swirls of orange, green, and midnight black danced like tiny lanterns in a midnight parade. When the bread finally emerged from the oven, the crust crackled like dried leaves underfoot, and the interior revealed a kaleidoscope of hues that could make even the most stoic vampire grin. I dare you to taste this and not go back for seconds – it’s that good.
Most Halloween breads either rely on generic food coloring or over‑sweeten with frosting that turns the whole thing into a sugar bomb. This version, however, uses a modest splash of molasses and a buttery base to create a depth of flavor that feels both festive and refined. The secret? A carefully timed “color burst” technique that locks the pigments into the crumb without bleeding, plus a touch of instant yeast that gives the loaf a light, airy lift while keeping the crust delightfully crisp. I’ll be honest — I ate half the batch before anyone else got to try it, and that’s a confession worth sharing.
But the real game‑changer isn’t just the colors; it’s the balance of sweet and savory, the way the butter glides through the crumb like silk, and the subtle caramel notes that linger long after the last bite. You’ll notice a faint, almost nutty aroma that only comes from the molasses marrying with the butter, a nuance most recipes completely miss. And the best part? You don’t need any fancy equipment – just a mixing bowl, a sturdy hand, and a willingness to get a little messy. Okay, ready for the game‑changer? Let me walk you through every single step — by the end, you’ll wonder how you ever made it any other way.
What Makes This Version Stand Out
- Taste: The molasses adds a deep, almost smoky sweetness that pairs perfectly with the buttery dough, creating a flavor profile that’s richer than any store‑bought Halloween treat.
- Texture: A crisp, golden crust gives way to a soft, pillowy interior that’s speckled with vibrant swirls, delivering a satisfying bite every time.
- Simplicity: Only eight pantry staples are required, and the technique is straightforward enough for beginners yet impressive for seasoned bakers.
- Uniqueness: The “color burst” method locks in vivid hues without bleeding, so each slice looks like a piece of edible artwork.
- Crowd Reaction: Guests rave about the unexpected depth of flavor and the visual wow factor – it’s the kind of loaf that sparks conversation at any party.
- Ingredient Quality: Using unsulphured molasses and real butter elevates the taste far beyond the artificial flavorings found in most holiday breads.
- Cooking Method: A short rise and a high‑heat bake create that perfect crust‑to‑crumb ratio, something most recipes get completely wrong.
- Make‑Ahead Potential: This bread freezes beautifully, so you can prep it ahead of time and still deliver fresh‑baked magic on the day of the party.
Alright, let's break down exactly what goes into this masterpiece...
Inside the Ingredient List
The Flavor Base
Milk is the liquid hero of this recipe, providing the necessary hydration for gluten development while adding a subtle creaminess that you’ll taste in every bite. If you substitute almond milk, you’ll lose some of that buttery richness, but you’ll gain a nutty undertone that pairs nicely with the molasses. Choose whole milk for the best flavor, and make sure it’s at room temperature so the yeast doesn’t get shocked.
Granulated sugar does more than sweeten; it feeds the yeast, encouraging a vigorous rise and contributing to that golden crust we all love. Skipping the sugar will result in a denser loaf with a pale crust, and the flavor will feel flat. If you’re watching carbs, you can halve the amount, but expect a slower rise and a less caramelized crust.
The Texture Crew
All‑purpose flour is the backbone of our dough, providing the gluten network that traps gas bubbles and creates that airy crumb. For an even lighter texture, you could swap a quarter of the flour for cake flour, but be careful – too much will make the loaf crumbly. Always sift the flour to avoid lumps and ensure an even distribution of the dry ingredients.
Unsalted butter, melted and cooled, adds richness and a tender crumb. Its fat coats the gluten strands, preventing them from becoming too tight, which is why the bread stays soft inside. If you prefer a dairy‑free version, coconut oil works, but expect a faint coconut flavor that could clash with the molasses.
The Unexpected Star
Unsulphured molasses is the secret weapon that gives this bread its deep, earthy sweetness and a hint of bitterness that balances the sugar. It also contributes a dark, almost mahogany hue that intensifies the color swirls. If you only have regular molasses, you can use it, but the flavor will be slightly more bitter; dark corn syrup is a decent backup, though it lacks the complexity.
Instant yeast is the catalyst that turns a simple mixture into a lofty loaf. Its rapid action means you don’t need a long proofing time, which is perfect for last‑minute Halloween prep. Fresh yeast would work, but you’d need to adjust the amount and proofing time accordingly.
The Final Flourish
Food coloring is where the fun really begins. Using a set of yellow, green, purple, and black lets you create a spooky yet playful palette that mimics pumpkins, goblins, and midnight skies. For a more natural approach, beet juice, spinach puree, or turmeric can replace synthetic colors, though the intensity may vary.
Kosher salt enhances the overall flavor, balancing the sweetness and highlighting the buttery notes. Skipping the salt will leave the bread tasting flat, while over‑salting can overpower the delicate molasses. A pinch more than the recipe calls for can actually bring out the depth of the molasses even further.
Everything's prepped? Good. Let's get into the real action...
The Method — Step by Step
Start by warming the milk in a small saucepan until it reaches about 110°F (43°C). This temperature is warm enough to coax the yeast into action without killing it. As the milk warms, stir in the granulated sugar until it dissolves completely – you’ll see it start to sparkle like tiny crystals. Tip: If the milk is too hot, the yeast will go to sleep, and you’ll end up with a dense loaf.
Sprinkle the instant yeast over the warm milk‑sugar mixture and give it a quick stir. Let it sit for 5 minutes; you should see a frothy foam forming on the surface, a sign that the yeast is alive and kicking. This is the moment of truth – if no foam appears, your yeast is dead, and you’ll need to start over with fresh yeast.
In a large mixing bowl, combine the flour, kosher salt, and the set of food colorings. Divide the flour into four equal portions, and tint each portion with a different color using a small spoon to swirl the pigment in. The colors should be vibrant but not overly saturated – you’ll be folding them later, so a little goes a long way.
Kitchen Hack: Use a clean, empty spice jar to store each colored flour portion – it keeps the colors from mixing unintentionally.Make a well in the center of the flour mixture and pour in the melted, cooled butter, the molasses, and the yeast‑infused milk. Using a wooden spoon, gently incorporate the wet ingredients into the dry, starting from the center and working outward. The dough will be shaggy at first, then gradually come together into a sticky, cohesive mass.
Turn the dough onto a lightly floured surface and knead for about 8‑10 minutes. You’ll feel the dough become smoother and more elastic; it should pass the “windowpane test” – stretch a small piece, and it should become translucent without tearing. This is where the gluten develops, giving the bread its structure.
Place the kneaded dough into a lightly oiled bowl, cover it with a damp cloth, and let it rise in a warm spot for 45‑60 minutes, or until it has doubled in size. While it rises, the colors will settle slightly, creating subtle gradients that will later burst into vivid swirls.
After the first rise, gently punch down the dough to release excess gas. Divide the dough into four equal sections, each representing a different color. Roll each section into a long rope, about 12‑inch long, then stack them on top of each other, aligning the ends.
Now for the “color burst” – using a sharp knife, cut diagonal slashes across the stacked ropes, about 1‑inch apart. When you fold the dough over these cuts, the colors will interlace, creating a marbled effect that looks like a haunted forest at twilight.
Shape the folded dough into a loaf and place it on a parchment‑lined baking sheet. Cover loosely with foil and let it proof for a second time, about 30 minutes, until it puffs up slightly. Watch Out: Over‑proofing at this stage can cause the loaf to collapse in the oven, so keep an eye on the volume.
Preheat the oven to 375°F (190°C). Just before baking, brush the top of the loaf with a mixture of melted butter and a drizzle of molasses – this creates a glossy, caramelized crust that crackles delightfully.
Bake for 30‑35 minutes, or until the crust is deep golden‑brown and the loaf sounds hollow when tapped on the bottom. The interior should be a soft, colorful tapestry that pulls apart like silk. Let the bread cool on a wire rack for at least 15 minutes before slicing – this allows the crumb to set and the flavors to meld.
That's it — you did it. But hold on, I've got a few more tricks that'll take this to another level...
Insider Tricks for Flawless Results
The Temperature Rule Nobody Follows
Never bake this bread straight from the fridge. Let the shaped loaf sit at room temperature for 20 minutes before it hits the oven. This small step ensures the dough expands evenly, giving you that perfect rise and a crust that’s crisp on the outside yet tender inside. A friend once tried to skip this and ended up with a dense, gummy loaf – not a Halloween miracle.
Why Your Nose Knows Best
While the timer is a useful guide, your nose is the ultimate indicator of doneness. When the loaf is nearing completion, you’ll notice a sweet, caramel‑rich aroma wafting through the kitchen. If the scent turns slightly burnt, the crust is probably done, and you can pull the loaf out early to avoid over‑browning.
The 5‑Minute Rest That Changes Everything
After the loaf comes out of the oven, give it a five‑minute rest on the baking sheet before transferring it to a wire rack. This brief pause lets the steam finish cooking the interior gently, resulting in a softer crumb and a more pronounced flavor. Skipping this rest can make the loaf dry out too quickly.
Butter Brush Boost
Mix a teaspoon of melted butter with a pinch of extra molasses and brush it on the loaf halfway through baking. This creates a glossy finish that looks like a midnight glaze and adds an extra layer of buttery richness that even the most discerning palate will notice.
Color Preservation Pro Tip
Food coloring can bleed if the dough sits too long before baking. To lock in the hues, chill the colored dough portions for 10 minutes before assembling the loaf. The cold firms the pigments, preventing them from bleeding into each other during the final rise.
Creative Twists and Variations
This recipe is a playground. Here are some of my favorite ways to switch things up:
Spooky Pumpkin Swirl
Replace half of the all‑purpose flour with pumpkin puree and add a pinch of cinnamon and nutmeg. The orange hue deepens, and the subtle spice complements the molasses, making it perfect for a Thanksgiving‑meets‑Halloween crossover.
Midnight Chocolate
Swap the yellow food coloring for cocoa powder mixed into the flour, and add 2 tablespoons of dark chocolate chips. The result is a rich, almost brownie‑like crumb that still retains the festive swirl pattern.
Ghostly White Cheese
Stir in ½ cup of shredded mozzarella into the dough and use white food coloring for a ghostly appearance. The cheese melts into pockets of gooey goodness, creating a savory‑sweet contrast that surprises the palate.
Caramel Apple Drizzle
After baking, drizzle a thin stream of caramel sauce and sprinkle thinly sliced dried apple pieces on top. The caramel adds a glossy finish while the apples bring a tart crunch that cuts through the sweetness.
Vegan Velvet
Replace the butter with coconut oil, use oat milk instead of dairy milk, and swap the molasses for maple syrup. The loaf stays moist, the colors remain vivid, and you have a fully plant‑based treat that still feels indulgent.
Extra Crunch Crunch
Fold in a handful of toasted pumpkin seeds or chopped candied pecans during the final fold. The nuts add a delightful crunch that contrasts the soft crumb, and they also bring an earthy depth that pairs well with the molasses.
Storing and Bringing It Back to Life
Fridge Storage
Wrap the cooled loaf tightly in plastic wrap or store it in an airtight container. It will stay fresh for up to five days, though the crust may lose some of its crispness. To revive the crust, pop it in a 350°F oven for 5 minutes before serving.
Freezer Friendly
Slice the bread before freezing, then place the slices in a zip‑top bag, removing as much air as possible. The loaf freezes beautifully for up to three months. When you’re ready to eat, thaw overnight in the fridge, then warm in a toaster or oven.
Best Reheating Method
Preheat your oven to 300°F (150°C). Lightly mist the loaf with a tiny splash of water – this creates steam that revives the interior moisture while the crust regains its crunch. Heat for 10‑12 minutes, and you’ll have a loaf that tastes as if it just left the oven.