I dare you to taste this and not go back for seconds. That’s the exact dare my roommate threw at me after I accidentally set the kitchen timer for ten minutes instead of thirty and the dip turned into a molten, cheese‑laden volcano. The smell that hit us was like a stadium of fireworks—sharp, buttery, and unmistakably buffalo—while the sound of the oven door opening sounded like a victory chant from a packed arena. I was honest enough to admit that I ate half the batch before anyone else could even grab a chip, but the lingering heat and the way the sauce clung to the chicken like velvet convinced me that I’d finally cracked the code for the ultimate game‑day treat.
Picture yourself pulling this out of the oven, the whole kitchen smelling incredible, the cheese bubbling in perfect, golden ridges that shatter like thin ice when you dig in with a sturdy chip. Most recipes get this completely wrong—either they drown the chicken in sauce or they leave the dip dry as a desert. This version, however, balances tang, heat, and creaminess with the precision of a seasoned quarterback calling the perfect play. I’m about to spill the beans (and the cheese) on a technique that involves a quick stovetop melt that locks in flavor before the bake, a move most home cooks overlook but that makes a world of difference.
Okay, ready for the game‑changer? The secret isn’t a mysterious exotic spice; it’s the simple decision to let the cream cheese melt gently with the buffalo sauce, creating a silky base that coats every shred of chicken like a buttery hug. The result? A dip that stays luxuriously creamy even after an hour in the oven, and that’s why I’m calling this the Buffalo Chicken Dip Classic: The Ultimate Game Day Treat. If you’ve ever struggled with a dip that separates or turns soggy, you’re not alone — and I’ve got the fix. Let me walk you through every single step — by the end, you’ll wonder how you ever made it any other way.
⚡ What Makes This Version Stand Out
- Flavor Explosion: The buffalo sauce is balanced by a cool ranch or blue‑cheese dressing, creating a push‑pull of heat and cream that dances on the palate like a well‑choreographed halftime show.
- Texture Harmony: The dip boasts a velvety interior with a slightly crisp top, thanks to the cheese‑crust that forms during the final bake, offering that satisfying crunch you crave.
- Simplicity Meets Sophistication: Only seven core ingredients, all pantry staples, yet the method elevates each one to superstar status without any fancy gadgets.
- Ingredient Quality: Using real shredded chicken (or rotisserie leftovers) and premium buffalo sauce ensures the flavor isn’t watered down by processed fillers.
- Crowd Reaction: This dip is a proven crowd‑pleaser; expect cheers, high‑fives, and a line forming around the snack table before the first quarter ends.
- Make‑Ahead Potential: Assemble the dip a few hours ahead, refrigerate, then bake just before serving—perfect for busy hosts who still want to impress.
- Cooking Method Magic: The stovetop melt before the oven finish locks in moisture, preventing the dreaded “dry dip” syndrome that haunts many home cooks.
🍋 Inside the Ingredient List
The Flavor Base
Buffalo Sauce (1 cup): This is the heart‑throb of the dip, delivering that signature heat and tang. It’s a blend of cayenne, vinegar, and butter that coats the chicken like a spicy blanket. If you skip it, you’ll end up with a bland, chicken‑only affair that no one will remember. For a milder version, try a reduced‑spice buffalo sauce, but remember you’ll lose the authentic kick that makes this dip legendary.
Ranch or Blue Cheese Dressing (½ cup): This cooling counterpart tempers the heat, creating a harmonious balance. Ranch adds herbaceous notes while blue cheese offers a pungent depth. If you’re a dairy‑free friend, swap with a vegan ranch—just make sure it’s thick enough to hold the dip together.
The Texture Crew
Cream Cheese (8 oz): The cream cheese melts into a silky matrix that binds the sauce and chicken, preventing any separation. It’s the secret behind that luxurious mouthfeel that makes you want to lick the spoon. Use full‑fat cream cheese for the richest texture; low‑fat versions can become grainy.
Shredded Chicken (2 cups): Cooked, shredded chicken provides protein and a meaty backbone. It’s best to use freshly cooked or rotisserie chicken for maximum juiciness—frozen, pre‑shredded chicken can release excess water, making the dip soupy. If you’re vegetarian, substitute with shredded jackfruit or crumbled tempeh, but the flavor profile will shift.
The Unexpected Star
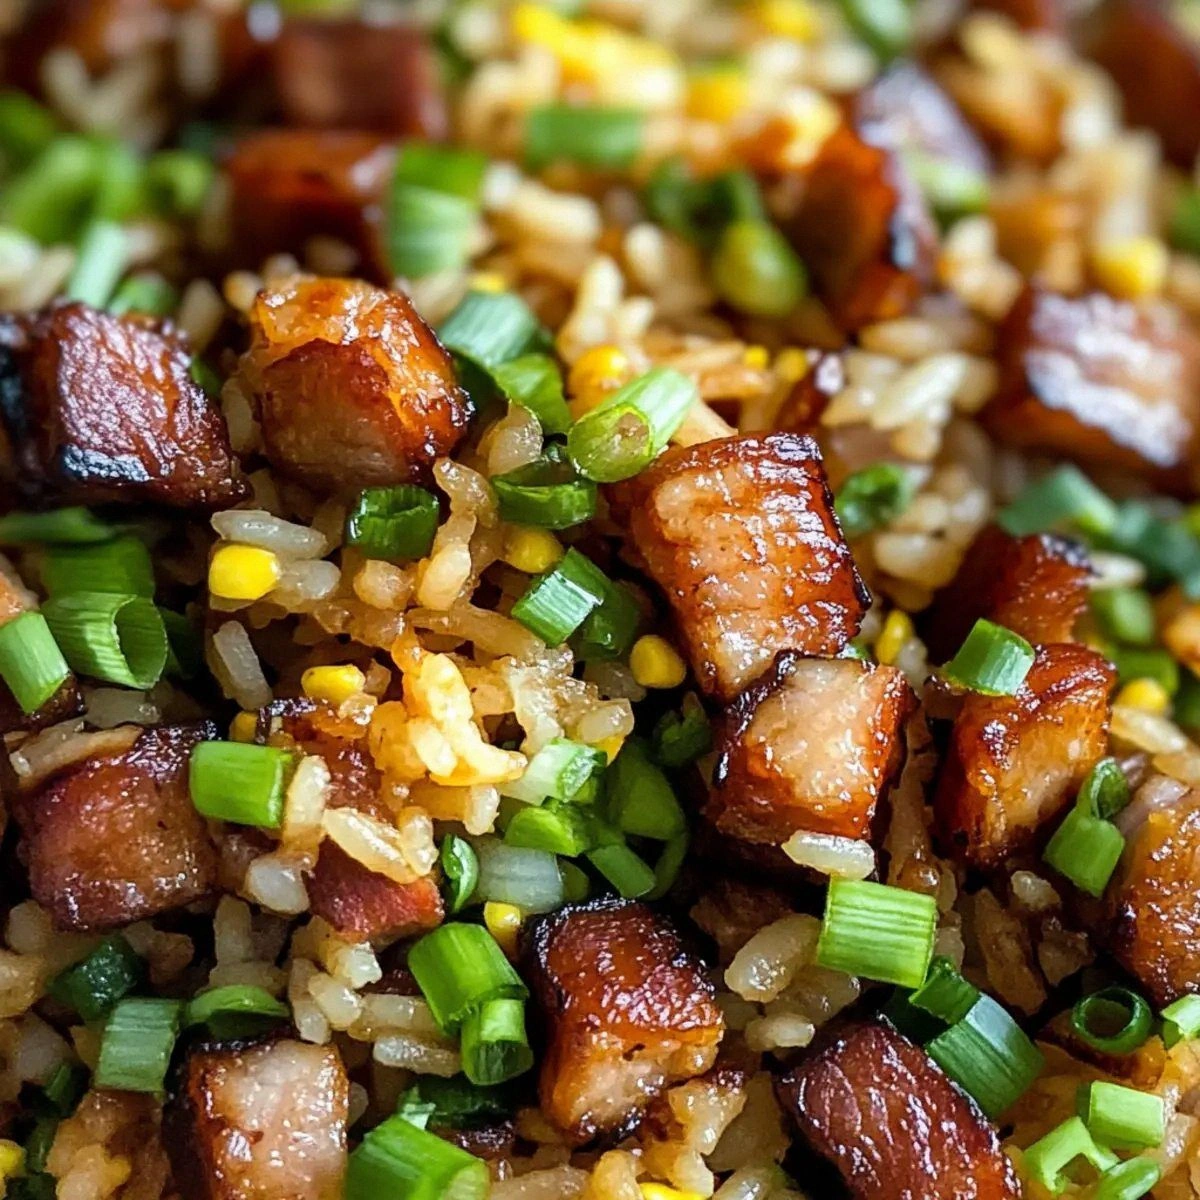
Cheddar Cheese (1 cup): Sharp cheddar adds a golden crust and a subtle sharpness that cuts through the richness. It melts into a gooey top layer that browns beautifully, giving you those coveted crispy edges. If you love extra melt, blend cheddar with mozzarella for a stringier pull.
The Final Flourish
Tortilla Chips (1 bag) & Veggie Sticks (1 cup): These are the vehicles for your dip, offering crunch and contrast. Chips bring salty, corn‑flavored support while veggie sticks add freshness and a color pop. For a gluten‑free crowd, swap chips for sturdy cucumber slices or cucumber‑pepper boats.
Everything's prepped? Good. Let's get into the real action—because the magic really starts when the pan meets the heat and the kitchen transforms into a flavor factory.

🔥 The Method — Step by Step
Preheat your oven to 375°F (190°C). While the oven warms, grab a medium saucepan and set it over low heat. Add the cream cheese, breaking it into chunks, and stir constantly until it starts to soften—think of it as coaxing a shy cat out of its shell.
Once the cream cheese is pliable, pour in the buffalo sauce and the ranch or blue‑cheese dressing. This is the moment of truth: the mixture should turn a glossy, ruby‑red hue and emit a fragrant steam that whispers “we’re about to be amazing.” Keep stirring until the blend is completely smooth, no lumps in sight.
Now, fold in the shredded chicken. Use a wooden spoon to ensure every strand gets a generous coating of that saucy goodness. The chicken should look like it’s been bathed in a spicy spa, each piece shimmering with the red‑orange glaze.
Stir in half of the shredded cheddar cheese, allowing it to melt into the mixture, creating a slightly thicker, richer base. This step adds a subtle depth that will later turn into that coveted golden crust.
Transfer the entire mixture into a 9‑inch baking dish, spreading it out evenly with a spatula. The surface should be smooth, ready to receive the final cheese blanket.
Sprinkle the remaining shredded cheddar cheese over the top in an even layer. This will create that beautiful bubbling crust that turns golden brown and slightly crisp at the edges.
Slide the dish into the preheated oven and bake for 20‑25 minutes. You’ll know it’s ready when the cheese is melted, bubbling, and the edges start pulling away from the dish like a shy performer stepping offstage.
Halfway through, give the dip a gentle swirl with a spoon—just enough to keep the heat moving and avoid a burnt top. The aroma at this point should be intoxicating, a blend of buttery cheese and spicy buffalo that makes your stomach do a victory dance.
When the cheese has achieved a perfect amber hue, pull the dish out and let it rest for 5‑7 minutes. This rest period is crucial—it allows the dip to thicken slightly, making it easier to scoop without it sliding off the chip.
During this time, arrange your tortilla chips and veggie sticks on a platter around the dip, creating a colorful, inviting spread. The visual contrast of the bright dip against the golden chips is as satisfying as the first bite.
Now, the fun part: dig in! Grab a sturdy chip, scoop up a generous mound, and feel the creamy, spicy, cheesy goodness melt in your mouth. That sizzle when it hits the pan? Chef’s kiss. Trust me, you’ll hear the crunch and feel the heat simultaneously—a perfect symphony of textures.
And if you’re feeling extra daring, drizzle a little extra ranch or blue‑cheese dressing on top for that extra zing. I dare you to taste this and not go back for seconds—because once you do, there’s no turning back.
🏆 Insider Tricks for Flawless Results
The Temperature Rule Nobody Follows
Most home cooks crank the oven to 400°F thinking “more heat = faster melt,” but that’s a myth that leads to a burnt top and undercooked interior. Keeping the oven at 375°F ensures even heat distribution, allowing the cheese to melt slowly and develop that coveted crust without scorching. I once tried 425°F and ended up with a dip that looked like a charred pancake—definitely not the winning play I wanted. Remember: patience is the secret sauce.
Why Your Nose Knows Best
Your sense of smell is the ultimate timer. When the dip starts releasing a buttery, slightly nutty aroma, you’re about 5 minutes away from perfection. If you ever doubt the timer, trust that nose—if it smells like a cheese‑laden fireworks show, it’s ready. I’ve saved many a batch from over‑baking by following this olfactory cue.
The 5‑Minute Rest That Changes Everything
Leaving the dip to sit for five minutes after baking allows the cheese to set, preventing it from sliding off the chip like a slippery quarterback. This short pause also lets the flavors meld further, creating a more cohesive taste experience. I once served it straight out of the oven, and the dip was so runny that chips turned into soggy sponges—lesson learned.
Shred Like a Pro
When shredding chicken, use a fork to pull apart the meat rather than a knife. This creates irregular strands that trap more sauce, delivering a burst of flavor with each bite. If you use a food processor, you risk turning the chicken into mush, which will make the dip overly dense.
Cheese Distribution Mastery
Instead of dumping all the cheddar at once, split it—half goes into the sauce base, half stays on top. This technique ensures a creamy interior while still giving you that golden, crunchy crown. Trust me, the visual appeal alone earns you extra points from guests.
🎨 Creative Twists & Variations
This recipe is a playground. Here are some of my favorite ways to switch things up:
BBQ Chicken Dip
Swap the buffalo sauce for your favorite smoky BBQ sauce and add a tablespoon of smoked paprika. The result is a sweet‑smoky dip that pairs beautifully with pretzel sticks. Perfect for a summer backyard gathering when you want something a little less fiery.
Spicy Sriracha Fusion
Mix half the buffalo sauce with an equal part sriracha and a dash of honey for a sweet‑heat twist. This variation brings an Asian flair, and the honey balances the heat nicely. Serve with rice crackers for a crunchy, international vibe.
Green Chili & Cilantro
Add chopped green chilies and fresh cilantro to the base, and replace ranch with a lime‑yogurt sauce. The dip gets a fresh, zesty punch that’s perfect for springtime parties. It’s like a fiesta in a bowl.
Vegan Version
Use plant‑based cream cheese, shredded jackfruit for the chicken, and a vegan buffalo sauce. Swap the cheddar for a sharp vegan cheese that melts well. This version still delivers the same creamy, spicy experience, proving you don’t need dairy to dominate the snack table.
Cheesy Bacon Bomb
Stir in crumbled cooked bacon and a handful of shredded pepper jack cheese before baking. The bacon adds a smoky crunch, while pepper jack amps up the heat. It’s the ultimate indulgence for carnivores who love a little extra decadence.
❄️ Storing & Bringing It Back to Life
Fridge Storage
Transfer leftovers to an airtight container and refrigerate for up to 3 days. The dip will thicken slightly as the cheese sets, but you can revive its creaminess by stirring in a tablespoon of milk before reheating.
Freezer Friendly
Portion the dip into freezer‑safe bags or containers, leaving a little headspace for expansion. Freeze for up to 2 months. When ready to use, thaw overnight in the fridge, then reheat gently on the stove or in the oven, adding a splash of water to steam it back to life.
Best Reheating Method
Preheat the oven to 350°F (175°C), spread the dip in a shallow baking dish, and cover with foil. Heat for 15‑20 minutes, then remove the foil for the last 5 minutes to re‑crisp the top. The tiny splash of water I mentioned earlier creates a gentle steam that prevents the dip from drying out.