I’m going to be blunt: the first time I tried a chicken‑and‑grape combo, I thought I’d accidentally stumbled into a culinary crime scene. The kitchen smelled like a vineyard after a rainstorm, the onions were caramelizing like gold, and the grapes—yes, actual fresh grapes—were about to turn my dinner into a sweet‑savory masterpiece. I was half‑expecting the dish to taste like a fruit salad gone rogue, but instead it delivered a flavor punch that made my taste buds do a happy dance. I dared a friend to try the first bite without a grin, and she immediately begged for seconds. That moment sparked a quest to perfect this dish, and now I’m ready to share the ultimate version with you.
Picture this: a skillet sizzling as the butter meets hot oil, the sound a crisp crackle that tells you the base is forming a caramelized crust. The aroma of onions slowly turning amber mingles with the faint perfume of fresh grapes, creating a scent that is both comforting and exotic. The chicken, seared to a golden‑brown perfection, releases juices that mingle with the sweet‑tart burst of grapes, while a splash of white wine lifts everything into a glossy glaze. The texture? Imagine the chicken’s skin crisp as a fresh‑baked baguette, the grapes soft‑yet‑firm like a perfectly ripened pear, and the onions sweet enough to make you wonder why you ever settled for plain sautéed onions.
What makes this version a cut above the rest? For starters, I’m using bone‑in, skin‑on chicken thighs because they stay juicy while the skin gets that irresistible crunch. The grapes are halved and tossed in a quick reduction with honey and thyme, creating a glaze that clings to the chicken like velvet. I also throw in a splash of chicken broth and a whisper of white wine to deglaze the pan, turning the fond into a sauce that’s richer than any store‑bought glaze. Most recipes skip the caramelized onion layer, but I swear by it—those sweet, amber onions are the secret weapon that balances the grapes’ bright acidity.
Now, I’m about to spill the beans on a technique that will make your skillet sing: I finish the dish with a quick butter‑basting step that adds a glossy sheen and a buttery richness you can’t fake. It’s a simple move that turns a good meal into a show‑stopper. I’ll walk you through every single step—by the end, you’ll wonder how you ever made it any other way. Ready? Let’s dive in and transform a humble skillet into a stage for flavor fireworks.
What Makes This Version Stand Out
- Flavor Explosion: The interplay of sweet grapes, savory chicken, and caramelized onions creates a layered taste that dances across the palate, balancing bright acidity with deep umami.
- Texture Symphony: Crispy skin, tender meat, and juicy grape bursts provide contrast that keeps each bite interesting and satisfying.
- Simplicity Meets Sophistication: Only a handful of pantry staples are needed, yet the final dish feels restaurant‑worthy.
- Ingredient Quality: Using fresh, seedless grapes and high‑quality chicken thighs ensures every component shines.
- Crowd‑Pleaser Factor: Even picky eaters love the sweet‑savory combo; it’s a conversation starter at any dinner table.
- Make‑Ahead Friendly: The sauce improves after a short rest, making leftovers taste even better.
- Cooking Method Mastery: The skillet‑sear‑then‑deglaze technique locks in moisture while building flavor depth.
- Versatility: Swap grapes for dried cranberries or add a pinch of chili for a heat kick; the base holds up.
Inside the Ingredient List
The Flavor Base
First up, the backbone of any great skillet dish: onions, garlic, and butter. The onions are sliced thin and cooked low and slow until they turn a deep caramel color, releasing natural sugars that become the sweet counterpoint to the grapes. Garlic, minced just before adding the chicken, adds a punch of aromatic depth that you can’t fake with powders. Butter, combined with olive oil, raises the smoke point just enough to sear the chicken without burning while providing a luxurious mouthfeel. If you skip any of these, you’ll lose the foundational flavor that makes the whole dish sing.
The Texture Crew
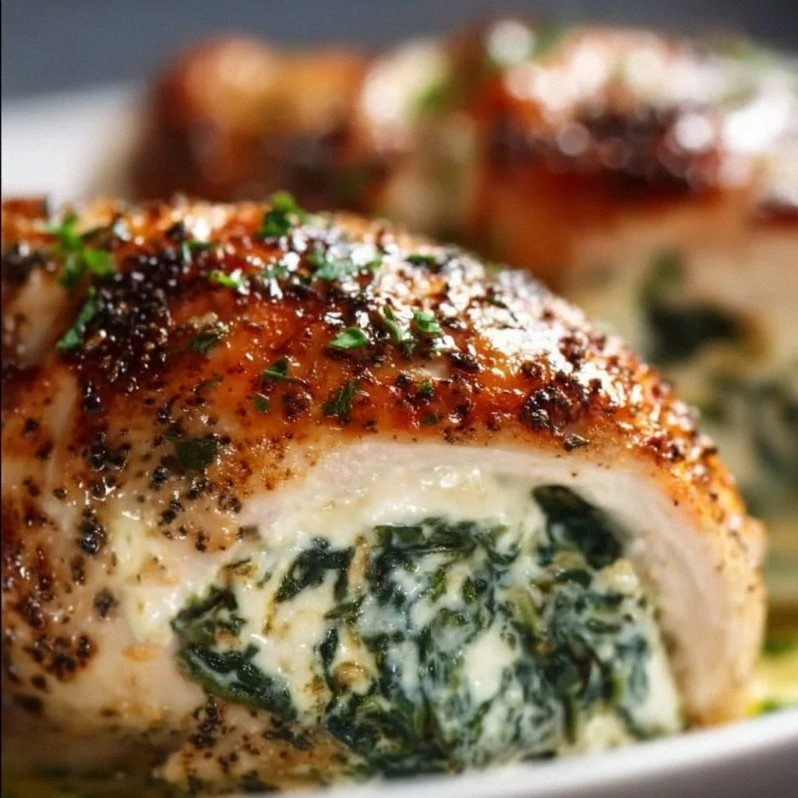
Chicken thighs are the star here, and choosing bone‑in, skin‑on pieces is non‑negotiable. The bone insulates the meat, preventing it from drying out, while the skin renders into a crisp, golden crust that adds a satisfying crunch. Fresh grapes—ideally seedless red or black varieties—are halved, giving each bite a burst of juicy sweetness that contrasts beautifully with the savory chicken. If you’re out of fresh grapes, frozen ones work, but thaw them first to avoid excess water in the pan. The combination of these textures ensures every mouthful is a surprise.
The Unexpected Star
A splash of white wine and a drizzle of honey might seem like minor players, but they’re the secret sauce architects. The wine deglazes the pan, lifting the browned bits (fond) and turning them into a silky, slightly acidic base. Honey, added just before the grapes, caramelizes quickly, giving the fruit a glossy sheen and a deeper sweetness that balances the acidity. If you prefer a less sweet profile, reduce the honey and add a pinch of balsamic vinegar for a tangy finish.
The Final Flourish
Fresh thyme and a pinch of sea salt round out the dish, providing herbal brightness and enhancing the natural flavors. Thyme’s earthy notes complement the grapes’ fruitiness, while the salt amplifies the savory components without overwhelming the dish. If you’re allergic to thyme, rosemary or sage can step in, though they bring a slightly different aromatic profile. Remember, seasoning is your final chance to fine‑tune the balance, so taste as you go and trust your palate.
Everything's prepped? Good. Let’s get into the real action—where the skillet becomes a flavor laboratory and you become the mad scientist.
The Method — Step by Step
Pat the chicken thighs dry with paper towels, then season both sides generously with salt and pepper. The dry surface ensures the skin crisps up like a fresh‑baked baguette. Heat a large skillet over medium‑high heat, add the olive oil and butter, and wait for the butter to foam and the oil to shimmer. Once the butter stops foaming, place the thighs skin‑side down, listening for that satisfying sizzle that signals the start of a perfect sear.
Let the chicken cook undisturbed for about 6‑7 minutes. You’ll see the edges of the skin start to pull away from the pan, an indicator that the crust is forming. Flip the thighs and sear the other side for another 5 minutes, then remove the chicken from the skillet and set aside on a plate. This step locks in juices, so resist the urge to move the chicken around too much.
Turn the heat down to medium and add the sliced onions to the same skillet. Stir them occasionally, letting them soften and start to caramelize. After about 8 minutes, they’ll turn a deep amber, filling the kitchen with a sweet, almost nutty aroma. At this point, add the minced garlic and cook for another minute—be careful not to let it burn, or you’ll end up with a bitter bite.
Now, it’s time for the grapes. Toss the halved grapes into the pan, drizzle the honey over them, and stir gently. The grapes will start to soften, and the honey will melt, coating the fruit in a glossy, caramel‑like sheen. Let them cook for about 3‑4 minutes, watching as the grapes release their juices and the honey begins to brown just slightly. This is where the dish acquires its signature sweet‑savory harmony.
Deglaze the pan with the white wine, scraping up the browned bits from the bottom. Let the wine reduce by half, which should take about 2‑3 minutes. Then pour in the chicken broth, add the fresh thyme leaves, and stir to combine. Return the chicken thighs to the skillet, skin side up, nestling them among the onions and grapes. Spoon a bit of the sauce over each piece; this helps the flavors meld and keeps the meat moist.
Cover the skillet with a lid and let everything simmer on low heat for 15‑20 minutes. You’ll notice the sauce thickening, the grapes becoming tender, and the chicken reaching an internal temperature of 165°F (74°C). The aroma at this stage is intoxicating—sweet grapes, buttery onions, and a hint of thyme that makes your stomach rumble in anticipation.
When the chicken is cooked through, remove the lid and increase the heat to medium‑high for a final 2‑3 minutes. This step crisps the skin once more, giving it that final crackle that makes you want to bite in immediately. Finish with a quick butter basting: swirl a knob of butter into the pan, tilt the skillet, and spoon the melted butter over the chicken and grapes. This adds a glossy finish and a buttery richness that ties the whole dish together.
Turn off the heat, let the skillet rest for 5 minutes, and then serve directly from the pan. Garnish with a sprinkle of fresh thyme or a drizzle of extra honey if you love a touch more sweetness. That final rest lets the juices redistribute, ensuring each bite is juicy and flavorful. That's it—you did it. But hold on, I've got a few more tricks that'll take this to another level...
Insider Tricks for Flawless Results
The Temperature Rule Nobody Follows
Most home cooks crank the heat up to “get it done fast,” but that’s a recipe for soggy skin. Keep the skillet at medium‑high for searing, then drop to medium for the onions, and finally to low for simmering. This graduated heat approach preserves the chicken’s moisture while allowing the onions to caramelize fully. I once tried a high‑heat sprint and ended up with burnt onions and a rubbery chicken crust—lesson learned.
Why Your Nose Knows Best
Your nose is an underrated kitchen tool. When the onions turn a deep amber, the scent shifts from sharp to sweet. That sweet, almost caramel scent is your cue to add the garlic; if you hear a hiss, the garlic is burning. Trust that nose signal—it’s more reliable than a timer for achieving perfect caramelization.
The 5‑Minute Rest That Changes Everything
After the skillet is done, resist the urge to dive in immediately. Let the chicken rest, covered loosely with foil, for five minutes. This short pause lets the juices settle back into the meat fibers, preventing them from spilling out onto the plate. I once sliced the chicken right away and watched half the juices drain away, leaving the meat drier than a desert. A brief rest makes the difference between good and unforgettable.
Butter Basting for a Glossy Finish
Swirling butter at the end is not just for show; it adds a silky texture that clings to the grapes and chicken. The butter emulsifies with the pan juices, creating a sauce that shines like a lacquered surface. If you’re watching calories, use a light hand—just enough to coat the top of the dish.
Seasoning at the End
A final pinch of flaky sea salt right before serving brightens the flavors and adds a subtle crunch. It’s like the final brushstroke on a painting—tiny but impactful. I’ve found that a pinch of smoked salt adds an extra layer of depth without overwhelming the sweet grapes.
Creative Twists and Variations
This recipe is a playground. Here are some of my favorite ways to switch things up:
Citrus Burst
Swap the white wine for a splash of orange juice and add a zest of lemon at the end. The citrus lifts the dish, making it brighter and perfect for spring gatherings. It pairs beautifully with a side of herb‑roasted potatoes.
Spicy Kick
Add a pinch of crushed red pepper flakes when you introduce the grapes. The heat balances the sweetness, creating a sweet‑heat combo that’ll have your guests reaching for more. Serve with a cooling cucumber salad to tame the fire.
Herb Garden
Replace thyme with rosemary and add fresh sage leaves during the simmering stage. These herbs infuse the sauce with piney notes, turning the dish into a rustic, woodland-inspired plate. Pair with roasted root vegetables for a comforting meal.
Wine‑Lover’s Version
Use a full-bodied red wine instead of white, and add a tablespoon of balsamic vinegar. The richer wine deepens the sauce, while balsamic adds a mellow acidity that complements the grapes. This variation works well with a side of creamy polenta.
Harvest Twist
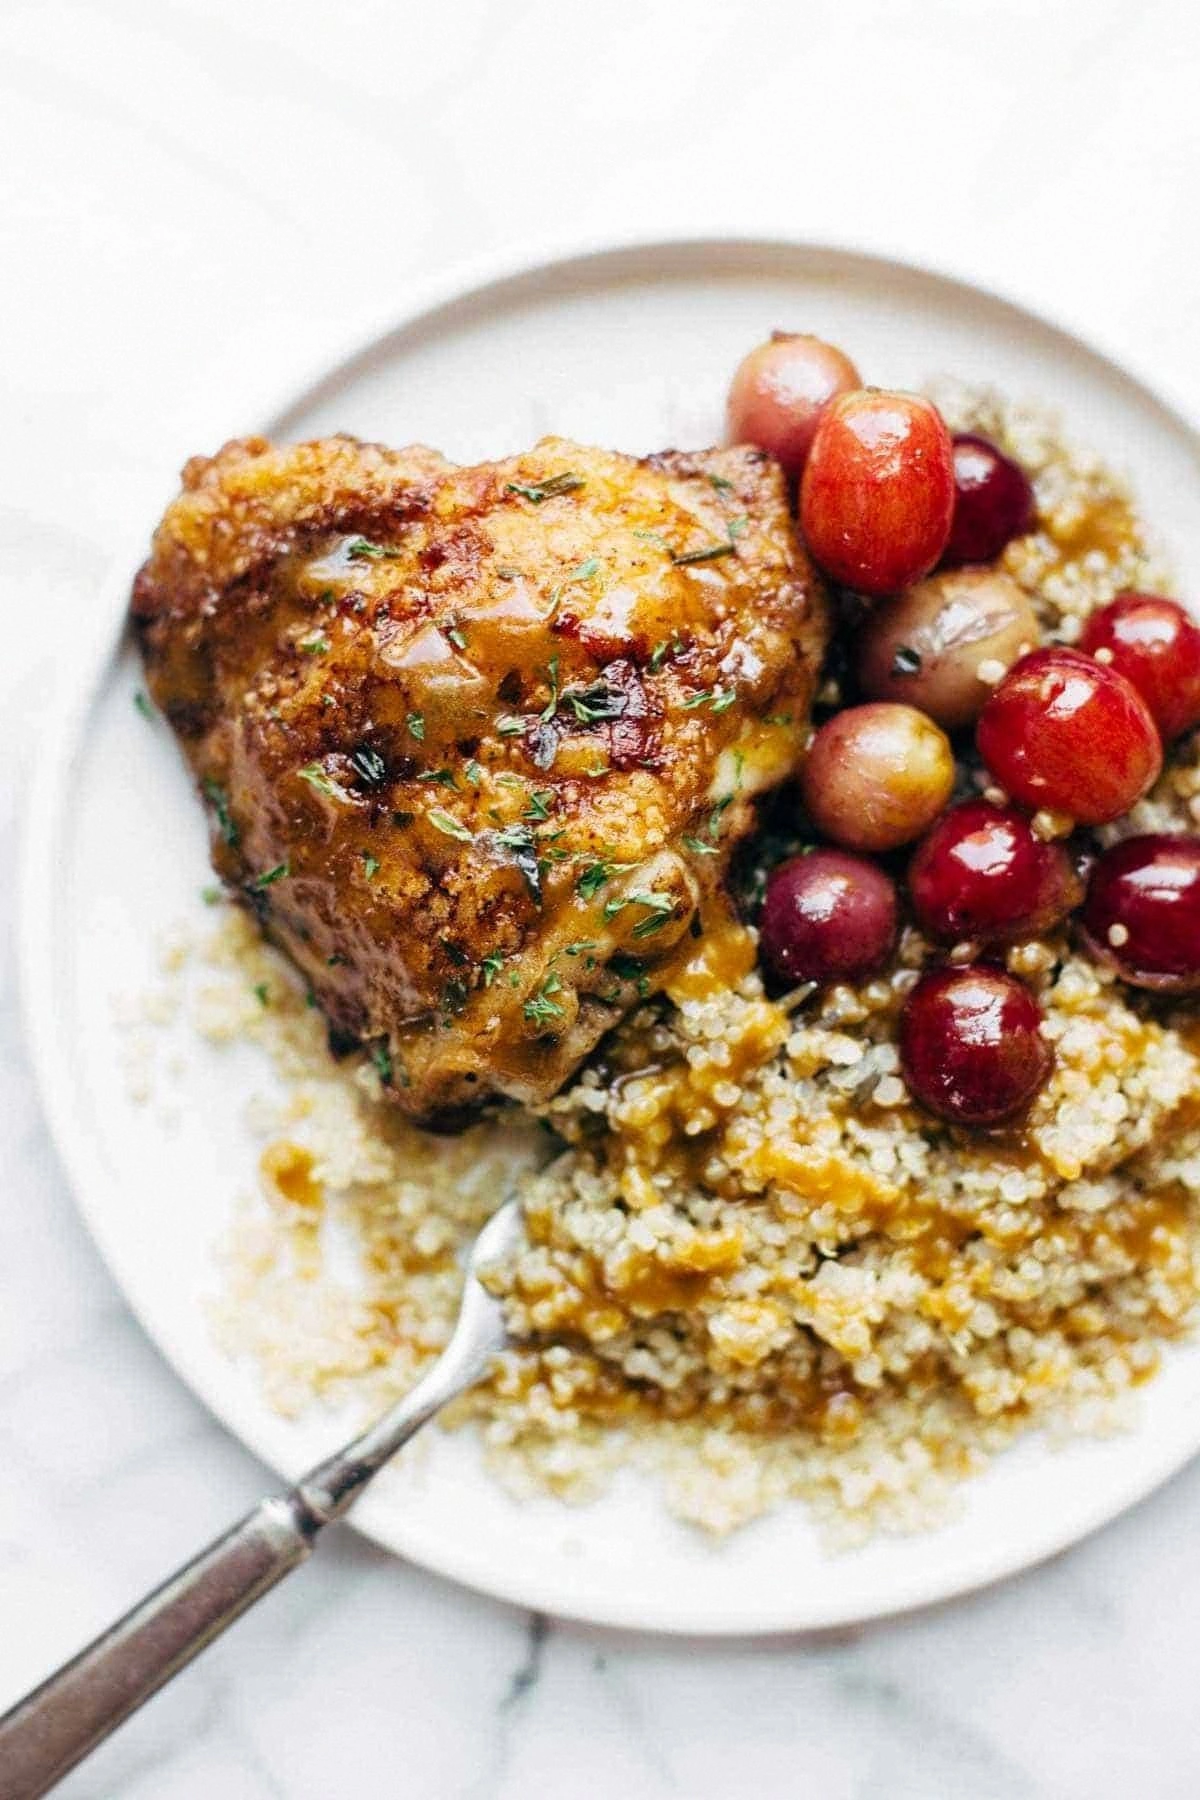
In the fall, substitute half the grapes with sliced apples and add a pinch of cinnamon. The apple‑cinnamon combo brings a warm, seasonal flavor that feels cozy and nostalgic. Serve over a bed of quinoa for a hearty, wholesome dinner.
Storing and Bringing It Back to Life
Fridge Storage
Cool the skillet to room temperature, then transfer the chicken, grapes, and sauce to an airtight container. Store in the refrigerator for up to 3 days. Reheat gently on the stovetop over low heat, adding a splash of broth or water to revive the sauce’s sheen.
Freezer Friendly
Portion the cooked dish into freezer‑safe bags or containers, leaving a little headspace for expansion. Freeze for up to 2 months. Thaw overnight in the fridge, then reheat in a skillet, adding a teaspoon of butter to restore richness.
Best Reheating Method
When reheating, add a tiny splash of water or broth and cover the pan. The steam will bring the grapes back to their juicy state and keep the chicken moist. Avoid microwaving, as it can make the skin soggy and the grapes mushy.