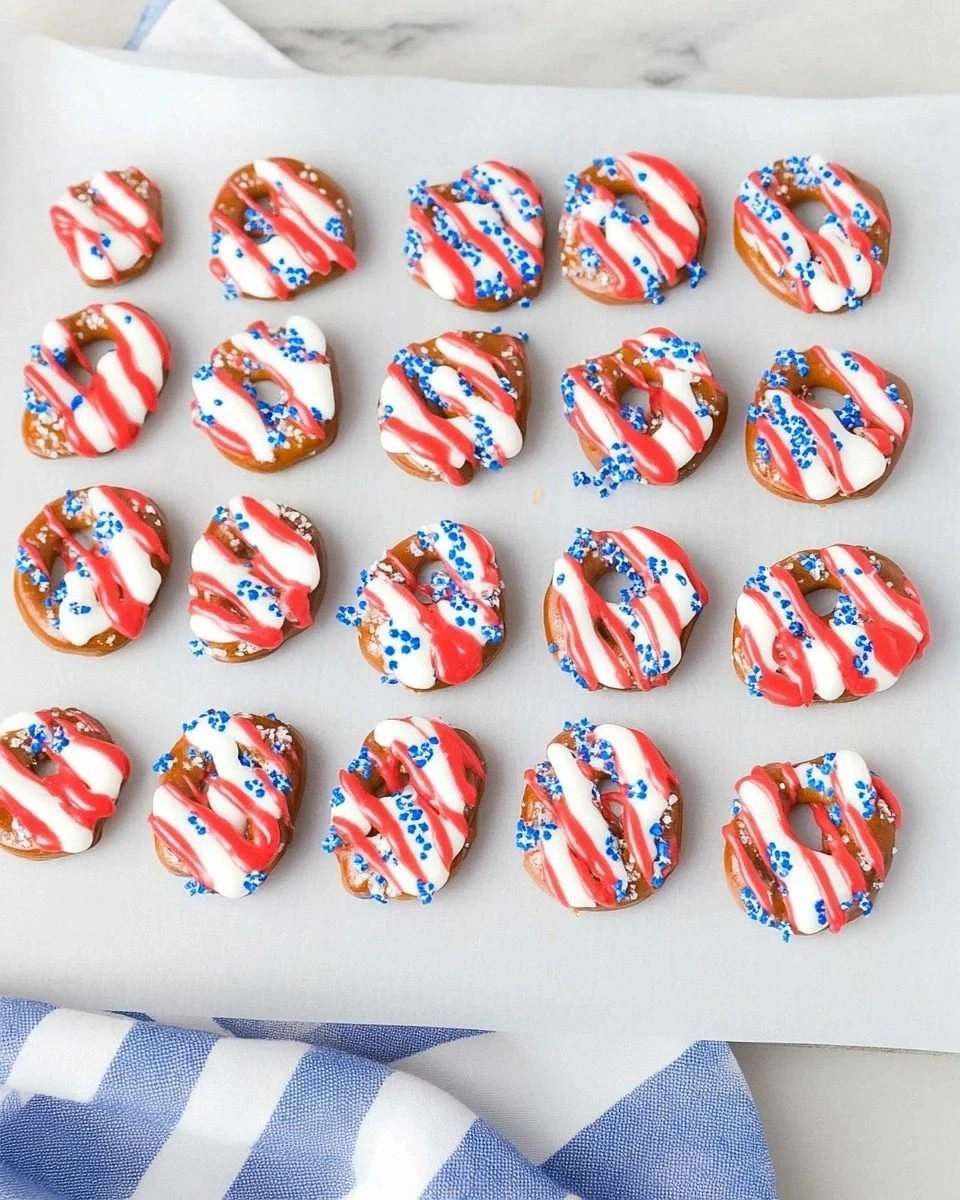
I still remember the Fourth of July when my neighbor bet me twenty bucks that I couldn't turn a plain bag of pretzels into something worthy of a White House picnic. Challenge accepted, my competitive streak roared louder than the fireworks overhead. What happened next was a blur of butter, sugar, and food coloring that ended with a platter of glossy red, white, and blue twists so addictive the entire block demolished them before the sparklers even came out. That sizzle when the butter hits the hot sugar? Absolute perfection. If you've ever struggled with snacks that look cute but taste like cardboard, you're not alone—and I've got the fix.
Picture yourself pulling these out of the oven, the whole kitchen smelling like a carnival midway, your phone already buzzing with friends asking if they can bring anything—translation: can they show up early and hover by the tray. The glossy coating crackles under your teeth, giving way to that soft-yet-chewy pretzel heart, each bite painted in flag-waving colors that somehow taste even better than they look. I dare you to taste this and not go back for seconds; I've seen grown adults hide the bowl behind the potato salad so they don't have to share.
Most recipes get this completely wrong. They either drown the pretzels in waxy candy coating that shatters like plastic, or they bake the seasoning right off, leaving you with sad, pale twists that scream "afterthought." This version uses a quick stovetop caramelization that locks in the crunch, followed by a lightning-fast candy-color drizzle that sets like stained glass. The secret weapon? A whisper of citric acid that makes the berry flavors pop like a summer soda fountain. Stay with me here—this is worth it.
Let me walk you through every single step—by the end, you'll wonder how you ever made it any other way. We'll cover the science behind that snap, the temperature rule nobody follows, and the five-minute rest that changes everything. Grab your biggest mixing bowl and a wooden spoon that looks like it's seen some things; we're about to create the snack that'll have your future self thanking you every time the grill gets fired up.
What Makes This Version Stand Out
Flavor Explosion: These aren't just pretty faces. A double-hit of vanilla and a whisper of almond extract turn the white coating into melted ice cream magic, while the red gets a punch of strawberry oil that tastes like summer camp in the best way. The blue? Blue raspberry that actually tastes like real fruit instead of a chemistry experiment gone wrong.
Texture Nirvana: The key is a two-stage crunch. First, we oven-toast the pretzels so they're bone-dry and ready to grab every molecule of flavor. Then we hit them with a hot sugar syrup that crystallizes into a shattering shell, trapping air pockets that dissolve on your tongue like spun sugar at the fair.
Ridiculously Simple: No candy thermometers, no tempering chocolate, no praying to the baking gods. One saucepan, one sheet pan, and twenty minutes of actual work. If you can boil water and stir, you can make these look like you apprenticed under a French confectioner.
Crowd Psychology: There's something about the color combo that triggers instant nostalgia. I've watched skeptical teenagers abandon their phones to hover, watched dads pretend they're "just checking the grill" while sneaking handfuls. The bowl empties faster than ice water at a July barbecue.
Ingredient Integrity: Real butter, pure cane sugar, and natural flavor oils mean these taste like actual food, not like you licked a scented marker. The difference is immediate—no waxy after-coat, no artificial film on your teeth, just clean, bright flavors that leave you wanting more.
Make-Ahead Champion: Mix up a triple batch, cool them completely, and they keep for two weeks in an airtight tin. That is, if you can hide them from yourself. I once found my husband at midnight with the tin on his lap, watching history documentaries and systematically working his way to the bottom.
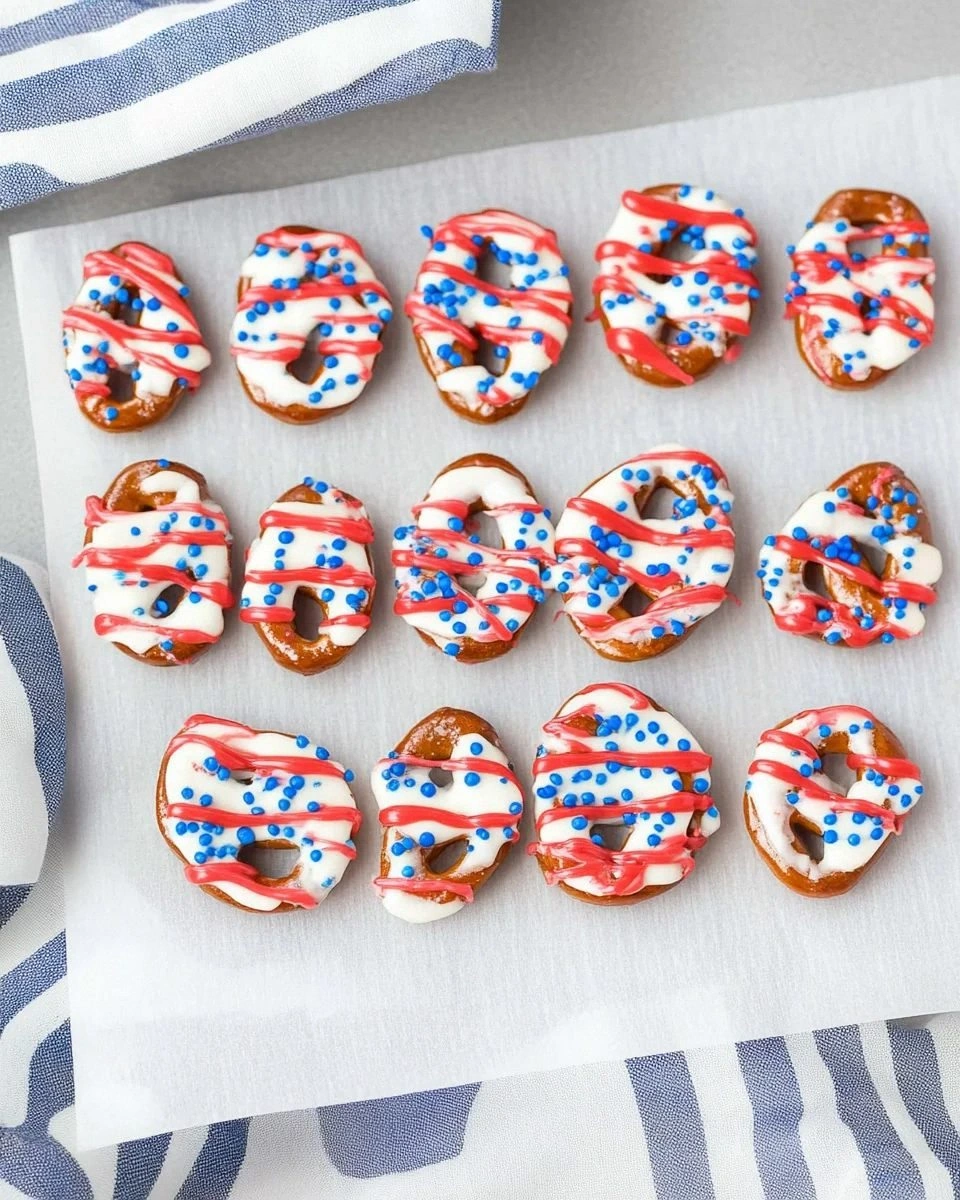
Photo-Ready Magic: The colors stay vibrant for days—no bleeding, no fading into sad pastels. They'll look as good on day three as they did coming out of the pan, which means you can prep early for parties without sacrificing that just-made glow.
Alright, let's break down exactly what goes into this masterpiece...
Inside the Ingredient List
The Flavor Base
Start with a solid foundation of mini pretzels—those little twisted nuggets have more surface area per bite, which means more room for our glossy coating to grab hold. Skip the rods; they're dramatic but wasteful, and nobody wants to gnaw on a stick when they could pop handfuls. I buy the cheap store brand because we're about to drown them in so much flavor the subtle differences disappear. The salt on the outside? Leave it. That hit of savory against the sweet is what keeps people reaching back in.
Unsalted butter is non-negotiable here. Salted butter muddies the flavor profile and makes the final candy taste like you dropped it on the beach. You want the pure, clean fat to carry the vanilla and almond without competition. European-style butter with its higher fat content melts silkier and gives you that bakery-shop richness, but honestly, I've made these with basic grocery-store sticks and nobody complained. Just promise me you won't try to substitute margarine—I can taste the artificial notes through the wrapper.
The Texture Crew
Granulated sugar is the workhorse, but we're adding a tablespoon of corn syrup to prevent crystallization. Without it, you'll get a sandy coating that falls off in sheets. The corn syrup acts like a bouncer at the molecular club, keeping rogue sugar crystals from starting a brawl. If you're anti-corn-syrup, honey works, but it will add a floral note that competes with the berry flavors. Light agave is cleaner, though it keeps the candy a touch more flexible.
A tiny pinch of baking soda might seem weird, but it's the secret to that shattering crunch. It creates micro-bubbles in the hot sugar, so when it cools you get a brittle shell that cracks like thin ice instead of a tooth-breaking jawbreaker. Too much and your candy foams like a science fair volcano, so measure carefully. I once eyeballed it and spent the evening chiseling caramel off my stove-top; learn from my hubris.
The Unexpected Star
Citric acid is the stealth MVP. You can find it in the canning aisle or the bulk spice section, and it keeps forever in a jar. Just an eighth of a teaspoon brightens the fruit flavors so dramatically that tasters swear there's real berry juice in there. It's the difference between flat cherry and zingy fruit-roll-up nostalgia. If you can't track it down, a squeeze of fresh lemon juice works, but add it off the heat so it doesn't invert your sugar.
Food coloring gels beat liquid drops every time. Gels are concentrated, so you use less, which means you aren't thinning your candy and risking a sticky mess. Americolor makes a "patriotic" trio that's already calibrated for true red and blue, but I've mixed primary gels from the craft store with equal success. Pro tip: dip a toothpick in the gel, then swirl it through the sugar—better control, zero stained fingers.
The Final Flourish
Pure vanilla extract goes into the white drizzle, but for the red and blue we're using flavor oils—LorAnn makes a strawberry and a raspberry that taste like real fruit without the water content that seizes sugar. Oils are potent; we're talking three or four drops for the whole batch. Overdo it and your kitchen smells like a Lip Smacker factory in the best possible way. Underdo it and the candy just tastes like...sweet. Balance is everything.
finishing touch of edible glitter is optional but highly recommended for the full fireworks effect. Look for "edible" not just "non-toxic"—the latter is craft glitter and will scratch your throat like swallowing tinsel. Wilton makes a fine pearl dust that catches the light without making you feel like you ate a disco ball. A gentle puff through a tea strater gives you that sparkler sparkle without turning your tongue into a glitter beard.
Everything's prepped? Good. Let's get into the real action...
The Method — Step by Step
- Heat your oven to 275°F—low and slow is the name of the game here. Spread the mini pretzels on a half-sheet pan in a single layer; overlap is fine, but double layers won't dry properly. Slide them in for twenty minutes while you prep the coating. This step sounds optional; it's not. Toasting drives off hidden moisture so the candy grabs like Velcro instead of sliding off like a greased watermelon. Your kitchen will start to smell like a warm brewery—malty, yeasty, comforting.
- Meanwhile, line two more sheet pans with parchment and set out three heat-proof bowls. You'll need them the instant the sugar hits temperature, and scrambling for bowls while hot candy climbs toward burnt is how stoves get decorated in burnt sugar stalactites. Arrange your flavor oils and food coloring gels within arm's reach, tiny ramekins like you're on a cooking show. Trust me, future you will thank present you for the foresight when the sugar is bubbling like lava.
- In a heavy two-quart saucepan, melt the butter over medium heat until it foams and the milk solids turn golden. You're not making brown butter, just waking up the nutty notes. Swirl, don't stir—stirring splashes milk solids onto the sides where they'll burn and bitter your entire batch. The aroma should remind you of Sunday popcorn nights. Okay, ready for the game-changer?
- Dump in the sugar and corn syrup all at once. Turn the heat to medium-high and resist every instinct to stir. Instead, grip the pan handle and swirl gently so the sugar melts evenly. Stirring causes crystals to form, and one crystal is like a match in a drought—suddenly your whole pan is grainy. Watch as the sugar goes from snowy to slushy to liquid gold. That first whiff of caramelizing sugar is pure aromatherapy.
- When the mixture hits 285°F on a candy thermometer, pull it off the heat immediately. No thermometer? No problem. Drop a bead into ice water; it should form hard threads that snap cleanly. If it bends, keep cooking. If it cracks like toffee, you're there. This next part? Pure magic. Sprinkle the baking soda across the surface and whisk like your life depends on it. The sugar will foam and triple in volume, turning the color of light caramel and smelling like a carnival.
- Working fast, pour one-third of the hot candy over the toasted pretzels in a large heat-proof bowl. Use a silicone spatula to fold and flip, coating every nook. Work gently; crushed pretzels become expensive cereal. The candy sets quickly, so efficiency beats perfection. If it hardens before you're done, pop the bowl in a 200°F oven for two minutes to loosen. Don't walk away from the stove here.
- Divide the remaining candy between your two prepared bowls. Into one, whisk three drops of strawberry oil and a toothpick swipe of red gel. Into the other, three drops of raspberry oil and a touch of blue gel. Move fast; the candy is cooling and you want it fluid enough to drizzle. The colors should be bold, almost cartoonish—they mute slightly as they set. If you've ever wanted to feel like a food stylist for a cartoon, this is your moment.
- Spread the coated pretzels back onto the parchment-lined pans in loose clusters. Now the fun part: dip a fork into the colored candy and flick it over the clusters like abstract art. Rotate pans for cross-hatching, or go Jackson Pollock and fling with abandon. Kids love this step; just lay down newspaper first unless you want a tie-dye kitchen. The candy sets in under five minutes, so work quickly and confidently.
- Let everything cool completely—about fifteen minutes—then break into party-size chunks. You'll hear satisfying snaps as the candy fractures, revealing glossy shards that catch the light like sea glass. Taste one (okay, taste three) and marvel how the sweet shell gives way to the salty pretzel heart. That contrast is the hook; the colors are just the flashy outfit.
- Store in an airtight tin at room temperature for up to two weeks, though I've never seen them last past day two. If you live in high humidity, toss in a packet of food-grade silica gel—the kind that comes in vitamin bottles—to keep the candy crisp. And now the part where you become the neighborhood legend who brings "those pretzels" to every cookout.
That's it—you did it. But hold on, I've got a few more tricks that'll take this to another level...
Insider Tricks for Flawless Results
The Temperature Rule Nobody Follows
Your sugar will continue cooking off the heat, so pull it at 280°F if you're using cast iron, 285°F for thin stainless steel. Cast iron holds so much residual heat that the temperature can climb five degrees after you move it to the trivet. I mark the difference on a piece of tape stuck to my thermometer: CI 280, SS 285. Sounds obsessive until you realize one batch overcooked while you answered the doorbell and now tastes like burnt marshmallow regret.
Why Your Nose Knows Best
Caramelizing sugar goes through distinct aroma stages: warm cotton candy, then butterscotch, then deep caramel. When you smell the shift from sweet to slightly bitter, you're thirty seconds from done. Trust your nose more than the clock; humidity, altitude, even how fresh your sugar is can swing timing by a full minute. A friend tried skipping this step once—let's just say it didn't end well, and her garbage disposal still smells like scotch candy.
The 5-Minute Rest That Changes Everything
After you drizzle the colored candy, walk away for five full minutes. No poking, no sampling, no Instagram photos. The sugar needs to set from the outside in; disturbing it traps heat and creates sticky spots that never harden. Set a timer, wipe down the syrup splatters, and pour yourself something cold. Return like a professional, snap a perfect piece, and bask in the audible crunch that echoes through the kitchen. Future pacing: picture yourself doing this while guests hover, noses pressed to the patio door.
Creative Twists and Variations
This recipe is a playground. Here are some of my favorite ways to switch things up:
Firecracker Heat
Add a pinch of cayenne to the red candy and swap the raspberry oil for cinnamon extract. The heat sneaks up after the sweet, just like those fireworks that whistle then explode. Kids usually skip these, which means more for the adults who appreciate a little danger in their dessert.
Beach Bash Coconut
Replace the almond extract with coconut extract and toss the finished pretzels in a zip-top bag with a handful of unsweetened toasted coconut flakes. The white candy looks like sea foam, the blue like ocean waves, and suddenly your snack table feels like a vacation.
Midnight Spark
Use black cocoa powder in the base candy for a cookies-and-cream vibe, then drizzle with silver edible glitter. Perfect for New Year's Eve or any party where you want snacks that match your moody playlist. The bitter cocoa keeps them sophisticated, the glitter keeps them fun.
Strawberry Shortcake Shake-Up
Fold freeze-dried strawberry powder into the white candy before drizzling. The powder rehydrates slightly, giving you tangy fruit flecks that taste like summer jam. Bonus: the natural pink hue lets you skip red food coloring if you're feeding the dye-sensitive crowd.
Caramel Apple Fair
Stir a tablespoon of apple-cider powder and a dash of cinnamon into the hot sugar. The resulting candy tastes like caramel apples without the sticky chin disaster. Green food coloring turns them into little Granny Smith imposters that disappear first from the platter.
Chocolate-Dipped Deluxe
Let the coated pretzels cool completely, then dip the bottoms in melted dark chocolate and park them on parchment to set. The bitter chocolate anchors the sweetness and makes them feel fancy enough for a wedding shower. Sprinkle with flake salt for the sweet-salty nirvana that keeps people guessing.
Storing and Bringing It Back to Life
Fridge Storage
Don't do it. The moisture in a fridge will turn your glossy candy into sticky taffy overnight. If you must transport them in a cooler, seal them in a zip-top bag with a paper towel inside to absorb condensation, then let them come to room temperature before opening. Break apart any clumps with gentle taps; the candy will re-crystallize and regain its snap.
Freezer Friendly
Completely cooled pretzels freeze beautifully for up to two months. Spread them on a sheet pan first to flash-freeze, then transfer to a rigid container so they don't get crushed by the frozen peas. Thaw at room temp for twenty minutes; they'll taste freshly made. I've stashed bags for camping trips and movie nights—nothing beats pulling out summer flavors in the dead of winter.
Best Reheating Method
If humidity has softened them, revive the crunch by spreading on a sheet pan in a 200°F oven for five minutes. Let cool completely before serving; the candy re-hardens into that satisfying snap. Add a tiny splash of water before reheating—just a teaspoon in the corner of the sheet pan creates a whisper of steam that loosens any sticky spots without melting the sugar.