I was halfway through a week of bland, store‑bought sausages when my kitchen exploded into a culinary revelation. The moment a stubborn kielbasa tried to resist the knife, I realized I’d been underestimating this humble pork staple. I sliced it into thin, almost translucent layers, each one a promise of crispness and flavor. The aroma that followed—smoky paprika, sweet honey, and a whisper of mustard—made the air taste like a summer barbecue in a winter kitchen. My friends, who had been skeptical, were already gasping at the first bite, their eyes widening like they’d stumbled upon a secret menu item. I knew, in that instant, I’d stumbled on something that would change the way people think about sausage forever.
Picture this: you’re standing over a pan, the sizzling sound of butter and olive oil announcing the start of a culinary symphony. The sausage slices sizzle like tiny fireflies, their edges caramelizing into golden, flaky crescents. When you lift a piece, the mustard glaze clings like a glossy coat, and the honey caramelizes into a subtle, sticky ribbon that glows amber. The first bite is a burst of savory, smoky heat balanced by sweet, tangy undertones. The texture is a delightful contrast—crisp on the outside, juicy and tender on the inside. If you think you’ve tasted all there is to sausage, think again; this is the ultimate version, a game‑changing twist that will make your taste buds do the happy dance.
What sets this version apart isn’t just the ingredients or the technique—though both are spot‑on—but the way each component works in harmony to create a flavor profile that feels both familiar and wildly unexpected. The mustard, honey, and smoked paprika create a glaze that’s as complex as a well‑crafted cocktail, while the thin slicing ensures maximum surface area for caramelization. The result is a bite‑sized marvel that’s perfect for parties, game nights, or a fancy appetizer that won’t break the bank. Most recipes get this completely wrong, either by over‑slicing and losing juiciness or by under‑seasoning and ending up with blandness. Here, we strike that perfect balance.
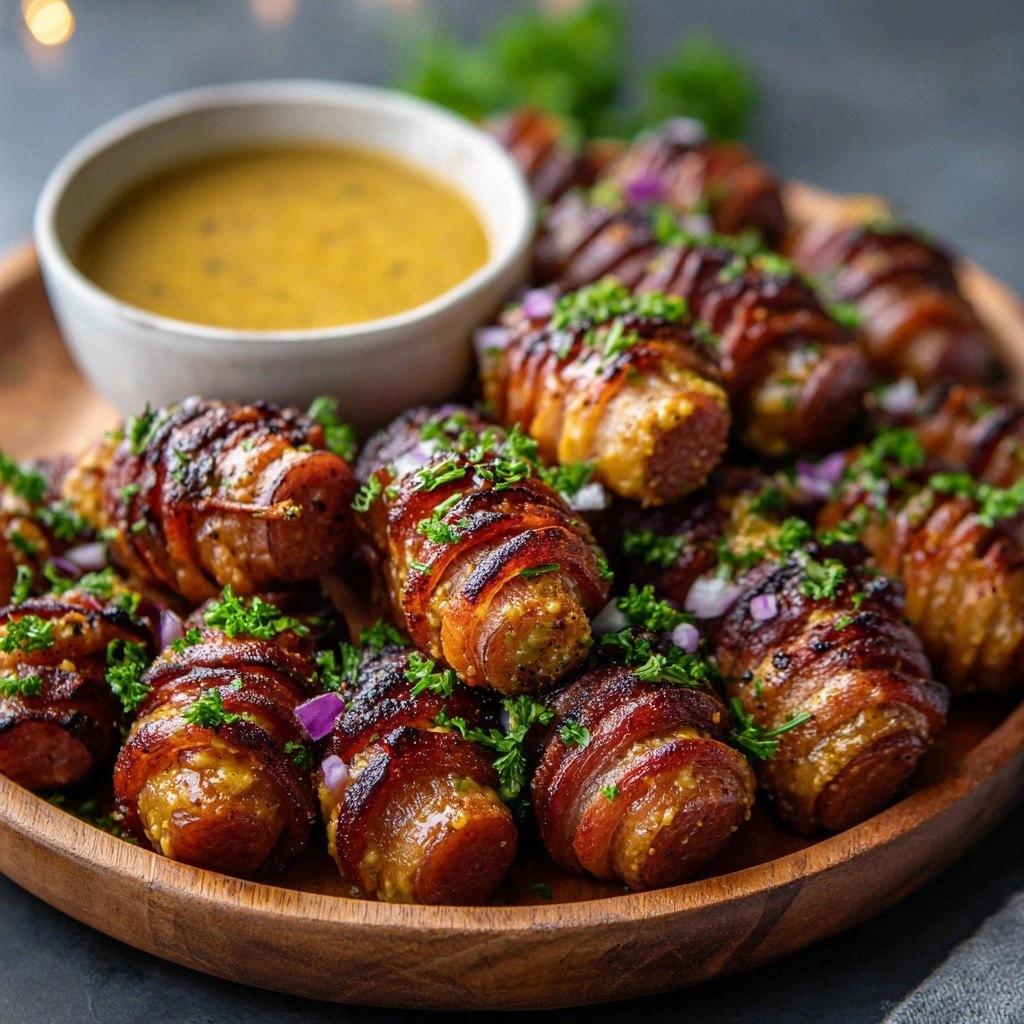
And there’s a twist you won’t expect—an extra layer of flavor that comes from a simple coating of flour, breadcrumbs, and Parmesan. This gives the exterior a subtle crunch that feels like a light, airy puff, while the inside stays moist and full of character. The result is a dish that’s not only delicious but also visually stunning, with the golden crust catching the light in a way that makes you want to photograph it before you eat it. I dare you to taste this and not go back for seconds. Trust me, this is hands down the best version you’ll ever make at home.
If you’ve ever struggled with turning a simple sausage into something memorable, you’re not alone—and I’ve got the fix. Picture yourself pulling this out of the oven, the whole kitchen smelling incredible, the table set with a platter of bite‑sized, perfectly caramelized pieces that look like little works of art. The anticipation, the aroma, the first bite—pure magic. Let me walk you through every single step—by the end, you’ll wonder how you ever made it any other way.
What Makes This Version Stand Out
- Flavor: The blend of mustard, honey, and smoked paprika creates a glaze that’s both sweet and savory, with a subtle heat that lingers on the palate.
- Texture: Thin, hasselback slicing ensures maximum caramelization, giving each bite a crisp exterior and juicy interior.
- Simplicity: Only a handful of pantry staples are needed, yet the end result feels luxurious and restaurant‑grade.
- Uniqueness: The flour, breadcrumb, and Parmesan coating adds a delightful crunch that sets this dish apart from standard sausage recipes.
- Crowd Reaction: Friends and family rave about the bite‑size portions, making it the perfect crowd‑pleaser for parties.
- Ingredient Quality: Using high‑quality kielbasa and fresh herbs elevates the overall taste.
- Cooking Method: The hasselback technique is simple yet transforms the sausage into a showstopper.
- Make‑Ahead Potential: You can assemble and refrigerate the coated sausages for up to 24 hours before baking, saving time on the day of the event.
Alright, let’s break down exactly what goes into this masterpiece…
Inside the Ingredient List
The Flavor Base
At the heart of this dish lies a simple yet powerful glaze. The Dijon and whole grain mustards provide depth and a slight tang, while honey adds a caramelized sweetness that balances the heat from smoked paprika. Garlic and onion powder contribute a subtle aromatic foundation, and a pinch of salt and pepper bring everything together. If you’re craving a smoky kick, feel free to add a dash of liquid smoke—just a few drops, and you’ll have an instant flavor upgrade.
The Texture Crew
The flour, breadcrumbs, and Parmesan are more than just a coating—they’re the secret to that coveted crunch. The flour helps absorb excess moisture from the sausage, ensuring the coating adheres perfectly. Breadcrumbs add a light, airy crunch, while Parmesan brings a nutty, savory finish. If you’re gluten‑free, swap the flour for a fine almond meal and use gluten‑free breadcrumbs. The result is just as crisp, and you’ll still get that delicious umami burst.
The Unexpected Star
Fresh thyme and parsley aren’t just garnish—they add a bright, herbaceous note that cuts through the richness of the sausage. Thyme’s earthy undertones complement the smoky glaze, while parsley offers a clean, slightly peppery finish. If you can’t find fresh herbs, dried ones will work, but use half the amount to avoid overpowering the dish.
The Final Flourish
A splash of olive oil and a pat of butter are the final touches that bring everything together. Olive oil helps the glaze spread evenly, while butter adds a silky richness that melts into the sausage. Together, they create a glossy, caramelized finish that makes each bite look as good as it tastes.
Everything’s prepped? Good. Let’s get into the real action…
The Method — Step by Step
- Prep the Sausage: Start by chilling the kielbasa in the freezer for 20 minutes to firm up. Then, using a sharp knife, slice each sausage lengthwise into thin, even layers—about 1/8 inch thick. Be careful not to cut all the way through; you want a stack that can still hold its shape. This hasselback technique maximizes surface area for caramelization. If you’re nervous about the slicing, you can use a mandoline set to a fine setting for consistency.
- Make the Glaze: In a small bowl, whisk together the Dijon mustard, whole grain mustard, honey, smoked paprika, garlic powder, onion powder, salt, and pepper until smooth. The glaze should be thick enough to coat the sausage without dripping. Taste a spoonful; if you prefer a sweeter glaze, add a splash more honey. If you like it spicier, sprinkle a pinch of cayenne pepper.
- Coat the Sausage: In a shallow dish, combine the flour, breadcrumbs, and Parmesan. Sprinkle the sausage slices with the coating, gently pressing to ensure an even layer. This will give the final crust a satisfying crunch. The flour helps the glaze stick, while the breadcrumbs add texture. If you’re feeling adventurous, add a pinch of smoked sea salt for an extra flavor boost.
- Heat the Pan: Melt the butter in a large skillet over medium heat. Add the olive oil and let it heat until it shimmers. This combination prevents the coating from burning while ensuring a golden crust. Place the coated sausage slices in the pan, making sure they’re not overcrowded. You may need to work in batches to avoid steaming.
- Cook the Sausage: Let the sausage cook for about 4-5 minutes on each side, or until the coating turns golden brown and crisp. Use a spatula to flip the slices gently, keeping the coating intact. The glaze should caramelize into a sticky, glossy finish. Watch the color change; when it starts to deepen, that’s the moment of truth.
- Brush with Glaze: While the sausage is still hot, brush the glaze generously over each slice. The heat will melt the butter, allowing the glaze to seep into the crust. This step creates that signature glossy sheen and adds an extra layer of flavor. Be sure to coat every side for a uniform taste.
- Finish with Herbs: Sprinkle fresh thyme and parsley over the sausage. The herbs add a fresh pop of color and a bright, aromatic finish. If you’re using dried herbs, use half the amount to avoid overpowering the dish. This final touch makes the dish look vibrant and appetizing.
- Serve Immediately: Transfer the sausage slices to a platter and serve hot. They’re best enjoyed while the coating is still crisp and the glaze is warm. Pair with a light salad or a drizzle of extra mustard for an extra kick. The aroma alone will have your guests lining up for more.
That’s it— you did it. But hold on, I’ve got a few more tricks that will take this to another level. These insider tips will help you perfect the dish every time and keep your guests coming back for more.
Insider Tricks for Flawless Results
The Temperature Rule Nobody Follows
Many cooks think a high heat is the key to crispness, but it’s actually the right balance that matters. Cook the sausage on medium heat to allow the coating to set before the glaze caramelizes. If you start too high, the outside will burn while the inside remains undercooked. Keep the skillet at a steady 350°F (175°C) and adjust as needed.
Why Your Nose Knows Best
Before you even taste the first bite, your nose will tell you if you’re on the right track. The smell of caramelizing honey and butter is a good sign. If the scent is overly metallic or burnt, the glaze is overcooked. Trust your senses—your nose is a reliable guide to flavor.
The 5-Minute Rest That Changes Everything
After you finish cooking, let the sausage rest for five minutes. This allows the juices to redistribute, keeping the interior moist. It also gives the glaze a chance to set, resulting in a more cohesive coating. A quick rest is a small step that makes a big difference.
The Fresh Herb Switch
If you’re in the mood for a different flavor profile, swap thyme for rosemary or sage. Each herb brings a unique aroma that can transform the dish. For a more Mediterranean twist, add oregano or basil. Experimentation is the spice of life.
The Quick Pickle Side
Serve the sausage with a quick pickle of cucumbers or pickled onions. The acidity cuts through the richness and adds a refreshing bite. A simple mix of vinegar, sugar, and dill works wonders and can be made in under ten minutes.
Creative Twists and Variations
This recipe is a playground. Here are some of my favorite ways to switch things up:
Spicy Jalapeño Kick
Add finely diced jalapeño to the glaze for a fiery punch. The heat pairs beautifully with the honey’s sweetness, creating a balanced flavor profile that will have guests reaching for more.
Citrus Burst
Replace half of the honey with orange marmalade and add a squeeze of fresh lemon juice. The citrus notes lift the dish, making it feel lighter and more refreshing—perfect for a summer gathering.
Cheesy Melt
Sprinkle shredded mozzarella or cheddar over the sausage slices before the final glaze brushing. The cheese melts into a gooey, savory coating that adds a new dimension of indulgence.
Smoky Chipotle
Swap smoked paprika for chipotle powder and add a dash of chipotle in adobo. The smoky, peppery flavor deepens the dish’s complexity and gives it a bold, adventurous edge.
Herb‑Infused Oil
Infuse the olive oil with rosemary, thyme, and bay leaves before cooking. This subtle herb infusion permeates the sausage, elevating the flavor profile without overpowering the glaze.
Sweet & Salty Crunch
Add a sprinkle of chopped candied pecans or almonds to the breadcrumb coating. The sweet crunch contrasts with the savory glaze, creating a delightful textural experience.
Storing and Bringing It Back to Life
Fridge Storage
Store any leftovers in an airtight container in the refrigerator for up to 3 days. Keep the coated side facing up to preserve the crunch. When you’re ready to reheat, use a skillet to re‑crisp the coating for a fresh experience.
Freezer Friendly
Freezing is a great option for meal prep. Place the coated sausage slices on a parchment‑lined tray and freeze until solid. Transfer to a freezer bag and store for up to 2 months. Reheat in a preheated oven at 375°F (190°C) for 10-12 minutes, or until heated through.
Best Reheating Method
The key to reheating is to keep the coating crisp. After thawing, lightly brush with olive oil and place the slices on a baking sheet. Bake at 400°F (200°C) for 8-10 minutes, turning halfway through. Add a splash of water before reheating if the coating feels dry; it steams back to perfection.