Picture this: I was standing in my kitchen, the oven preheated, the fridge humming, and the world outside feeling like a slow-motion movie. The night before, my friend dared me to make a cheesecake that would make her taste buds do a backflip, and I was too proud to back down. I stared at the box of graham crackers, the swirl of cream cheese, and the gleam of that extra heavy cream, feeling a spark of culinary rebellion. The kitchen smelled of vanilla, sugar, and the faint hint of citrus, a scent that promised indulgence and comfort in equal measure. I was about to embark on a cheesecake adventure that would forever change the way I think about dessert.
When the first bite landed on my tongue, the texture was a silky, buttery cloud that melted like a dream. The crust, crisp and buttery, offered a satisfying crunch before it softened into the creamy center. The lemon juice cut through the richness, giving it a bright, almost citrusy zing that lifted the whole experience. I could hear the faint crackle of the oven door opening as the cheesecake cooled, a sound that felt like a lullaby for the senses. Every bite was a revelation, a symphony of flavors that danced across my palate. I swear the kitchen felt like a sanctuary of flavor, a place where I could forget the chaos outside.
What sets this version apart from the countless other New York‑style cheesecakes is the meticulous layering of flavors and textures. I used a graham cracker base that’s been toasted just enough to add a subtle nutty crunch, then layered it with a velvety filling that’s both airy and dense. The addition of extra heavy cream gives the cheesecake a luxurious mouthfeel, while the fresh lemon juice brightens the flavor profile without overpowering the richness. This recipe also incorporates a secret ingredient—vanilla bean paste—that unlocks a depth of vanilla flavor that’s simply unmatched. It’s a recipe that turns an ordinary dessert into a showstopper, a dessert that will have everyone asking for seconds. I dare you to taste this and not go back for seconds.
If you’ve ever struggled with the dreaded over‑baked, cracked cheesecake, you’re not alone. I’ve seen so many kitchens produce a cheesecake that’s either too dry or too runny. This version is hands down the best you’ll ever make at home because it balances moisture, flavor, and structure like a well‑orchestrated symphony. Picture yourself pulling this out of the oven, the whole kitchen smelling incredible, and the first slice revealing a perfectly set center that still feels light and airy. Stay with me here—this is worth it. Let me walk you through every single step, and by the end, you’ll wonder how you ever made it any other way.
What Makes This Version Stand Out
- Texture: The cheesecake boasts a silky, mousse‑like filling that’s both dense and airy, thanks to the extra heavy cream and the gentle folding of eggs. The crust offers a crisp, buttery bite that transitions into a tender crumb. If you’re looking for a cheesecake that feels like a cloud on a spoon, this is it.
- Flavor: A subtle citrus twist from fresh lemon juice cuts through the richness, while vanilla bean paste deepens the vanilla profile. The graham crackers add a hint of toasted sweetness that complements the creamy center. The result is a balanced, layered flavor that lingers on the palate.
- Ease: Despite its indulgent taste, the recipe is straightforward. Each step is designed to keep you focused, with clear instructions that even novice bakers can follow. The method eliminates common pitfalls like cracking or over‑baking.
- Make‑Ahead: This cheesecake can be assembled and chilled ahead of time, making it perfect for parties or last‑minute dessert needs. The filling will hold its shape for up to 48 hours in the refrigerator.
- Versatility: The base can be swapped for a chocolate or almond crust, and the filling can be topped with fruit, ganache, or caramel. It’s a canvas that invites creativity.
- Quality Ingredients: Using full‑fat cream cheese, extra heavy cream, and fresh sour cream elevates the richness without compromising texture. These ingredients work together to create a silky, decadent mouthfeel.
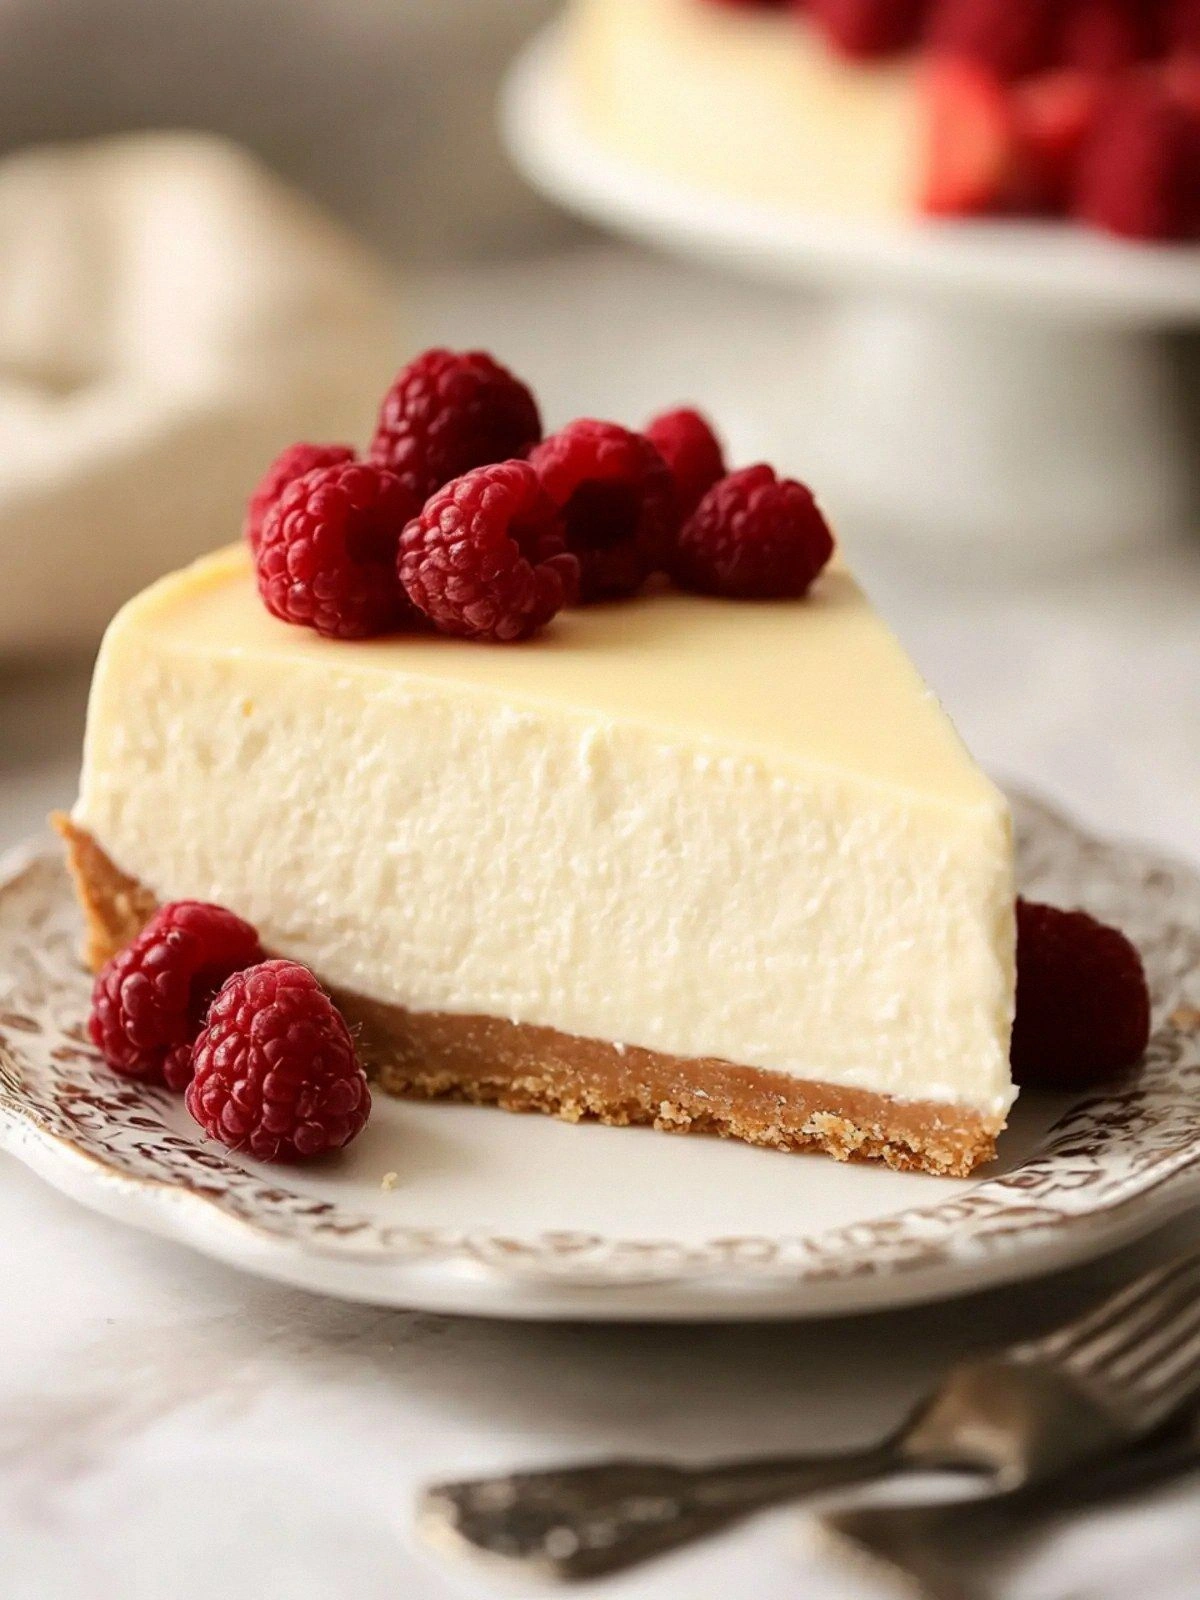
- Presentation: The cheesecake’s glossy finish and smooth top make it a showstopper, especially when served with fresh berries or a drizzle of lemon curd. It’s a dessert that looks as good as it tastes.
Alright, let's break down exactly what goes into this masterpiece...
Inside the Ingredient List
The Flavor Base
The graham crackers are the unsung hero of any cheesecake. They provide structure and a subtle sweetness that grounds the richness of the filling. If you skip them, the cheesecake will feel too heavy and lack that comforting crunch. A good rule of thumb is to toast the crackers just until they’re lightly golden; this brings out their natural nutty flavor without turning them bitter.
Granulated sugar is used in two stages: once in the crust and once in the filling. The crust sugar balances the saltiness of the graham crackers, while the filling sugar ensures a smooth, sweet center. If you prefer a less sweet cheesecake, reduce the filling sugar by a quarter cup; the result will still be creamy and luscious.
Unsalted butter is the secret to a buttery crust. It melts into the crackers, creating a cohesive base that holds together when sliced. Using salted butter would introduce an unwanted salty bite that clashes with the vanilla. Keep the butter at room temperature so it incorporates smoothly.
The Texture Crew
Full‑fat cream cheese is the backbone of the filling. It gives the cheesecake its signature richness and a silky mouthfeel. If you use low‑fat cream cheese, the cheesecake will turn out watery and lack that luxurious texture. For best results, let the cream cheese sit at room temperature for at least an hour before mixing.
Granulated sugar added to the cream cheese creates a smooth, glossy texture. The sugar dissolves into the mixture, preventing lumps and ensuring a silky consistency. A quick tip: beat the cream cheese on high speed for two minutes before adding the sugar; this incorporates air and lightens the filling.
Salt is a flavor enhancer that balances sweetness. Even a half teaspoon can dramatically elevate the overall taste profile. Skipping salt can result in a flat, overly sweet cheesecake that lacks depth.
Vanilla bean paste is the secret weapon that unlocks deep vanilla flavor without the bitterness of extracts. It brings a natural, aromatic sweetness that complements the cream cheese. If you can’t find vanilla paste, a teaspoon of vanilla extract will work, but the flavor will be slightly more pronounced.
The Unexpected Star
The extra heavy cream is the unsung hero that makes the filling incredibly smooth and airy. It adds a luxurious mouthfeel without making the cheesecake too heavy. If you’re looking for a lighter version, replace half of the heavy cream with whole milk; the texture will still be excellent.
Freshly squeezed lemon juice is a game‑changer. It brightens the richness, adds a subtle tartness, and helps stabilize the filling. If you’re using bottled lemon juice, reduce it by 25% because it’s more concentrated.
The sour cream adds tang and richness that balances the sweetness. It also helps keep the cheesecake moist and prevents it from drying out. For a vegan version, substitute with coconut cream for a similar texture.
Eggs act as the binder, giving the cheesecake structure. The eggs should be added one at a time, ensuring each is fully incorporated before the next is added. Over‑beating can incorporate too much air, causing the cheesecake to rise too much and crack.
The Final Flourish
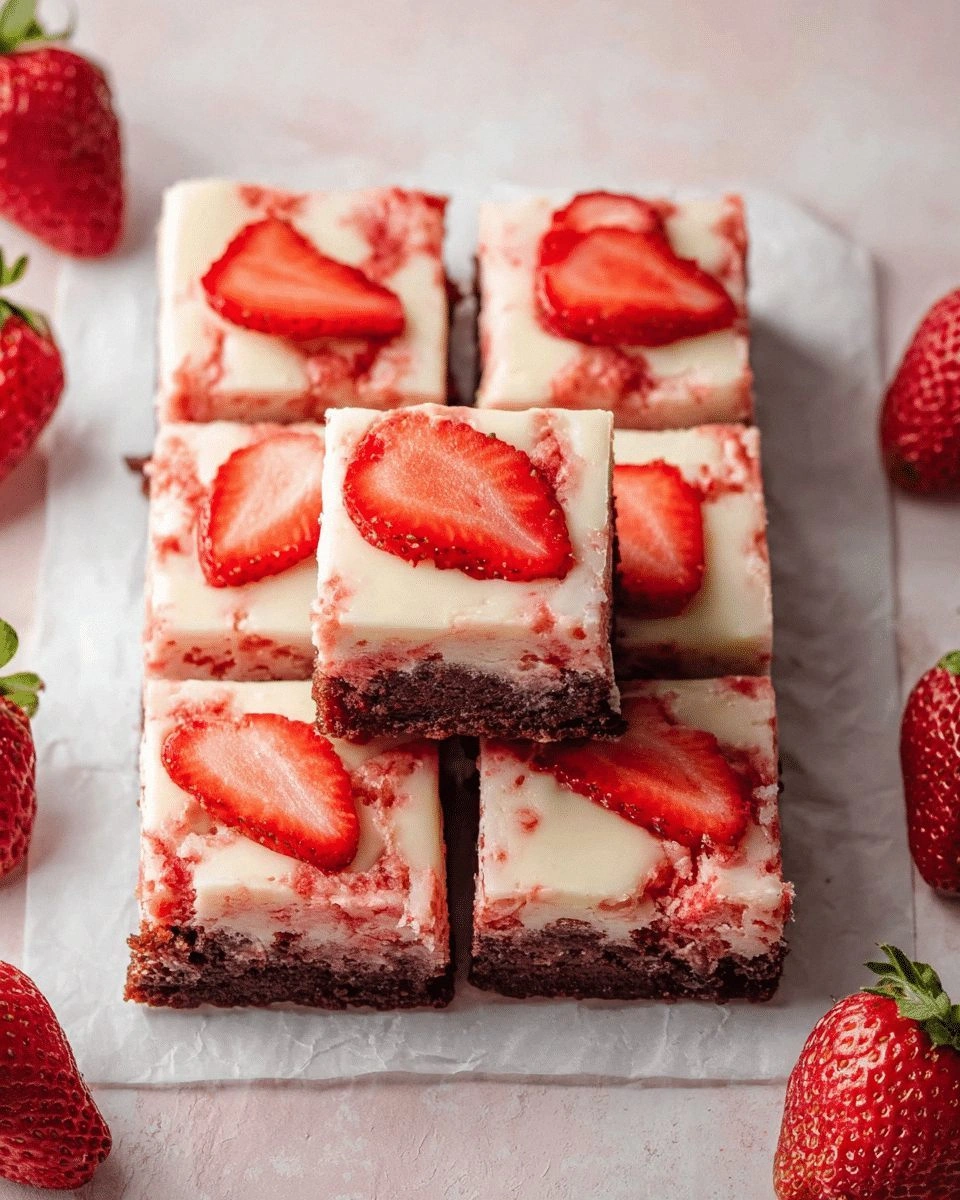
Berries are the finishing touch that adds color, freshness, and a burst of natural sweetness. They also provide a pleasant contrast to the rich filling. If berries are out of season, you can use a fruit compote or a drizzle of chocolate ganache.
Everything’s prepped? Good. Let’s get into the real action...
The Method — Step by Step
- First, preheat your oven to 325°F (163°C) and line a 9‑inch springform pan with parchment paper. The parchment ensures a clean release and prevents sticking. While the oven heats, prepare the crust by mixing graham crackers, sugar, and butter in a bowl until the crumbs are evenly coated. Press the mixture firmly into the pan’s bottom, ensuring an even layer. Let it sit while you whip the filling.
- In a large mixing bowl, beat the cream cheese on medium speed until it’s smooth and free of lumps. Add the sugar in two portions, beating after each addition to maintain a silky texture. This step is crucial; rushing it will result in a gritty filling. Keep the mixture at room temperature to avoid separation.
- Add the salt, vanilla bean paste, and lemon juice to the cream cheese mixture. Beat until the ingredients are fully incorporated, creating a homogeneous base. The lemon juice will also help set the filling, giving it a firmer structure once baked.
- In a separate bowl, whisk the eggs one at a time, ensuring each is fully blended before adding the next. This prevents curdling and ensures a smooth final product. Gently fold the beaten eggs into the cream cheese mixture, using a spatula to maintain the airy texture. If you’re nervous, use a gentle fold rather than a vigorous stir.
- Pour the filling over the prepared crust, smoothing the top with a spatula. Tap the pan gently on the counter to release any air bubbles that may have formed. The absence of bubbles ensures a smooth surface that will look stunning when sliced.
- Place the pan in a larger baking dish and fill the dish with hot water until it reaches halfway up the sides of the pan. This water bath ensures even cooking and prevents the cheesecake from cracking. Keep a close eye on the water level, adding more if it evaporates during baking.
- Bake for 45 minutes, or until the edges are set but the center still wobbles slightly when you gently shake the pan. The slight wobble is the hallmark of a perfectly baked cheesecake. If you’re using a different oven, check the center with a toothpick; it should come out clean or with a few crumbs.
- Turn off the oven, crack the door open slightly, and let the cheesecake cool in the oven for an hour. This gradual cooling prevents the cheesecake from cracking due to a sudden temperature shift. After an hour, transfer the cheesecake to a wire rack to cool completely.
- Once cooled, refrigerate the cheesecake for at least four hours, preferably overnight. The chilling process allows the flavors to meld and the texture to firm up. When you’re ready to serve, run a knife around the edge to loosen the springform pan, then lift it out.
- Top the cheesecake with fresh berries, a drizzle of lemon curd, or a dusting of powdered sugar. The contrast of colors and flavors will elevate the presentation. Slice with a sharp knife, wiping it clean between cuts for a smooth edge.
That’s it — you did it. But hold on, I've got a few more tricks that'll take this to another level...
Insider Tricks for Flawless Results
The Temperature Rule Nobody Follows
Baking at a low, steady temperature is the key to preventing cracks. Many bakers instinctively increase the oven temperature for a firmer set, but this often causes the cheesecake to crack. Instead, bake at 325°F and use a water bath to keep the heat gentle and even. This method ensures the cheesecake cooks slowly, allowing the proteins to set without pulling away from the crust.
Why Your Nose Knows Best
A good way to gauge doneness is by aroma. As the cheesecake bakes, a warm, buttery scent will permeate the kitchen. If you notice a faint almond or nutty aroma, the cheesecake is almost ready. Trust your nose; it’s a reliable indicator that the interior is set without overcooking.
The 5‑Minute Rest That Changes Everything
After removing the cheesecake from the oven, let it sit in the warm oven for 5 minutes before cooling. This brief rest allows the residual heat to finish the cooking process evenly. Many people skip this step, resulting in a slightly uneven texture; I’ve learned that a short rest makes the difference between good and great.
The Chill‑First Strategy
Some bakers chill the cheesecake before baking, but this can cause the filling to become too stiff. Instead, keep the filling at room temperature until it’s time to bake. This ensures a smooth, even mixture that spreads nicely over the crust.
The Final Frosting Touch
If you want a glossy finish, brush the top of the cheesecake with a thin layer of beaten egg white before baking. This creates a shiny crust that looks professional and adds a subtle crunch. Just remember to whisk the egg white until it’s slightly frothy; a plain egg white will give a dull finish.
Creative Twists and Variations
Chocolate Ganache Overload
Swap the lemon juice for a rich chocolate ganache topping. Melt dark chocolate with a splash of heavy cream, let it cool slightly, then swirl over the cooled cheesecake. This variation is a chocolate lover’s dream and pairs wonderfully with a dusting of sea salt.
Berry Burst
Add a layer of mixed berries between the crust and filling. Layer strawberries, blueberries, and raspberries for a colorful, fruity middle. The berries release their juices during baking, adding natural sweetness and a vibrant pop of color.
Caramel Swirl
Drizzle caramel sauce over the top of the cheesecake before chilling. The caramel will seep into the filling, creating a decadent swirl effect. Serve with a sprinkle of crushed pecans for an added crunch.
Almond Crumb Base
Replace the graham crackers with almond flour for a nutty, gluten‑free crust. Combine almond flour, sugar, and melted butter, then press into the pan. The almond base provides a subtle crunch and pairs beautifully with the creamy filling.
Vegan Delight
Use coconut cream instead of heavy cream and a plant‑based cream cheese substitute. Replace the eggs with a flaxseed mixture (1 tablespoon ground flaxseed + 3 tablespoons water). The result is a dairy‑free cheesecake that still delivers on flavor and texture.
Spiced Citrus Twist
Add a pinch of freshly ground ginger and a splash of orange zest to the filling. The citrus notes brighten the richness, while the ginger adds a subtle warmth. This version is perfect for holiday gatherings or a festive brunch.
Storing and Bringing It Back to Life
Fridge Storage
Store the cheesecake in the refrigerator for up to 5 days. Keep it wrapped in plastic wrap and then place it in an airtight container. The cold temperature preserves the texture and prevents the filling from drying out. Before serving, let it sit at room temperature for 10 minutes to soften slightly.
Freezer Friendly
Freezing is a great option for long‑term storage. Wrap the cheesecake tightly in plastic wrap, then place it in a freezer‑safe container. It can stay frozen for up to 3 months. When ready to enjoy, thaw it overnight in the refrigerator. The texture remains silky; the only difference is a slightly denser mouthfeel.
Best Reheating Method
To revive a chilled cheesecake, place it in the oven at 300°F (149°C) for 10 minutes. The low heat gently warms the filling without drying it out. After reheating, let it rest for a few minutes, then serve with a drizzle of fresh lemon curd or a dusting of powdered sugar.