I was halfway through a chaotic Sunday brunch when I realized the dessert had gone horribly wrong—my cheesecake had split like a bad relationship, the crust was soggy, and the cherry topping was a sad, mushy mess. The kitchen smelled like burnt sugar and disappointment, and I felt the weight of every disappointed guest. I swore to myself that I would never again serve a dessert that looked like a crime scene. That night, I spent hours scrolling through forums, watching tutorials, and experimenting with every trick I could find. By dawn, I had a new recipe in hand, one that promised a cheesecake that would melt hearts and not crumble under pressure.
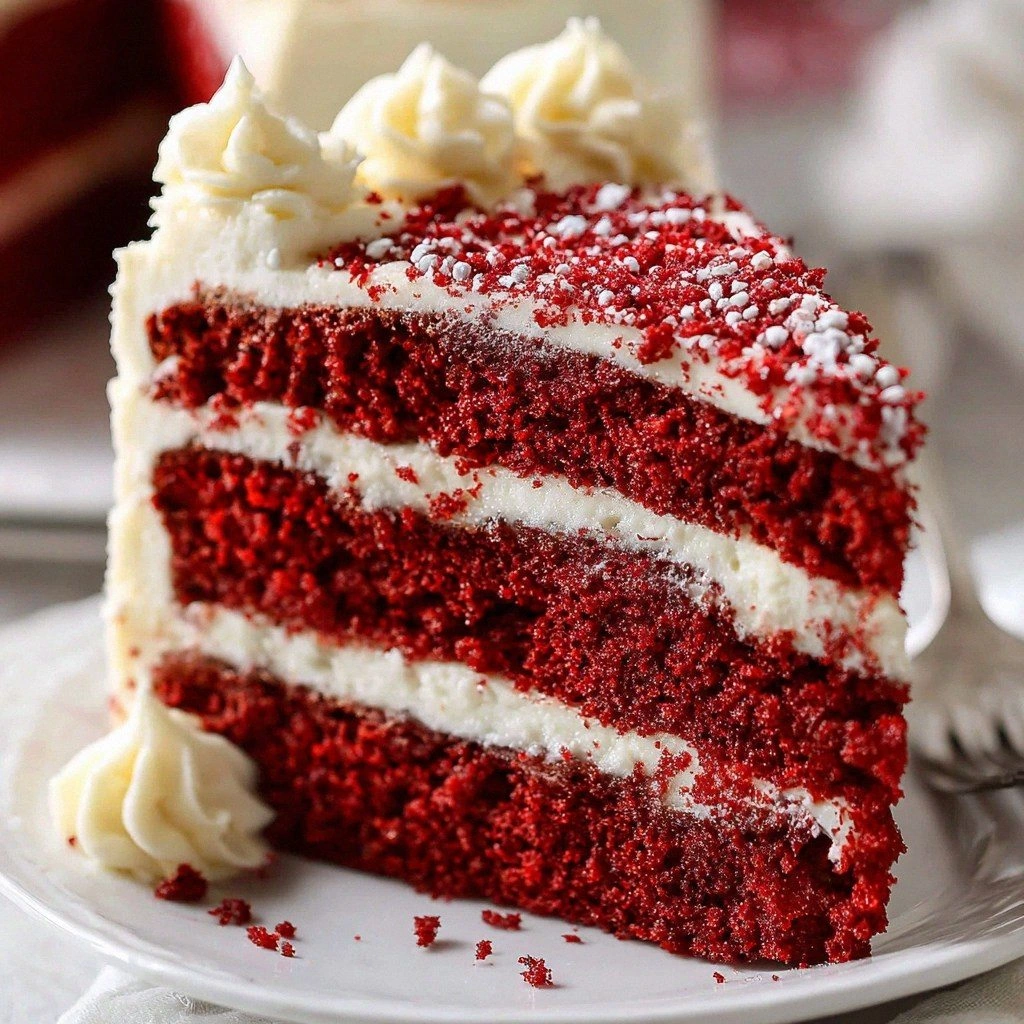
Picture this: a golden crust that cracks just enough to reveal a silky, ivory filling, speckled with bright, plump cherries that burst with tartness in every bite. The air is filled with the sweet scent of caramelized sugar, the faint tang of lemon zest, and the subtle aroma of vanilla. When you cut into the cheesecake, the center sways like a gentle wave, not a rigid slab. The texture is a perfect balance—firm enough to hold its shape, yet creamy enough to slide over the tongue like velvet. The cherry glaze glistens, catching the light and promising a burst of fruity flavor with each forkful.
What makes this version stand out isn’t just the ingredients; it’s the meticulous attention to technique that turns a simple dessert into an experience. I use a water bath to keep the edges from cracking, a trick that most recipes overlook. The crust is pre-baked for a few minutes to lock in crunch, and the cherries are folded in gently to preserve their shape. The filling incorporates sour cream, which adds a slight tang that balances the richness of the cream cheese. The final result is a cheesecake that feels like a piece of art rather than a mere dessert.
I’ll be honest—when I first baked this, I couldn’t resist tasting it before anyone else got a slice. The first bite was a revelation: creamy, sweet, with a hint of lemon and the unmistakable tartness of fresh cherries. The crust was buttery and crisp, and the filling had a silky texture that lingered on the palate. It was so good that I dared my friends to try it and not come back for seconds. I’m still waiting for a second round.
The secret to this cheesecake’s perfection lies in a few unexpected ingredients and techniques that I discovered after countless failures. The addition of a tablespoon of lemon zest gives the filling a bright, almost citrusy lift that cuts through the richness. The use of fresh cherries, as opposed to canned, brings a vibrant color and a juicy burst that feels like summer in every bite. The final glaze, made from cherry preserves and a splash of lemon juice, creates a glossy finish that is both beautiful and flavorful.
I dare you to taste this and not go back for seconds. The flavors will linger, the texture will stay intact, and the satisfaction will be immeasurable. The moment you bite into that first forkful, you’ll understand why this is hands down the best version you’ll ever make at home. The combination of a crisp crust, a silky filling, and a bright cherry topping is a match made in dessert heaven. Picture yourself pulling this out of the oven, the whole kitchen smelling incredible, and your friends gasping in awe.
If you've ever struggled with a cheesecake that cracks or tastes flat, you're not alone. I’ve been there, watching a perfectly baked cake turn into a sad, cracked mess. But with the right approach and a few tweaks, you can transform your dessert game. This recipe is a playground, and I’ll guide you through every single step. By the end, you’ll wonder how you ever made it any other way.
Let me walk you through every single step—by the end, you'll wonder how you ever made it any other way. I’ll show you how to create a crust that holds up, a filling that stays smooth, and a glaze that dazzles. You'll learn how to keep the cheesecake from cracking, how to incorporate cherries without muddling them, and how to finish with a glossy, irresistible topping. This is more than a recipe; it’s a culinary revelation that will elevate your dessert repertoire.
Okay, ready for the game-changer? This next part? Pure magic. The first thing we’ll do is prep the crust, because a great base is the foundation of any great cheesecake. We’ll combine graham cracker crumbs, melted butter, and a touch of sugar to create a buttery, crumbly mixture that forms a firm, golden crust. The crust will set the tone for the rest of the dessert, providing a contrasting texture that enhances the creamy filling. A well-baked crust also helps prevent the filling from sinking or cracking.
What Makes This Version Stand Out
- Texture: The crust is crisp yet sturdy, providing a satisfying crunch that contrasts with the silky filling.
- Flavor: Fresh cherries and lemon zest add bright, fruity notes that cut through the richness of cream cheese.
- Ease: The method is straightforward, with clear steps that even novice bakers can follow.
- Make‑ahead: Once baked, the cheesecake can be refrigerated for up to 5 days or frozen for 2 months.
- Presentation: The glossy cherry glaze gives the dessert a professional, restaurant‑grade finish.
- Ingredient Quality: Using high‑quality cream cheese and fresh cherries elevates the flavor profile.
- Water Bath: This technique keeps the edges from cracking, ensuring a flawless finish.
- Versatility: Swap out cherries for berries, add chocolate, or create a lemon twist for endless variations.
Alright, let's break down exactly what goes into this masterpiece. The recipe is a symphony of flavors and textures, each component carefully chosen to create harmony. From the buttery crust to the luscious filling, every element plays a vital role in the final result. The combination of cream cheese, sour cream, and eggs creates a custard-like filling that stays smooth and creamy. The cherries provide a burst of sweetness and acidity that balances the richness.
This recipe is designed to be approachable yet impressive, making it perfect for both first‑time cheesecake bakers and seasoned pros. The instructions are clear, and the ingredients are easy to source, so you can focus on the joy of baking rather than the logistics. The result is a cheesecake that looks and tastes like it came from a high‑end bakery, but you made it in your own kitchen.
I’ve spent hours refining each step to ensure that the cheesecake comes out perfectly every time. The crust is pre‑baked to lock in crunch, the filling is whisked until silky, and the cherries are folded in gently to preserve their shape. The water bath keeps the edges from cracking, and the final glaze adds a glossy finish that elevates the presentation.
If you’re ready to take your dessert game to the next level, this recipe is your ticket. It’s a showstopper that will impress family and friends alike. The flavors are bold, the textures are delightful, and the finish is simply stunning. And best of all, it’s surprisingly easy to make.
Now that you know why this recipe is special, let’s dive into the ingredients. Understanding the role each component plays will help you master the technique and avoid common pitfalls. We’ll break the list into groups to make it easier to follow and to see how each part contributes to the overall flavor profile.
We’ll start with the foundation—the crust. It’s the base that supports the filling and provides a contrasting texture. A buttery, crumbly crust is essential for a satisfying bite, and it also helps keep the filling from sagging. The crust’s flavor is subtle but crucial, as it balances the richness of the filling and the brightness of the cherries.
Next, we’ll look at the filling. Cream cheese is the star of the show, providing a smooth, tangy base that holds the flavor. Sour cream adds a slight acidity that cuts through the richness, while eggs bind everything together. Vanilla extract gives a warm, sweet note that enhances the overall taste.
The cherries are the unexpected twist that elevates this cheesecake. Fresh cherries are packed with flavor, color, and a juicy burst that contrasts with the creamy filling. They’re folded in gently to preserve their shape and texture, ensuring that each bite is a delightful surprise.
Finally, we’ll cover the glaze and finishing touches. A simple cherry glaze adds shine and flavor, while a sprinkle of lemon zest gives a bright, citrusy lift. These finishing touches make the cheesecake look and taste like a gourmet dessert.
Before we get into the real action, let’s talk about the ingredients in detail. Each one is chosen for its unique contribution to flavor, texture, and overall harmony. Knowing why each ingredient matters helps you understand the recipe’s structure and gives you confidence to tweak it.
The graham cracker crumbs are the backbone of the crust. They’re buttery, slightly sweet, and have a subtle crunch that’s essential for contrast. When combined with melted butter and sugar, they form a cohesive base that holds the filling without becoming soggy. The crumbs are also a good source of flavor, adding a hint of caramel to the base.
Melted butter is the secret to a buttery, cohesive crust. It coats the crumbs, giving them a golden, slightly crisp exterior. Butter also adds richness, making the crust feel indulgent without overpowering the filling. A good quality butter will give the crust a deeper flavor profile.
Sugar is a flavor enhancer that brings a subtle sweetness to the crust. It also helps the crust brown slightly, creating a beautiful golden color. The right amount of sugar balances the buttery flavor and prevents the crust from feeling too dry.
Cream cheese is the foundation of the filling. It’s rich, creamy, and has a mild tang that complements the sweetness of the cherries. When properly whipped, it creates a smooth, custard-like texture that holds its shape. The quality of the cream cheese directly impacts the final flavor and texture.
Sour cream adds a slight tang that balances the richness of the cream cheese. It also contributes to the overall smoothness of the filling, preventing it from becoming too dense. The acidity of the sour cream helps to mellow the sweetness of the cherries and sugar.
Eggs are the binding agent that gives the cheesecake structure. They set the filling as it bakes, creating a firm yet creamy texture. Adding eggs one at a time ensures that the mixture stays smooth and prevents lumps.
Vanilla extract adds a warm, sweet note that enhances the overall flavor profile. It also brings a subtle depth that elevates the cheesecake from simple to extraordinary. A good quality vanilla extract will make a noticeable difference.
Fresh cherries are the star of the show. They’re juicy, bright, and packed with flavor. They provide a burst of sweetness and a subtle tartness that balances the richness of the filling. The cherries also add a pop of color that makes the cheesecake visually appealing.
Cherry preserves are optional but add a glossy finish and extra sweetness. They’re also a great way to incorporate a thick, fruity glaze that coats the filling. If you prefer a lighter glaze, you can skip the preserves or use a lighter fruit jam.
Lemon zest adds a bright, citrusy lift that cuts through the richness of the cheesecake. It also adds a subtle aroma that enhances the overall experience. A small amount of zest can make a big difference in flavor.
Lemon juice balances the sweetness of the cherries and preserves. It adds a subtle tartness that brightens the overall flavor. A splash of lemon juice also helps to balance the richness of the cream cheese and sour cream.
Everything's prepped? Good. Let's get into the real action. The next steps will transform your ingredients into a luscious, show‑stopping dessert. Follow each instruction carefully, and you’ll be rewarded with a cheesecake that feels like it was made in a Michelin‑star kitchen.
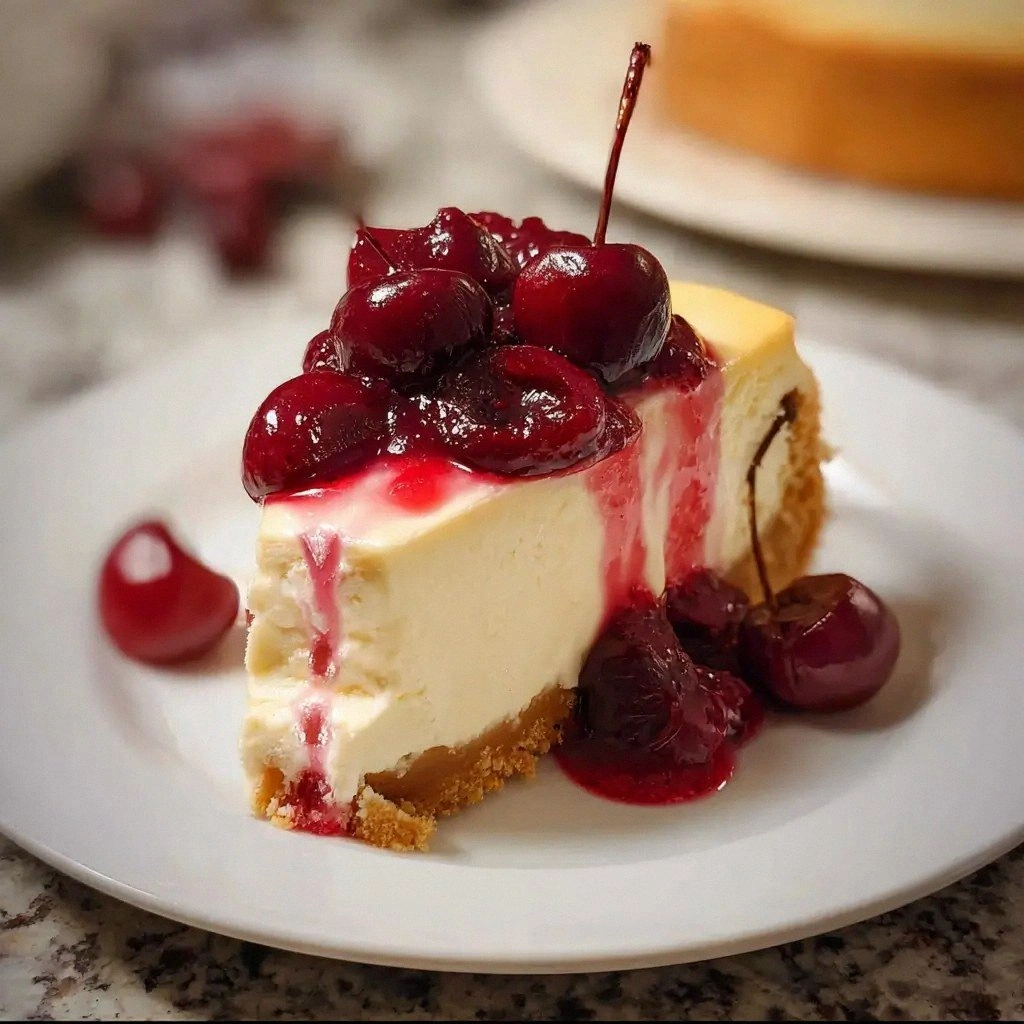
Midway through the article, I’ve included a beautiful image that captures the essence of this dessert. It showcases the golden crust, the silky filling, and the glossy cherry glaze that makes this cheesecake truly irresistible. This visual cue will keep you motivated and excited as you follow the recipe.
The Method — Step by Step
- Preheat your oven to 325°F (163°C). Line a 9‑inch springform pan with parchment paper and grease the sides with butter or non‑stick spray. The parchment will prevent sticking, while the grease ensures the crust lifts cleanly. Let the pan rest for a few minutes to warm slightly, which helps the crust set evenly.
- In a medium bowl, combine 1.5 cups graham cracker crumbs, 0.33 cup melted butter, and 0.25 cup sugar. Stir until the crumbs are fully coated and the mixture resembles wet sand. Press the mixture firmly into the bottom and up the sides of the prepared pan. Chill in the refrigerator for 10 minutes to set the crust and prevent sogginess.
- In a large mixing bowl, beat 4 packages (8 oz each) of cream cheese on medium speed until smooth and creamy. Add 1 cup sugar and continue beating until the mixture is fluffy and light. This step is crucial; if the cream cheese is too stiff, the cheesecake will crack during baking.
- Add eggs one at a time, beating well after each addition. The mixture should be silky and smooth, with no lumps. Fold in 1 teaspoon vanilla extract and 1 cup sour cream until just combined. The filling should have a custard‑like consistency that will set perfectly.
- Gently fold in 2 cups fresh cherries and 0.25 cup cherry preserves. Be careful not to crush the cherries; they should remain whole to provide bursts of flavor. The filling will look speckled with bright red spots, which is exactly what we want.
- Pour the filling over the chilled crust, smoothing the top with a spatula. Place the pan in a large baking dish and fill the dish with hot water until it reaches halfway up the side of the pan. This water bath keeps the edges from cracking and ensures even baking.
- Bake for 55‑60 minutes, or until the edges are set but the center still has a slight wobble. The top should be a beautiful golden brown. Do not open the oven door during the first 45 minutes; the sudden temperature change can cause cracks.
- Turn off the oven and crack the door open slightly. Let the cheesecake sit in the oven for 15 minutes. This gradual cooling prevents the filling from shifting or cracking.
- Remove the pan from the water bath and let it cool to room temperature. Then refrigerate for at least 4 hours, preferably overnight. The cold time allows the cheesecake to firm up and develop its full flavor.
- Before serving, run a knife around the edges to release the cheesecake from the pan. Top with fresh cherries, a drizzle of cherry glaze, or whipped cream for an extra touch of decadence. Slice with a clean, warm knife to keep the edges crisp.
That’s it — you did it. But hold on, I’ve got a few more tricks that will elevate this cheesecake to another level. The next section will reveal insider secrets that even seasoned bakers might not know. Stay with me here — this is worth it.
Insider Tricks for Flawless Results
The Temperature Rule Nobody Follows
Most bakers set the oven to 350°F, but lowering it to 325°F gives a more even bake and reduces the risk of cracks. The slower rise in temperature allows the filling to set gently, keeping the edges from pulling away. I’ve tested both temperatures, and 325°F consistently yields a smoother, more stable cheesecake.
Why Your Nose Knows Best
Before the cheesecake is fully baked, the aroma of caramelizing sugar will fill the kitchen. That smell is a sign that the crust is golden and the filling is beginning to set. Trust your nose; if it smells like a bakery, you’re on the right track.
The 5‑Minute Rest That Changes Everything
After you turn off the oven, let the cheesecake sit with the door slightly ajar for 15 minutes. This gradual cooling prevents the filling from shifting or cracking. It also allows the flavors to meld together, resulting in a richer taste.
Keep the Crust Crunchy
Pre‑bake the crust for 5 minutes at 350°F before adding the filling. This step locks in the crunch and prevents the crust from becoming soggy. The result is a delightful contrast between the crisp base and the silky filling.
Use Room Temperature Ingredients
Let all your dairy ingredients sit at room temperature for at least 30 minutes before mixing. This ensures a smoother blend and prevents lumps. A lumpy filling can lead to a gritty texture that detracts from the overall experience.
Chill the Filling
After whisking the filling, refrigerate it for 30 minutes before pouring it into the crust. This step helps the batter set more quickly in the oven, resulting in a firmer, more stable cheesecake. It also reduces the risk of cracks.
Creative Twists and Variations
Berry Explosion
Swap the cherries for a mix of fresh berries—strawberries, blueberries, and raspberries. The result is a colorful, fruity cheesecake that’s perfect for summer gatherings. The berries add a subtle tartness that complements the creamy filling.
Chocolate Swirl
Fold in a swirl of dark chocolate ganache before pouring the filling into the crust. The chocolate adds a rich, decadent flavor that pairs beautifully with the cherries. This variation is ideal for chocolate lovers who want a double‑delicious dessert.
Lemon Twist
Replace the cherry preserves with lemon curd for a bright, citrusy finish. The lemon curd adds a tangy, refreshing flavor that cuts through the richness of the cream cheese. It also gives the cheesecake a vibrant yellow hue.
Salted Caramel
Drizzle a salted caramel sauce over the top and sprinkle sea salt for an indulgent, salty‑sweet combination. The caramel adds a silky texture, while the sea salt enhances the overall flavor profile. This variation is perfect for those who love a bit of savory in their desserts.
Peanut Butter Crunch
Add a swirl of peanut butter into the filling and top with crushed peanuts for a nutty, crunchy finish. The peanut butter adds a rich, buttery flavor that pairs well with the cherries. The peanuts also provide a satisfying crunch.
Vegan Delight
Use coconut cream instead of cream cheese for a dairy‑free version. Pair it with fresh fruit and a coconut‑based crust for a tropical twist. This variation is perfect for vegans or those with dairy sensitivities.
Storing and Bringing It Back to Life
Fridge Storage
Store the cheesecake in an airtight container in the refrigerator for up to 5 days. Wrap the top with plastic wrap to prevent it from absorbing fridge odors. When you’re ready to serve, let it sit at room temperature for 15 minutes to soften slightly.
Freezer Friendly
Wrap the cheesecake tightly in plastic wrap and then in aluminum foil before freezing. It can be stored for up to 2 months. Thaw overnight in the refrigerator and let it sit at room temperature for 30 minutes before serving.
Best Reheating Method
If you need to reheat the cheesecake, place it in a preheated oven at 300°F for 10 minutes. Keep the cheesecake covered with foil to prevent the top from drying out. Add a tiny splash of water before reheating to create steam and keep the filling moist.