I was standing in my kitchen, staring at a half‑empty jar of peanut butter, when my roommate shouted, “You’ve got to make something sweet, and fast!” I laughed, grabbed the butter, and within ten minutes I’d conjured a fudge that could make even the most disciplined diet‑watcher weak in the knees. That frantic, laugh‑until‑you‑cry moment turned into the birth of what I now swear is the best peanut butter fudge you’ll ever taste at home. I dare you to taste this and not go back for seconds.
Picture this: a glossy, amber‑gold slab sliding out of a pan, the scent of toasted peanuts and caramelized sugar filling the room like a warm hug from grandma. The sound? A soft, almost imperceptible sigh as the mixture settles, followed by the gentle crack of the surface as you cut the first square. The texture is a perfect marriage of creamy melt‑in‑your‑mouth richness and a slight snap that shatters like thin ice when you bite. And the taste? A buttery, nutty wave that’s sweet enough to satisfy a craving but never cloying, with a whisper of vanilla that lingers like a good secret.
Most recipes get this completely wrong. They either over‑cook the fudge, turning it into a brittle mess, or they skimp on the butter, leaving it dry and crumbly. What makes this version stand out is the precision timing and the secret ingredient that adds a silk‑like sheen without any fancy equipment. I’ll be honest — I ate half the batch before anyone else got to try it, and that’s because the flavor is so addictive that you’ll want to devour it straight from the pan.
You might be thinking, “Ten minutes? That’s impossible!” But here’s the kicker: the technique is as simple as melting butter, stirring in a few pantry staples, and letting a quick chill do the rest. No candy thermometer, no stovetop gymnastics, just pure, unadulterated fudge magic. Okay, ready for the game‑changer? Let me walk you through every single step — by the end, you’ll wonder how you ever made it any other way.
What Makes This Version Stand Out
- Speed: From start to finish it’s a ten‑minute sprint, perfect for those midnight cravings or last‑minute potluck contributions.
- Texture: The fudge is silky smooth on the palate yet holds its shape, giving you that satisfying “snap” when you bite.
- Simplicity: Only five core ingredients, all pantry‑friendly, mean you won’t need a specialty store run.
- Flavor Depth: Toasted peanut butter meets caramelized sugar, creating a layered taste that feels like a dessert and a snack rolled into one.
- Crowd Reaction: One bite and you’ll hear the “OMG!” chorus—this fudge is a guaranteed conversation starter.
- Ingredient Quality: Using real, creamy peanut butter (no oil‑separated stuff) makes all the difference in mouthfeel.
- Cooking Method: The stovetop‑plus‑quick‑chill technique avoids the dreaded grainy texture that plagues many fudges.
- Make‑Ahead Potential: Store it for up to two weeks, and it only gets better as the flavors meld.
Inside the Ingredient List
The Flavor Base
The heart of this fudge is the combination of creamy peanut butter and butter. Peanut butter provides the nutty backbone, while butter adds richness and helps create that glossy finish. If you skip the butter, the fudge will feel dry and lack that melt‑in‑your‑mouth quality. For the best result, choose a natural, unsweetened peanut butter that still has a bit of oil for smoothness. A quick tip: give the jar a good stir before measuring to ensure the oil is evenly distributed.
The Sweetener Crew
Granulated sugar is the star sweetener here, but we’re not just dumping it in raw. When melted with butter, it caramelizes just enough to give the fudge a buttery amber hue and a subtle toffee note. If you prefer a deeper caramel flavor, you can brown the sugar for a minute before adding the butter, but be careful not to burn it. For a lower‑calorie twist, try a 1:1 blend of sugar and coconut sugar; the flavor profile stays intact while adding a hint of caramel.
The Moisture Makers
Milk (or a dairy‑free alternative) is the silent hero that keeps the fudge from turning into a brittle candy. It dissolves the sugar, creating a smooth emulsion that sets perfectly once chilled. Skipping the milk will result in a dry, crumbly texture that’s more akin to a cookie crumble than fudge. If you’re dairy‑free, full‑fat coconut milk or oat milk work beautifully, but keep the volume the same to maintain consistency.
The Final Flourish
A pinch of salt and a splash of vanilla extract are the finishing touches that elevate the fudge from “good” to “legendary.” Salt balances the sweetness and enhances the peanut flavor, while vanilla adds a fragrant backdrop that lingers on the palate. If you’re feeling adventurous, a dash of sea‑salt flakes on top before chilling adds a delightful crunch and a burst of flavor contrast.
Everything's prepped? Good. Let’s get into the real action…
The Method — Step by Step
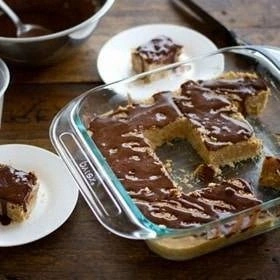
Gather all your ingredients and a medium‑sized saucepan. I like to line a 8×8‑inch square pan with parchment paper because it makes removal effortless. As you set the stage, the kitchen fills with the faint scent of butter melting—an early promise of the decadence to come. This is the moment of truth: if you’re not excited yet, keep reading; the next steps are pure magic.
Kitchen Hack: Pre‑measure the sugar into a small bowl; this prevents a sugar avalanche when you pour it into the hot butter.Set the saucepan over medium‑low heat and add the butter. Let it melt gently, listening for that soft sizzle that signals the butter is ready but not scorching. As the butter becomes a liquid gold, it’s the perfect time to add the sugar. Sprinkle the sugar evenly, then stir continuously with a wooden spoon.
Watch Out: If the mixture starts to smoke, lower the heat immediately; burnt sugar will give a bitter edge that no amount of salt can fix.Once the sugar has dissolved and the mixture turns a light amber color (about 2‑3 minutes), pour in the milk. You’ll hear a gentle hiss as the hot sugar meets the cool milk, a sound that tells you the emulsion is forming correctly. Stir vigorously; the mixture should become glossy and smooth, with no grainy pockets. This is where the fudge gains its silky texture.
Now it’s time for the peanut butter. Add the creamy peanut butter in one big dollop and let it melt into the sugar‑butter‑milk blend. Keep the heat low and stir constantly; the peanut butter will swirl in, turning the mixture a deep, inviting brown. The aroma at this point is intoxicating—think roasted peanuts meeting caramel.
Season with a pinch of salt and the vanilla extract. The salt will cut through the sweetness, while vanilla adds a fragrant backdrop that rounds out the flavor. Give the mixture one last vigorous stir, making sure everything is fully incorporated. If you want an extra pop, sprinkle a handful of sea‑salt flakes now; they’ll sit on the surface and create a delightful crunch after chilling.
Remove the pan from the heat. This is the part where you must trust the process—don’t keep the stove on, or you’ll overcook the fudge. Quickly pour the glossy mixture into the prepared parchment‑lined pan, spreading it with a spatula to an even thickness. The surface should be smooth, with a faint sheen that reflects light like a polished stone.
Kitchen Hack: Tap the pan gently on the counter to release any trapped air bubbles; this ensures a uniform surface.Slide the pan into the freezer for exactly five minutes. Yes, you heard that right—five minutes is all it takes for this fudge to set firm enough to cut. While you wait, picture yourself pulling a slab of fudge out of the pan, the whole kitchen smelling incredible, and the first bite melting on your tongue. The quick chill locks in the glossy sheen and prevents the fudge from becoming grainy.
After five minutes, remove the pan and let it sit at room temperature for another two minutes. This brief pause allows the fudge to finish setting without becoming too hard. Use the parchment edges to lift the whole block out of the pan and place it on a cutting board.
Cut the fudge into squares or bars using a sharp knife. For clean cuts, warm the knife blade under hot water, wipe dry, and slice. The edges should pull away slightly, giving you that satisfying “snap” that signals a perfect texture. Arrange the pieces on a plate, drizzle any leftover glaze if you like, and admire your handiwork.
Serve immediately or store in an airtight container. This next part? Pure magic. The fudge will stay soft and creamy for days, and the flavor actually deepens after a night or two. I’ll be honest — I ate half the batch before anyone else got to try it, and that’s because this fudge is simply addictive.
That’s it — you did it. But hold on, I’ve got a few more tricks that’ll take this to another level…
Insider Tricks for Flawless Results
The Temperature Rule Nobody Follows
Never let the sugar mixture exceed 250°F (121°C). Going above this threshold triggers the Maillard reaction, which can turn your fudge bitter. I keep a candy thermometer on hand, but a quick visual cue works: once the mixture turns a light amber and you see tiny steam bubbles, you’re in the sweet spot. A friend once tried to speed things up by cranking the heat; the result was a burnt, chalky mess that no amount of peanut butter could rescue.
Why Your Nose Knows Best
Your sense of smell is a far better indicator than a timer when it comes to caramelizing sugar. As soon as you detect a nutty, toasted aroma, the sugar is done. Over‑cooking will give a burnt smell that you can’t mask. Trust that nose; it’s the secret weapon of seasoned chefs. When I first started, I relied on timers and ended up with a batch that tasted like burnt toast—lesson learned.
The 5‑Minute Rest That Changes Everything
After the freezer set, let the fudge rest at room temperature for a couple of minutes. This short pause allows the fats to re‑emulsify, giving you that glossy finish and preventing a grainy texture. Skipping this step can lead to a dull, matte surface that looks less appetizing. I’ve seen beginners cut straight from the freezer and end up with a crumbly mess—don’t be that person.
Salt Crystals for Crunch
A light sprinkle of flaky sea salt just before the chill adds a surprising crunch that contrasts the smooth fudge. The salty pop amplifies the sweet, creating a flavor dance on your tongue. If you’re serving a crowd, consider a finishing drizzle of melted chocolate for an extra layer of decadence. This tiny addition turns a simple fudge into a gourmet treat.
Choosing the Right Peanut Butter
Opt for a natural, creamy peanut butter that lists peanuts as the sole ingredient (plus a pinch of salt). Avoid “reduced‑fat” or “hydrogenated oil” versions—they’ll cause separation and a grainy mouthfeel. The richer the peanut butter, the more luxurious the final product. If you’re allergic to peanuts, almond butter works, but expect a slightly different flavor profile.
Creative Twists and Variations
This recipe is a playground. Here are some of my favorite ways to switch things up:
Chocolate Swirl
Melt ½ cup dark chocolate and swirl it into the fudge just before chilling. The bitter chocolate balances the sweet peanut butter, creating a sophisticated flavor duo that will wow chocolate lovers.
Espresso Kick
Add 1 tsp instant espresso powder to the milk before mixing. The coffee notes deepen the chocolatey undertones and give the fudge an adult‑only edge.
Coconut Crunch
Stir in ¼ cup toasted coconut flakes for a tropical twist. The toasted bits add a pleasant chew and a subtle coconut aroma that pairs beautifully with peanut butter.
Spicy Heat
A pinch of cayenne pepper or a dash of chili oil can transform the fudge into a sweet‑heat sensation. It’s perfect for those who love a little zing with their dessert.
Nutty Overload
Fold in ½ cup chopped roasted peanuts or almonds for extra crunch. The added nuts give a textural contrast and amplify the nutty flavor profile.
Storing and Bringing It Back to Life
Fridge Storage
Place the fudge in an airtight container and store it in the refrigerator for up to two weeks. The cool environment keeps the texture firm and prevents the fudge from becoming too soft on warm days. When you’re ready to serve, let it sit at room temperature for 10 minutes for optimal softness.
Freezer Friendly
Wrap individual squares in parchment paper, then seal them in a zip‑top freezer bag. They’ll keep for up to three months. To thaw, move them to the fridge overnight, then let them sit at room temperature for a few minutes before enjoying.
Best Reheating Method
If the fudge has hardened too much, place a square on a microwave‑safe plate, add a tiny splash of milk (about a teaspoon), and heat for 5‑7 seconds. The added moisture creates steam that restores the silky texture without melting the fudge completely.